How to Automate Documents With Softr, Airtable & TypeFlow
A comprehensive guide explaining how to build a powerful no-code tech stack by integrating Airtable, TypeFlow, Softr, and Make. The article details step-by-step integration processes, automation workflows, and best practices for businesses seeking efficient document generation and web application deployment. Alternative tools like DocsAutomator, Documint, and Plumsail Documents also connect Airtable to document templates.
Pro Tip
We recommend creating accounts with all four platforms before starting. It offers the best experience possible and ensures a smooth integration process.
Creating a seamless workflow between your database, document automation, website, and integration tools shouldn't be a headache, yet many businesses struggle with connecting these powerful platforms.
When properly integrated, Airtable, Typeflow, Softr, and Make create a robust tech stack capable of handling everything from data management to customer-facing applications with automated document generation.
In this step-by-step guide, we'll explore how to connect these four powerful tools to create a fully automated workflow.
You'll learn how to transform your Airtable data into professional documents with Typeflow, display them on your Softr website, and automate the entire process with Make.
Let's dive into creating the most effective no-code ecosystem available in 2025.
Advanced method to generate PDF with Typeflow Softr, Airtable and Make - perfect for Softr using Pro plan and above
What You'll Need Before Starting
Before we begin, make sure you have:
- An Airtable account with at least one base set up
- A TypeFlow account (don't have one yet? Sign up here)
- A Softr account for creating your web application (check the Softr documentation for setup guides)
- A Make account for automation
- Basic understanding of each platform's interface
Understanding the Integration Flow
Before diving into the technical setup, let's understand how these four tools work together:
- Airtable: Serves as your database, storing all your information
- TypeFlow: Generates professional PDFs from your Airtable data
- Softr: Creates a user-friendly web interface to display your data and documents
- Make: Connects everything together with automated workflows (you can also use Zapier as an alternative)
This integration can support numerous use cases, including:
- Customer portals with automatic document generation
- Employee onboarding systems with dynamic document creation
- Client dashboards with on-demand PDF generation
- Membership sites with personalized documentation
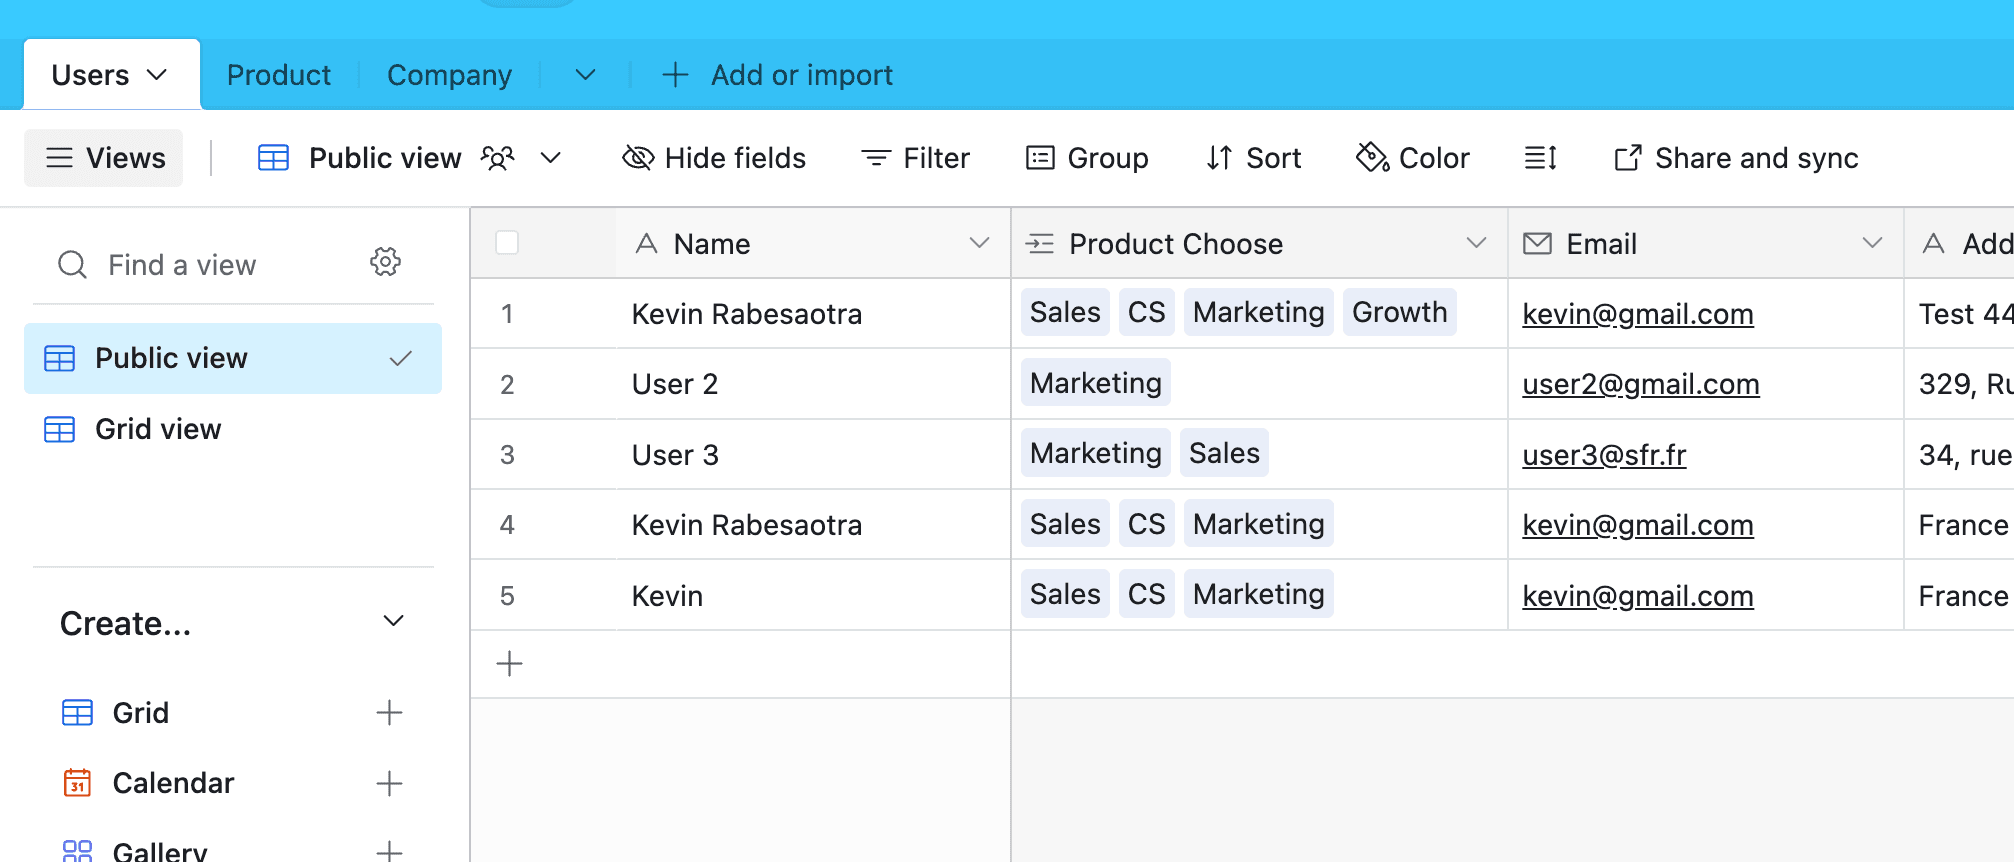
Step 1: Setting Up Your Airtable Base
The foundation of your integration is a well-structured Airtable base. For this tutorial, we'll create a simple client management system:
1. Create a new base in Airtable
2. Set up the tables (here is an example):
- Clients (with fields for Name, Email, Phone, Address, etc.)
- Projects (with fields for Project Name, Client, Start Date, End Date, Status, etc.)
- Documents (with fields for Document Name, Client, Project, Type, Status, and a field for the PDF attachment)
3. Create relationships between these tables
4. Add sample data to test your integration
Pro Tip
Remember to create an "Attachment" field in your Documents table. This is where your generated PDFs from Typeflow will be stored.
Step 2: Setting Up Document Templates in TypeFlow
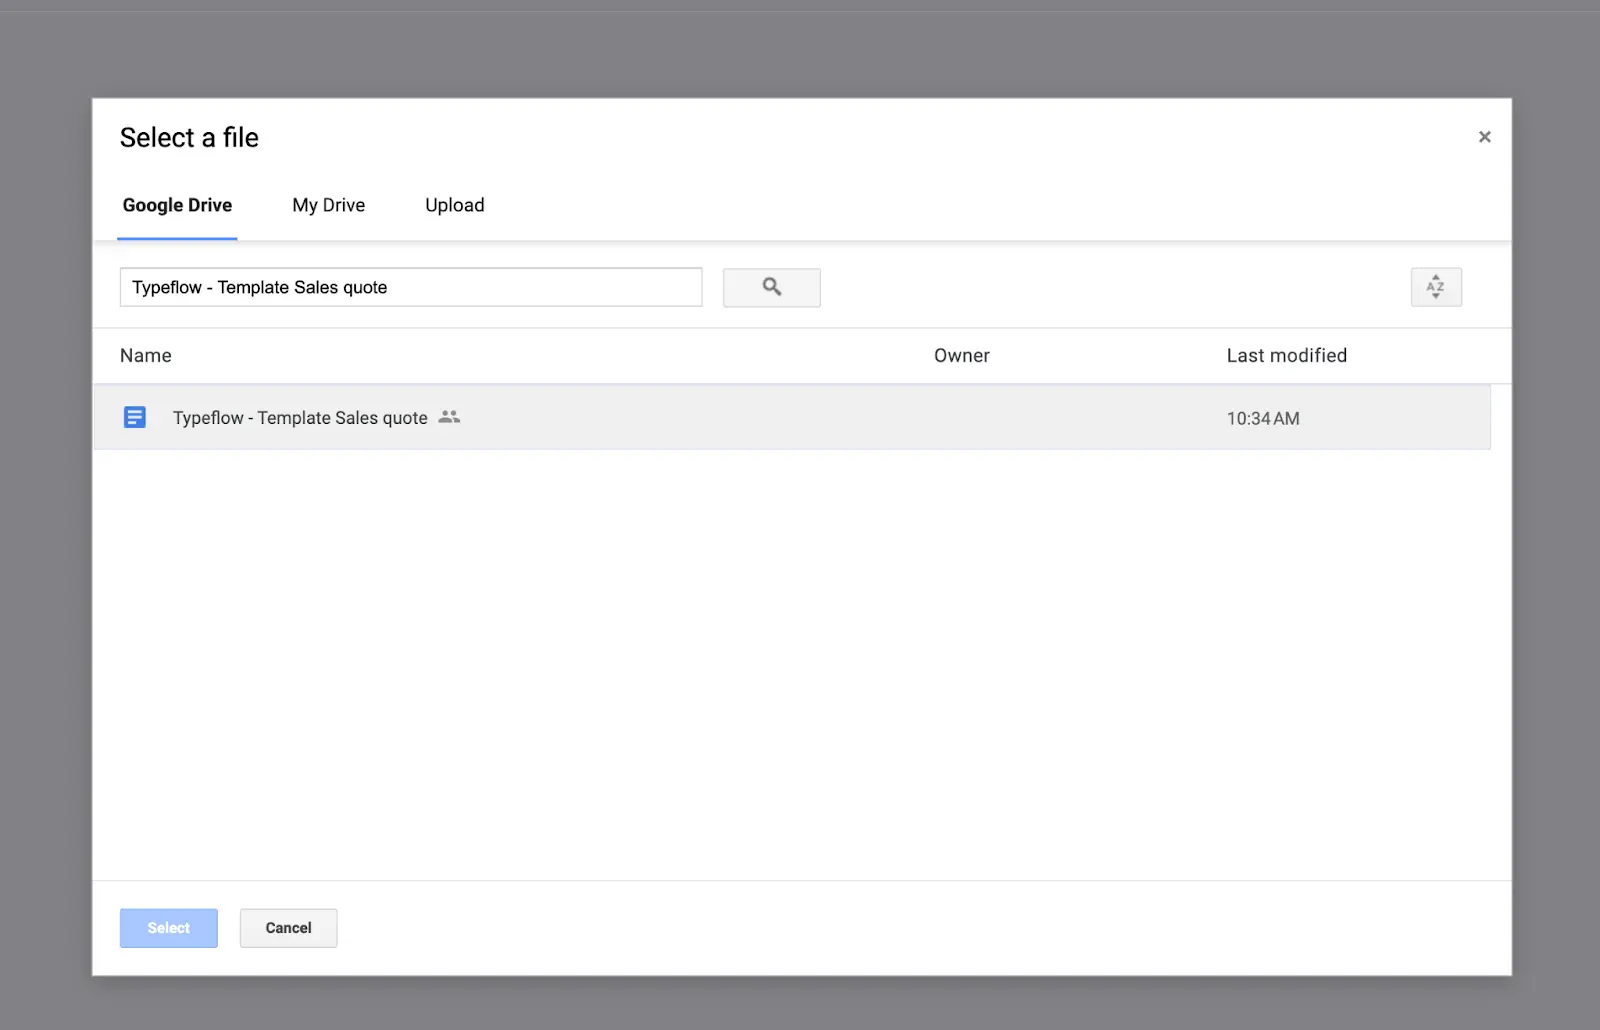
Now that your database is ready, let's create document templates in TypeFlow that will pull data from Airtable. You'll use Google Docs to design your template with placeholder variables:
1. Sign in to Typeflow
2. Click "Start a new automation workflow"
3. Choose your template
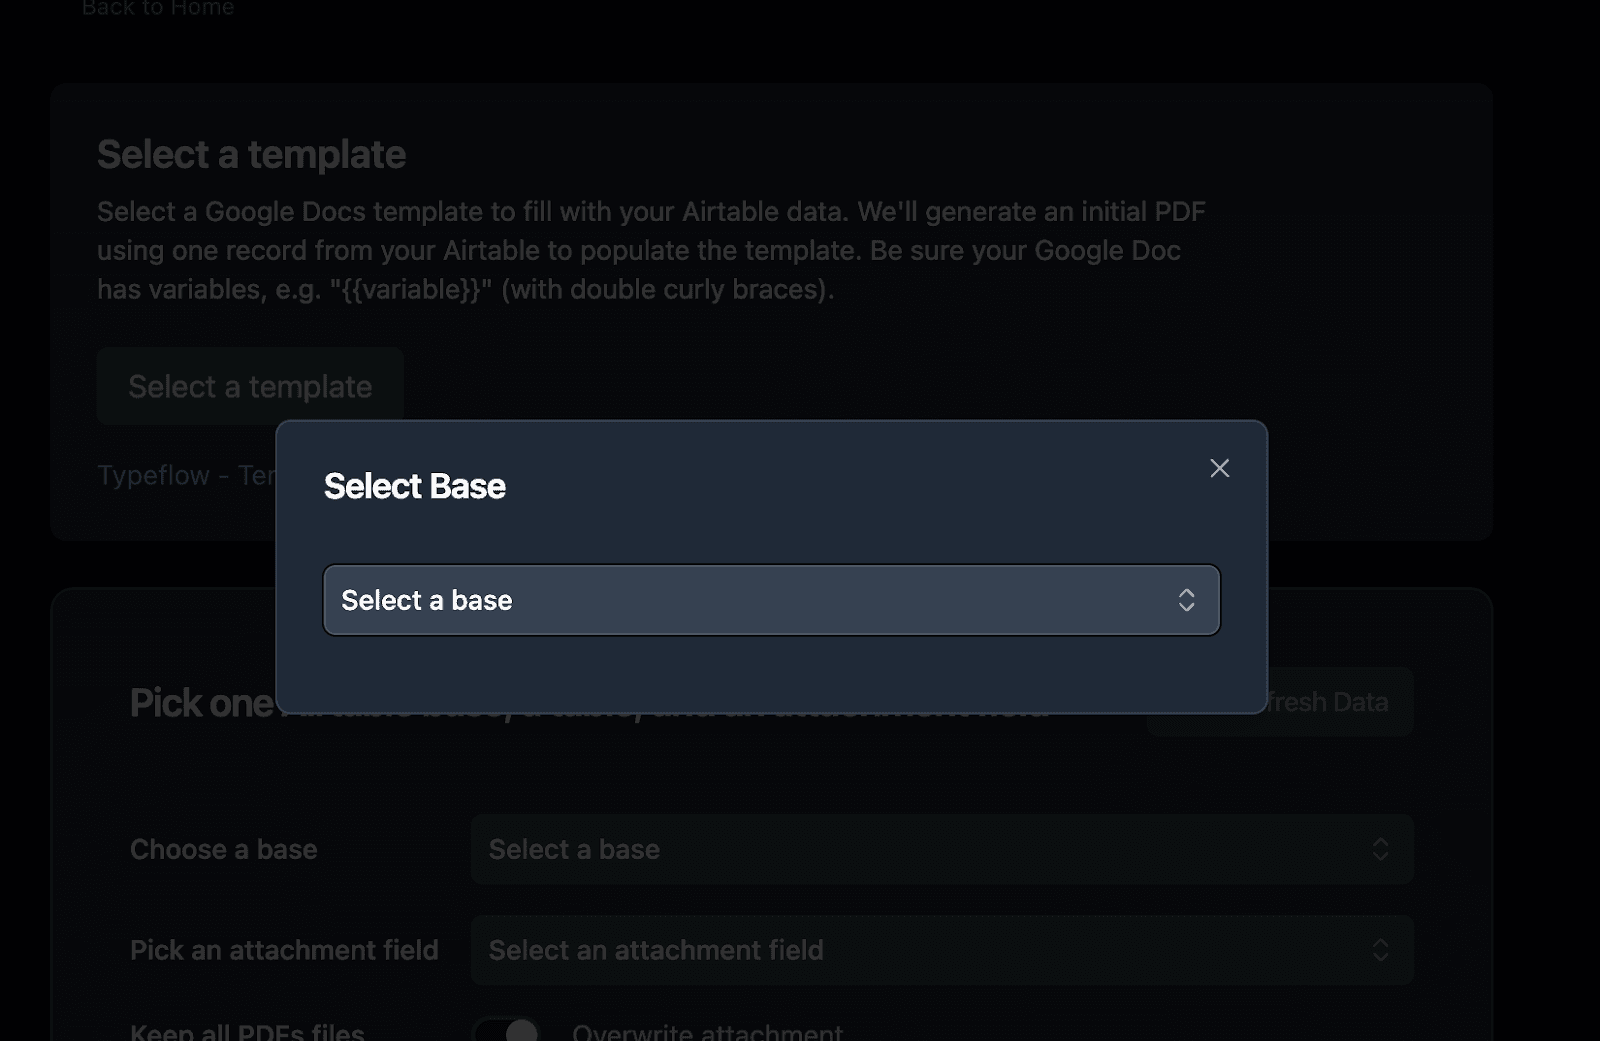
Now connect Typeflow to your Airtable base:
1. Select your Airtable base from the dropdown menu
2. Choose the specific table where you want to generate your PDF
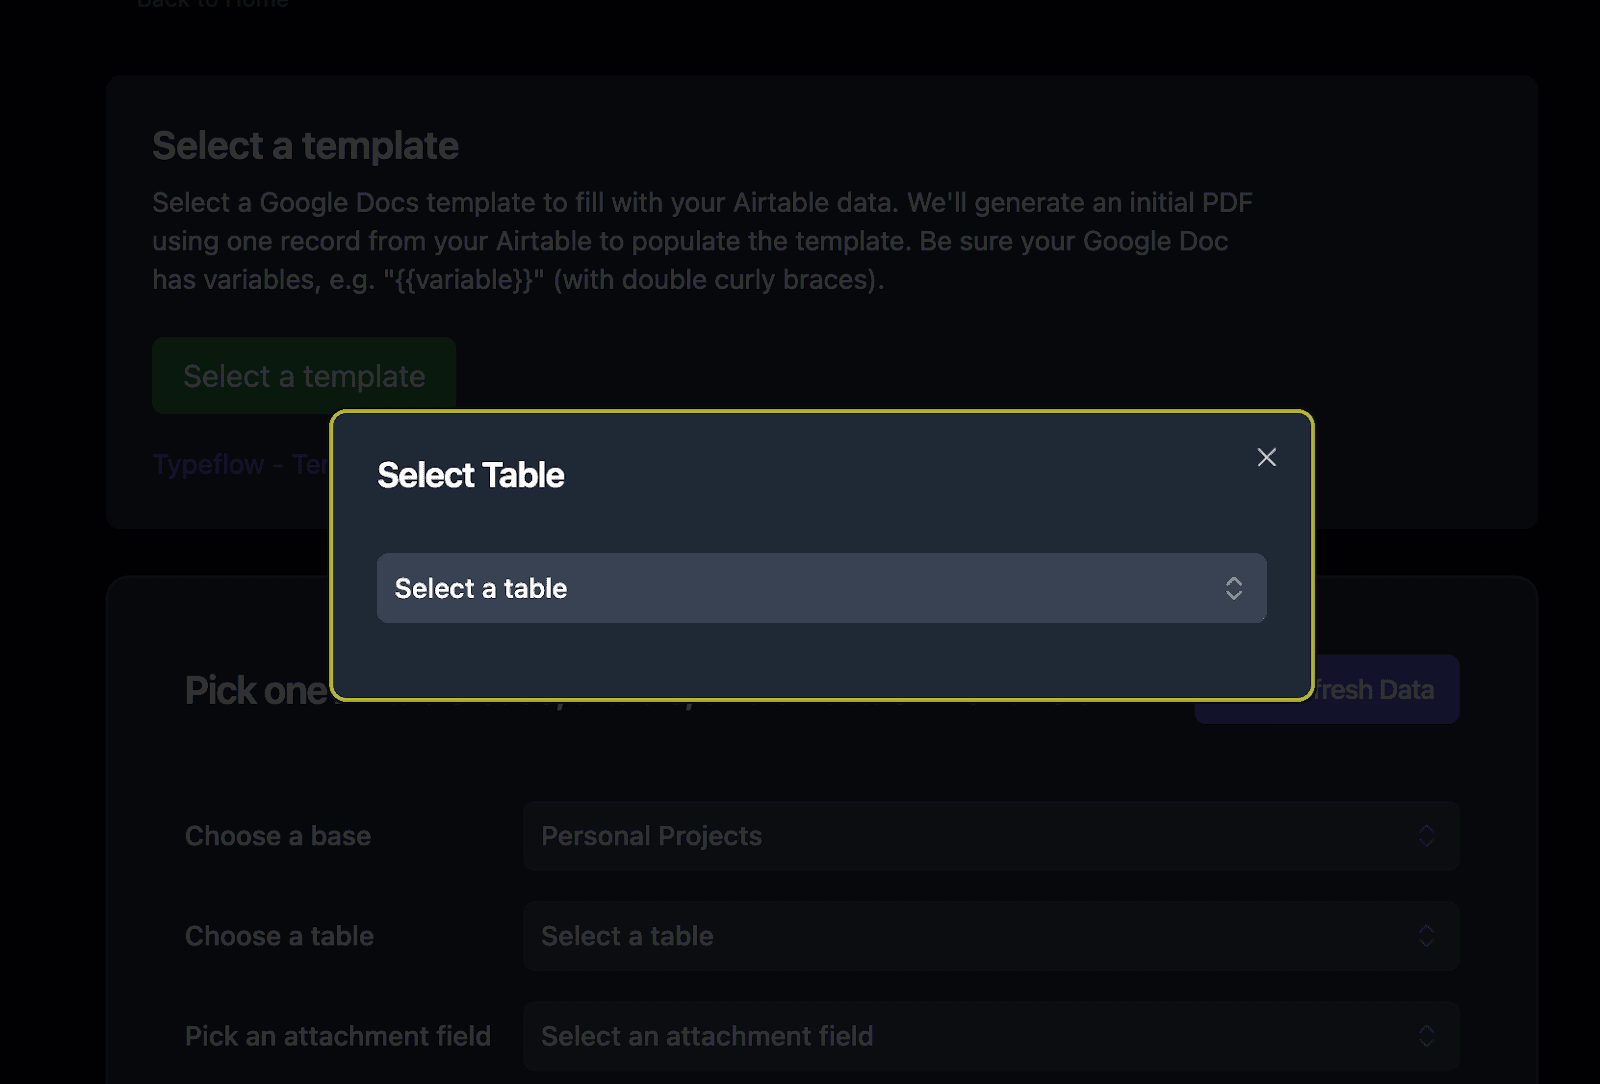
3. Set up the attachment field where generated PDFs will be saved
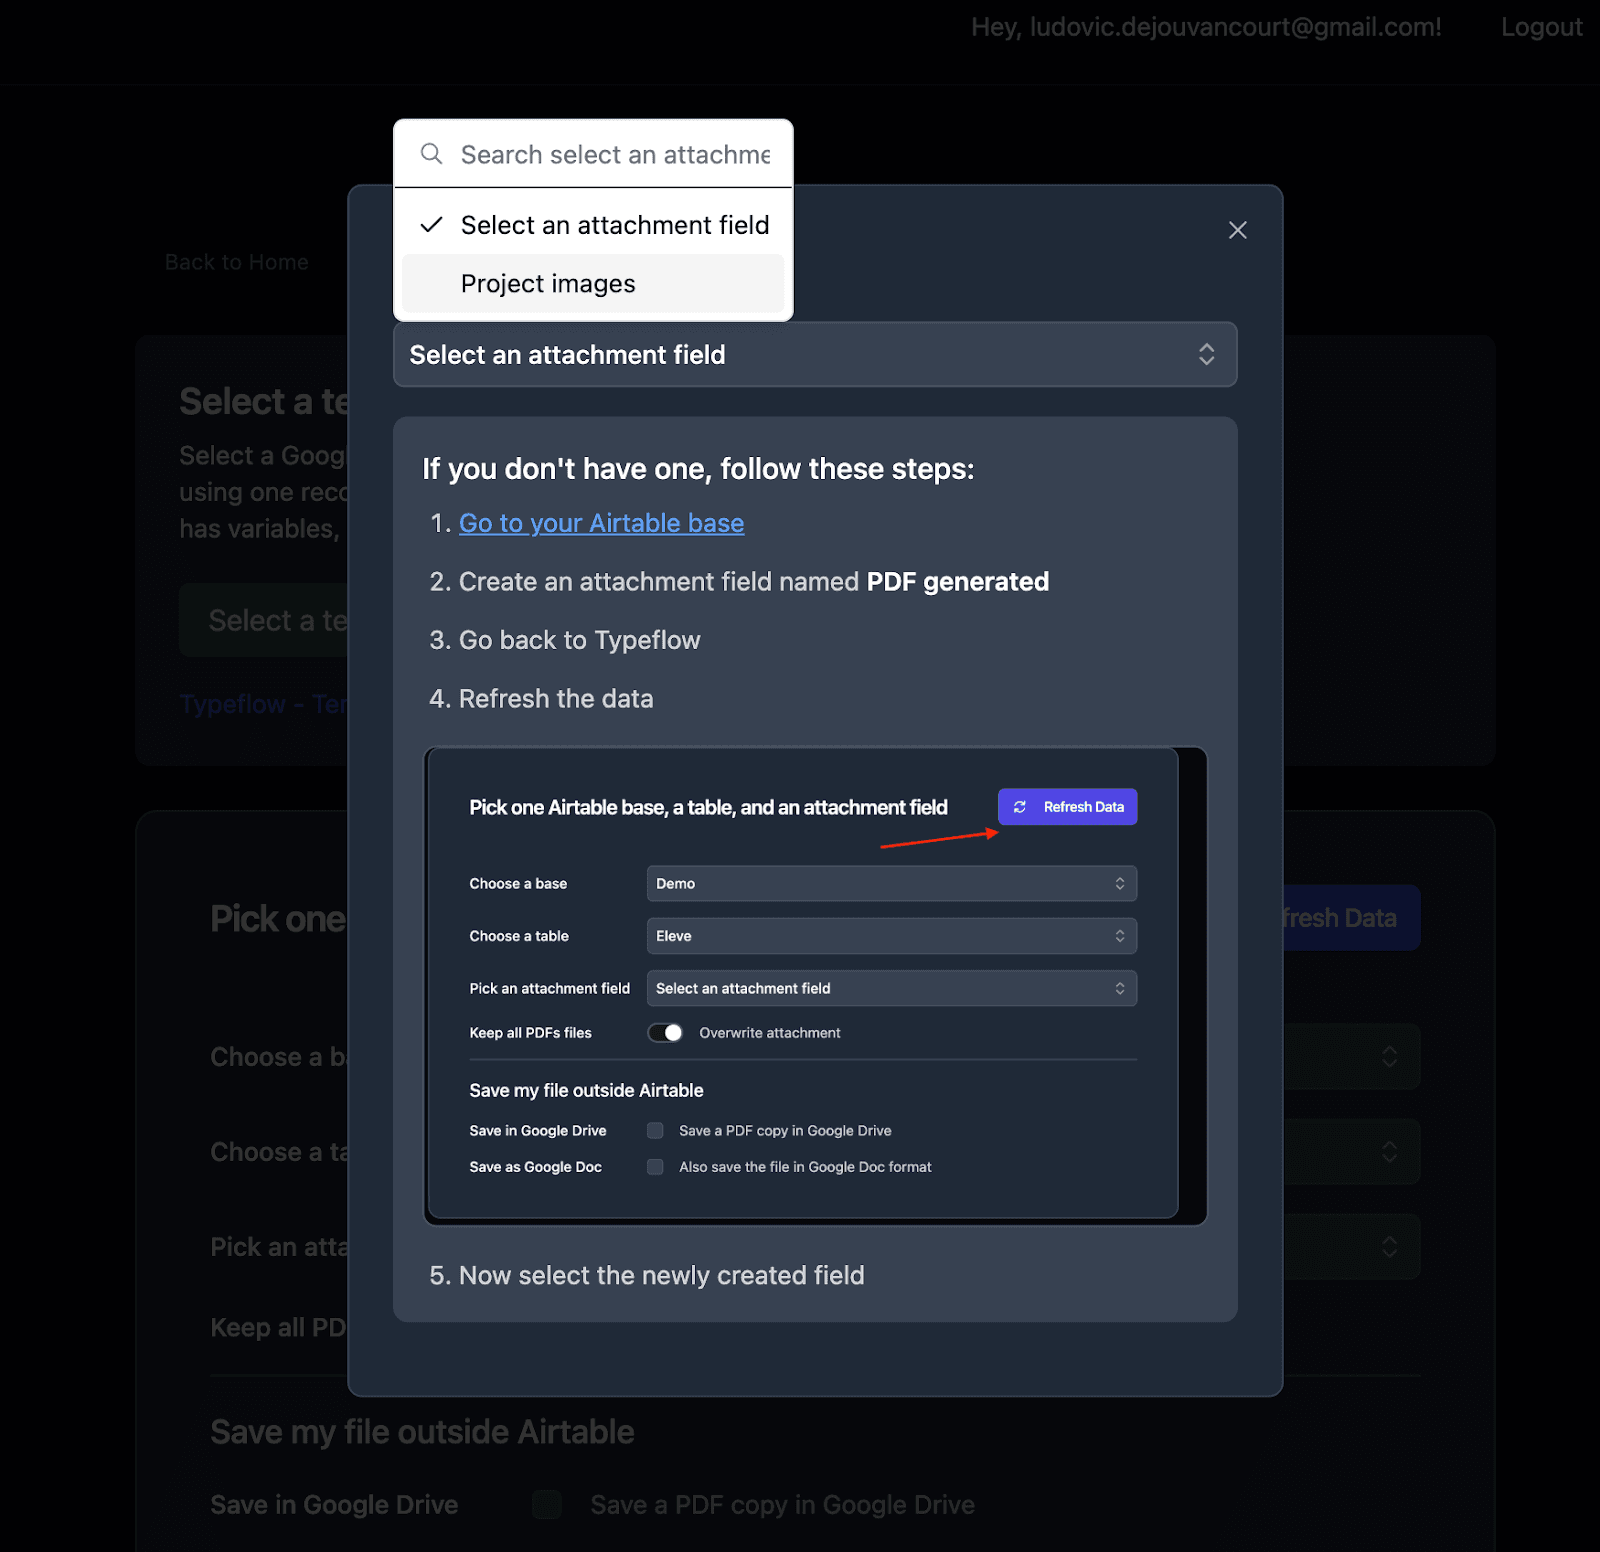
4. Map Airtable fields to your template variables
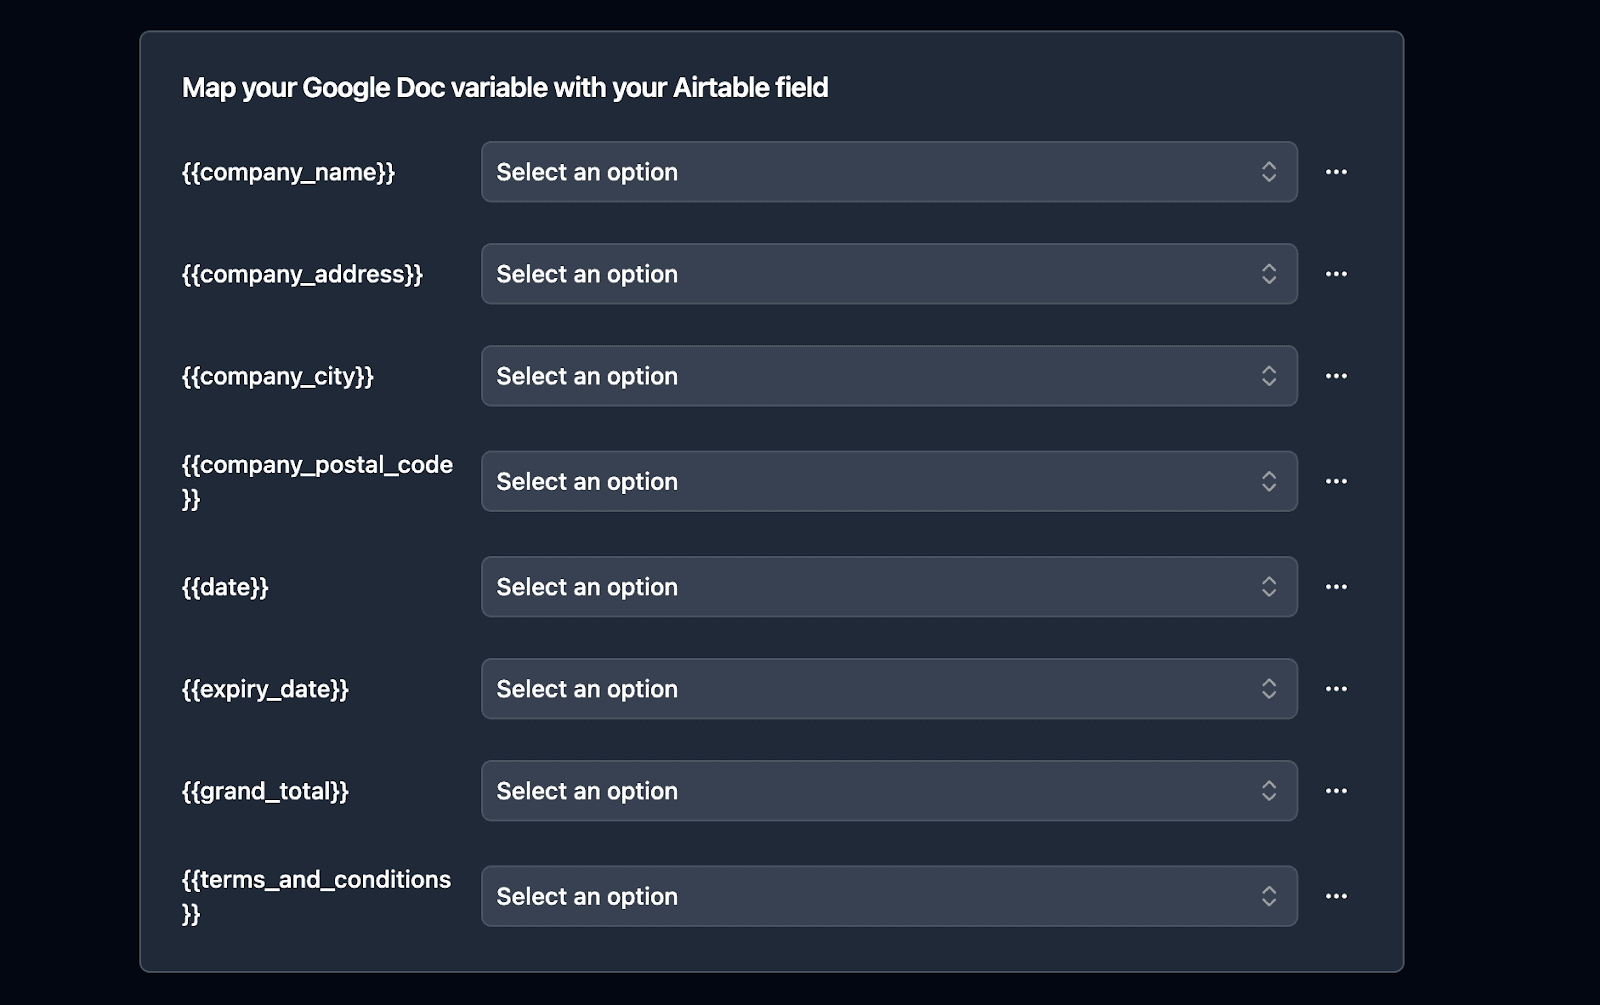
5. Identify any attachment fields you want to include
6. Verify field accessibility and permissions
Pro Tip
Test your template with a few records to ensure proper mapping, before moving forward.
Step 3: Building Your Softr Application
With your data management and document generation systems in place, it's time to create a user-friendly interface with Softr:
1. Sign in to Softr and create a new application
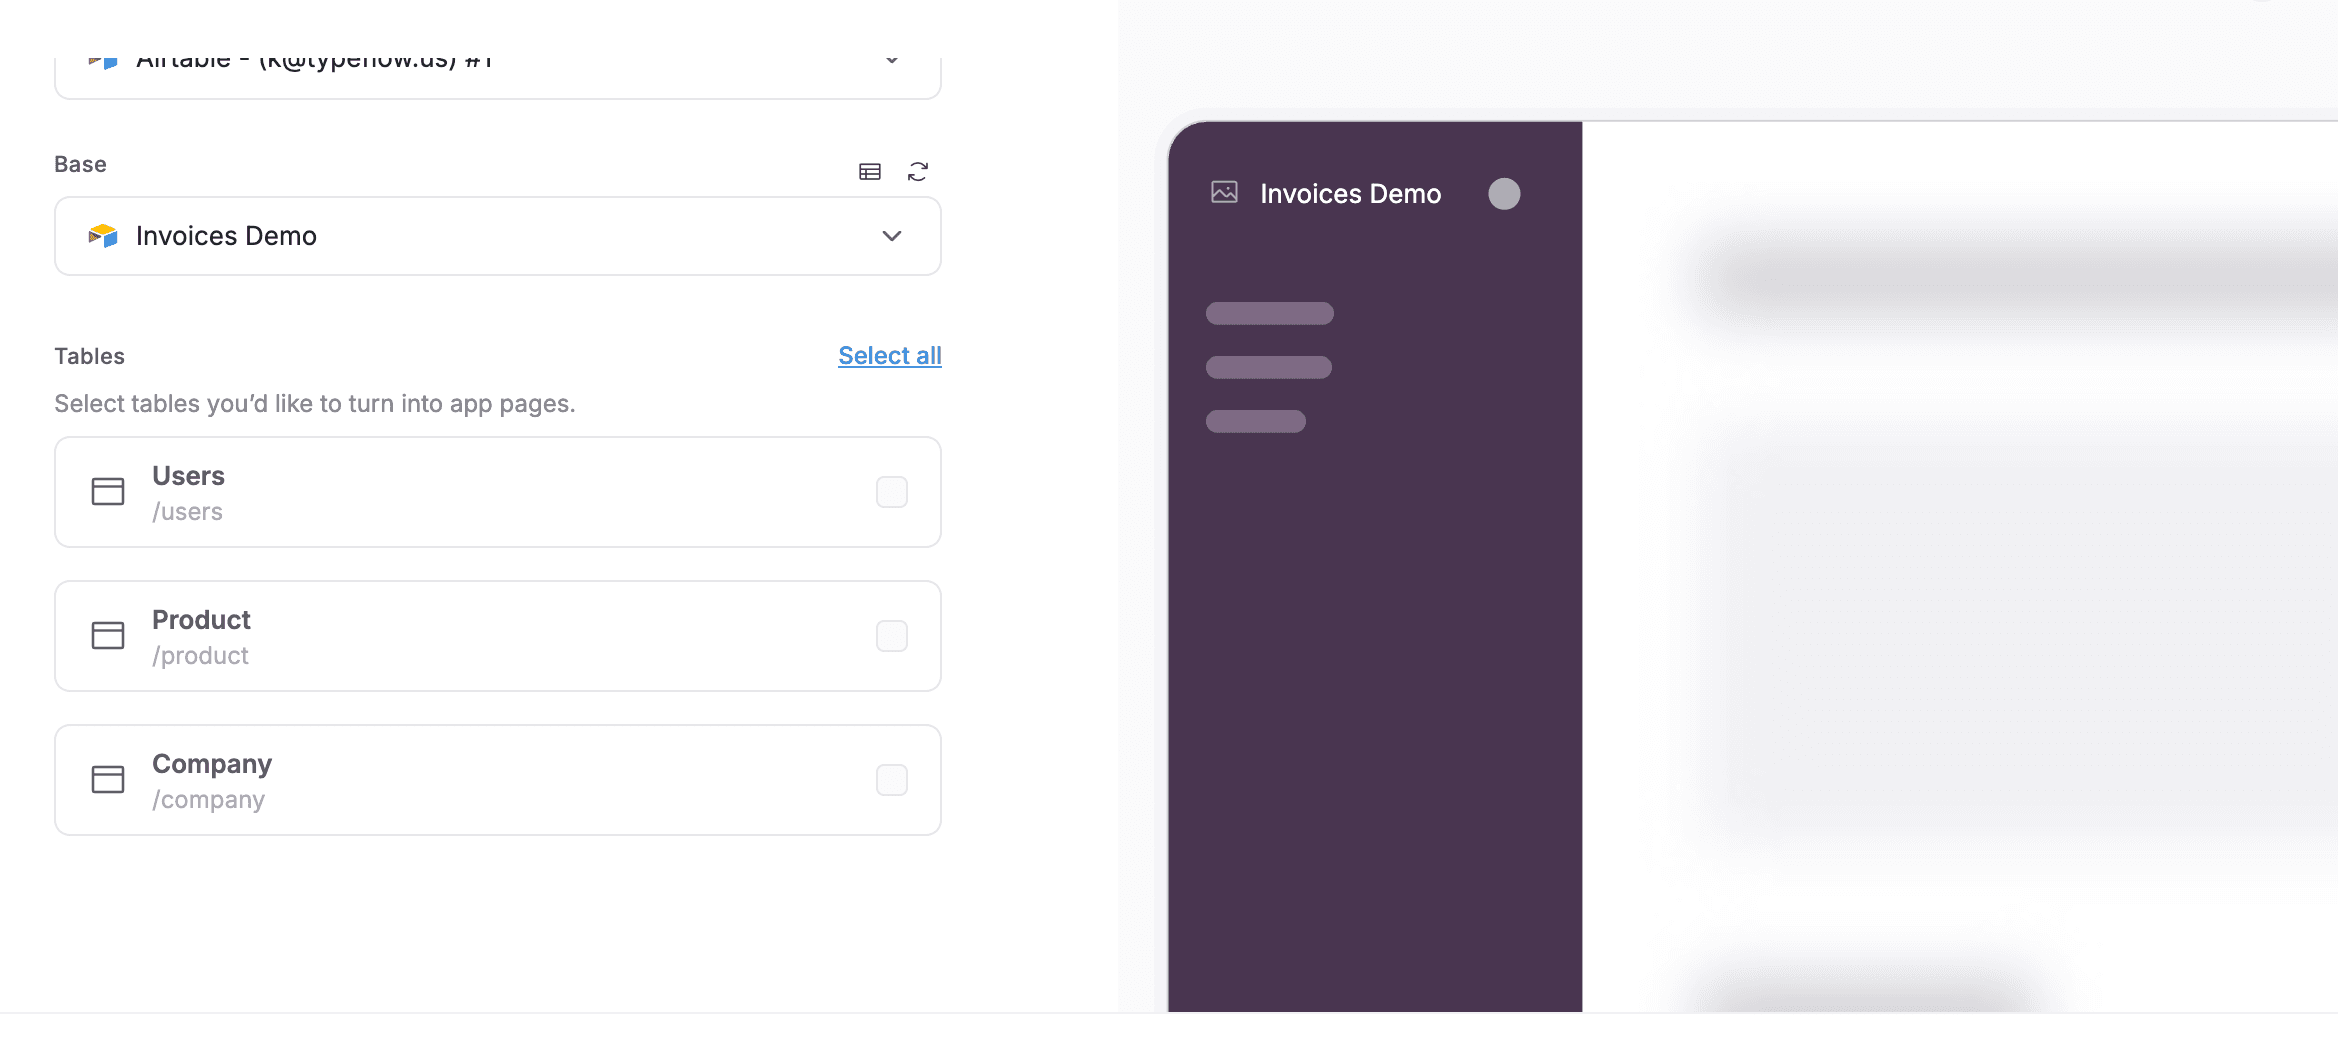
2. Connect your Softr application to your Airtable base
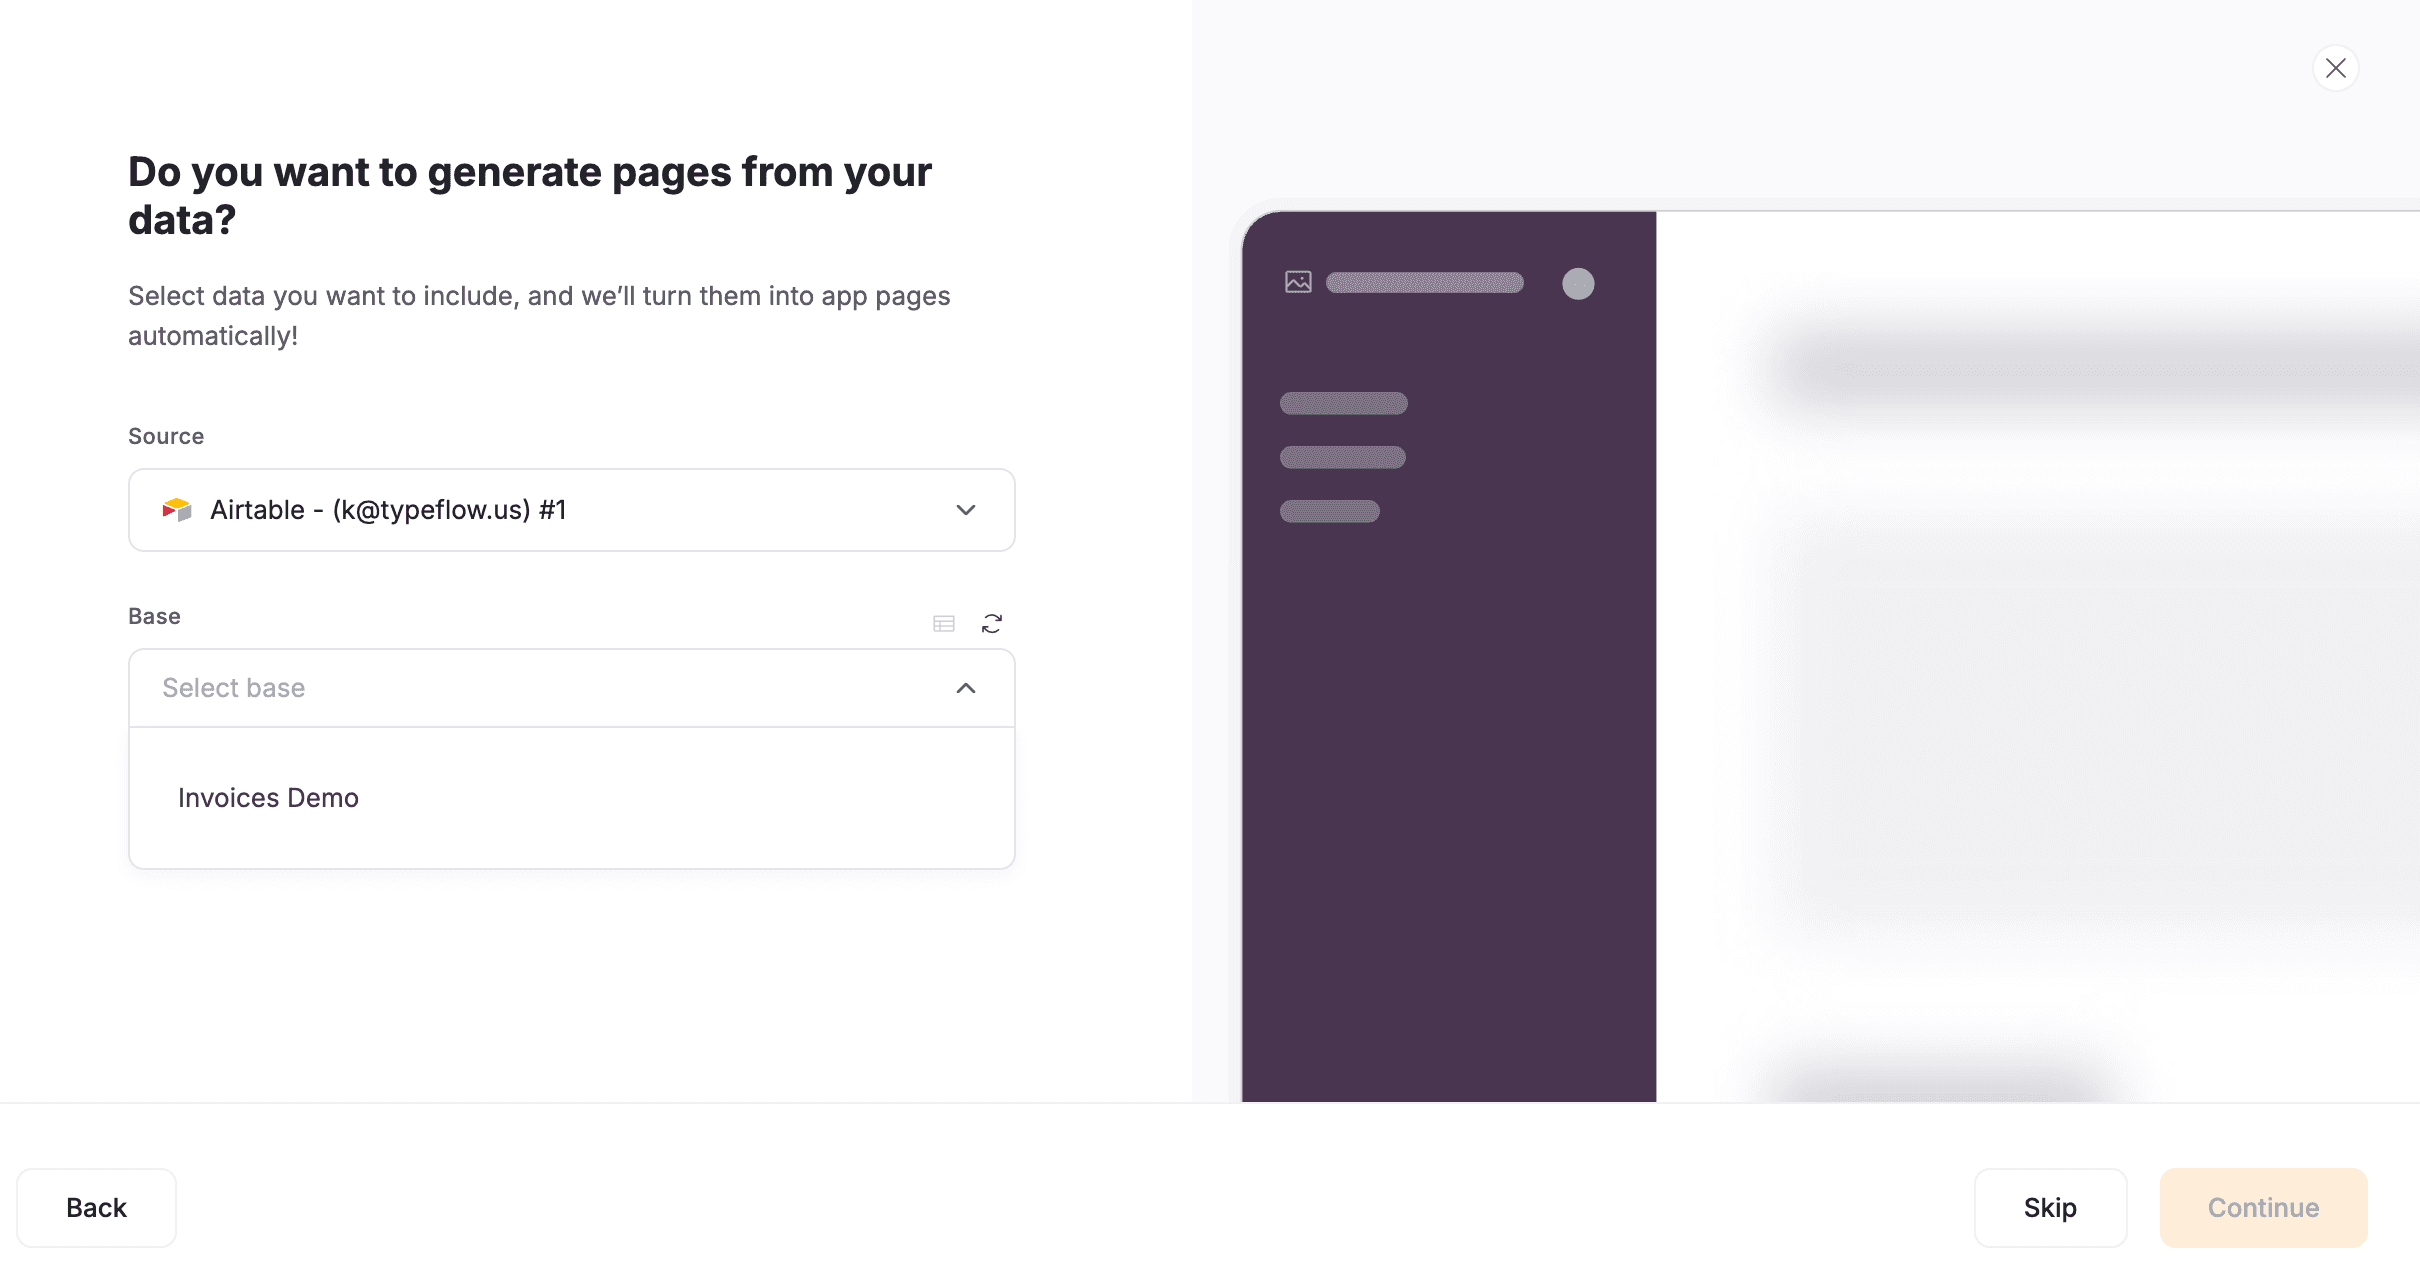
3. Choose a template or start from scratch
4. Set up pages for your application
Prepare one of your page detail to generate documents:
1. Add a button to generate documents
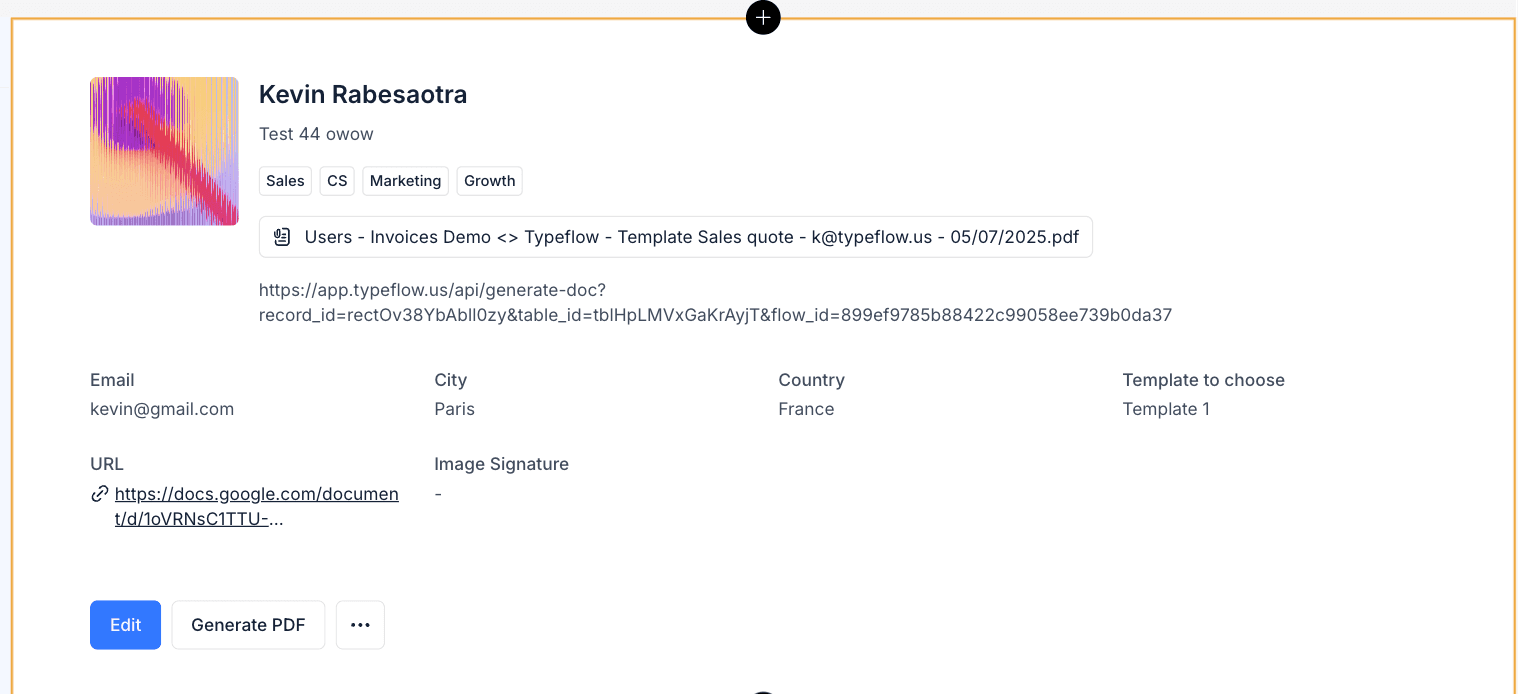
2. Make sure the button action triggers a Call API
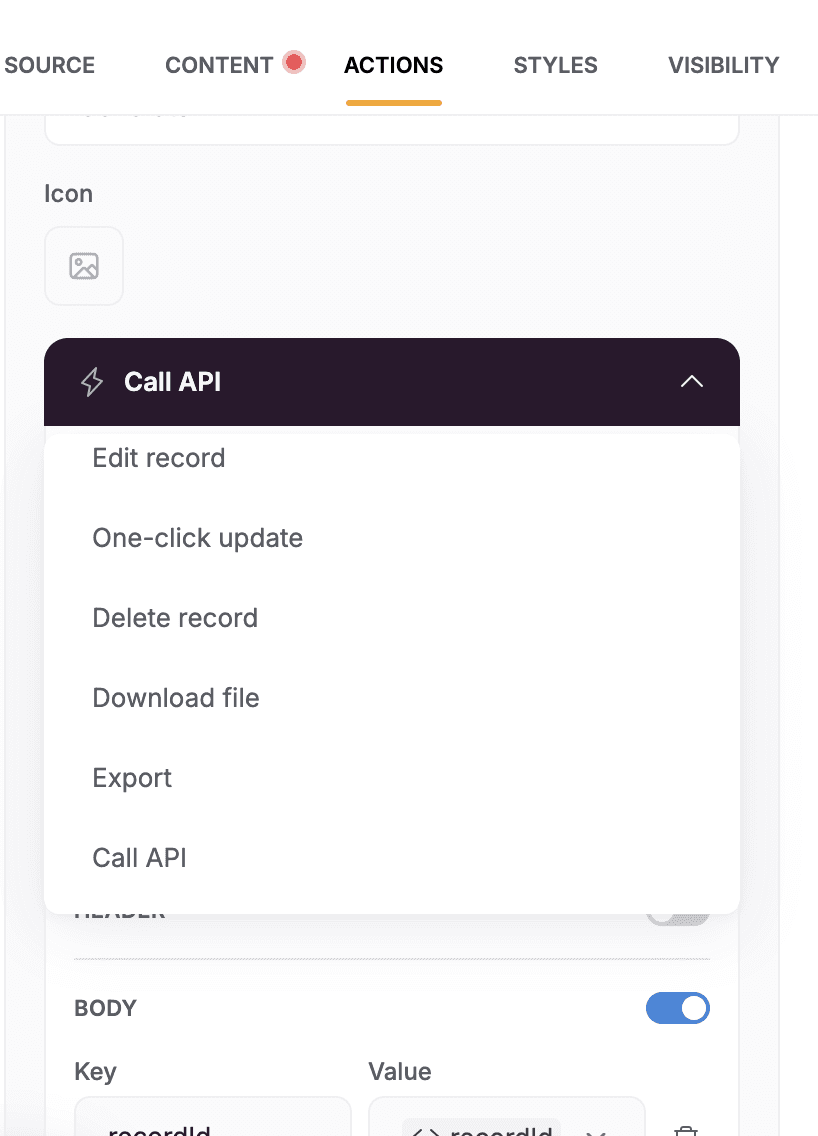
3. Check the body
4. Add the key: recordId
5. Add value by following those steps:
a. Click on the little arrow
b . Pick URL parameters
c. Enter recordId and Click Add
Now, you need to add a link into the API URL
7 . To do that, now connect to Make
Step 4: Creating Automation Workflows with Make
Now for the crucial part - connecting everything together with Make:
1. Sign in to Make and create a new scenario
2. Start with a trigger - common options include:
- New record in Airtable
- Form submission in Softr
- Scheduled document generation
- Manual trigger from Softr interface
For this tutorial, let's create a workflow that generates documents when a button is clicked:
1. Select "Custom Webhook" as your trigger
2. A new link will be generated. It's your webhook link. Copy it.
3. Go back to Softr and add the webhook link to the button action.
4. Publish your Softr app. It helps to set up your flow.
5. Visit your app and click on the button to generate a document.
- Check your Make scenario to see if your webhooks link has received data. If yes, you can see the data in the scenario.
Step 5: Setting up the workflow
Now it's going to be a bit technical. But no worries, we'll guide you through it.
1. Go back to your Typeflow automation flow.
2. At the bottom, we have an implementation step. Select the Make & Zapier tab.
3. Copy the link.
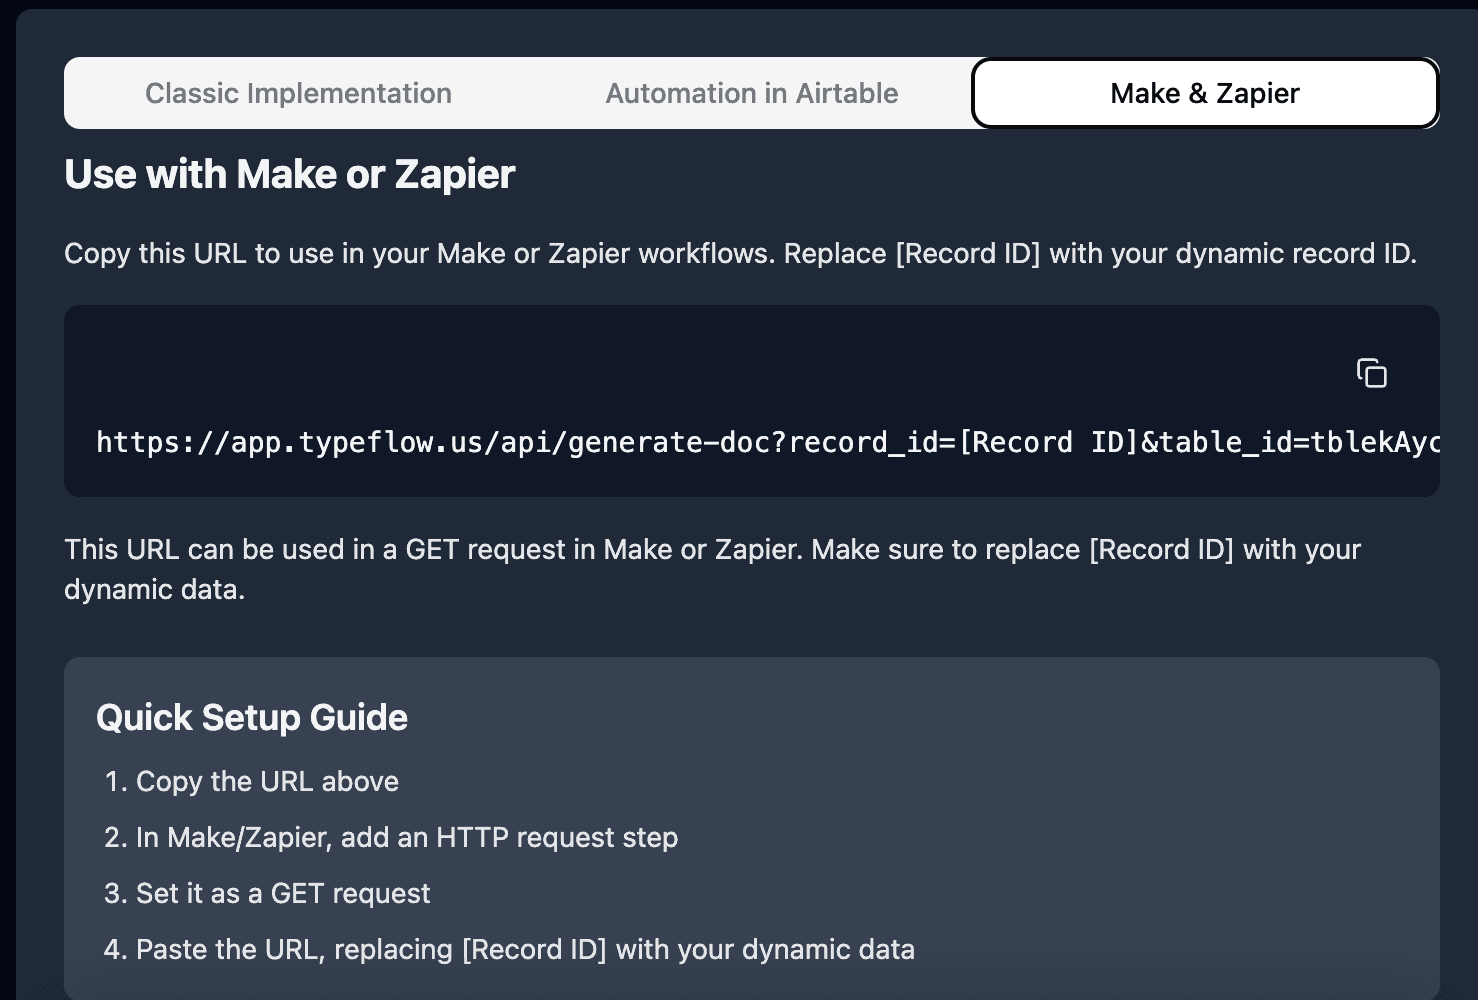
4. Go back to Make and create a new module, connected to your "Custom Webhook".
5. Search for "Make a Request".
6. In the URL section, paste the link you copied from Typeflow.
7. Replace the part [recordId] with the value of the recordId parameter.

8. Pick the method GET.
Step 6: Testing the workflow
- In Make, Click on "Run once" button to test your flow (bottom left).
2. Go back to your published Softr app and click on the button to generate a document.
3. It should generate a PDF. You can check the flow in Make to see if it works.
4. Once the flow is over, check your Airtable table to see if new PDF was added to the Documents table.
5. Check in your Softr app if the document was downloaded.
6. If it works well you can now activate your Make automation.
Advanced Make Workflows
With Make, it's possible to create advanced workflows.
For example after generating the PDF, you could send an email to the client with the document attached. For that, you just need to add another module, pick your email provider and configure the email to send. The possibilities are infinite. You can also explore the Softr community and Airtable community for more advanced workflow ideas.
Classic method to generate PDF with Typeflow, Airtable and Softr - perfect for Softr using Basic and Free plan
Now, if you want a simple process or don't use the Pro plan at Softr. Let me show you this method:
1. After having mapped your data in Typeflow, go to the bottom in the Implementation Section
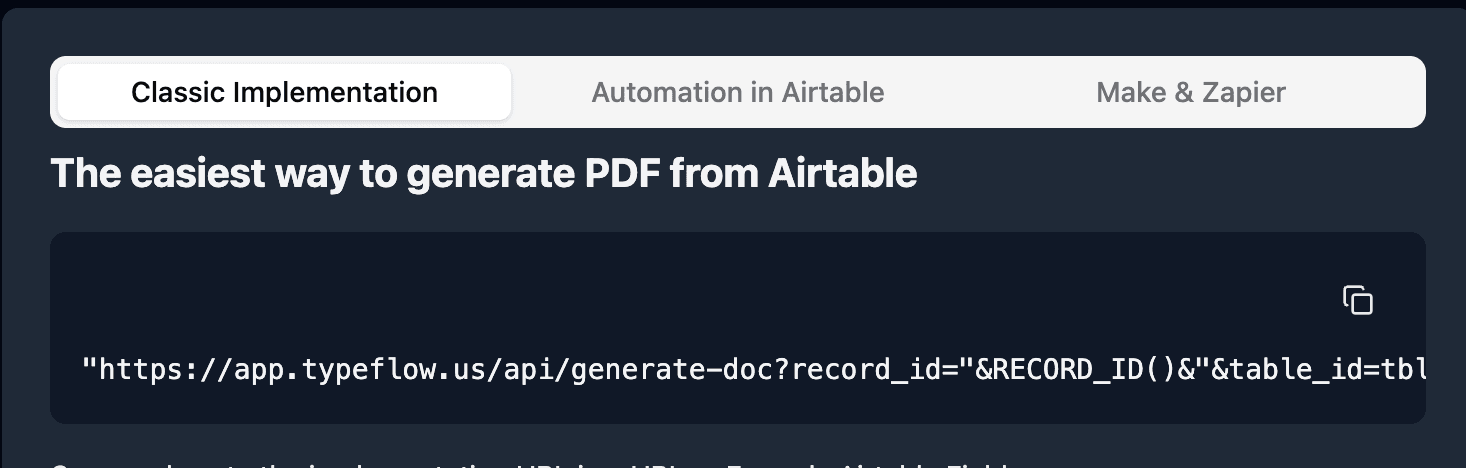
2. Copy the URL
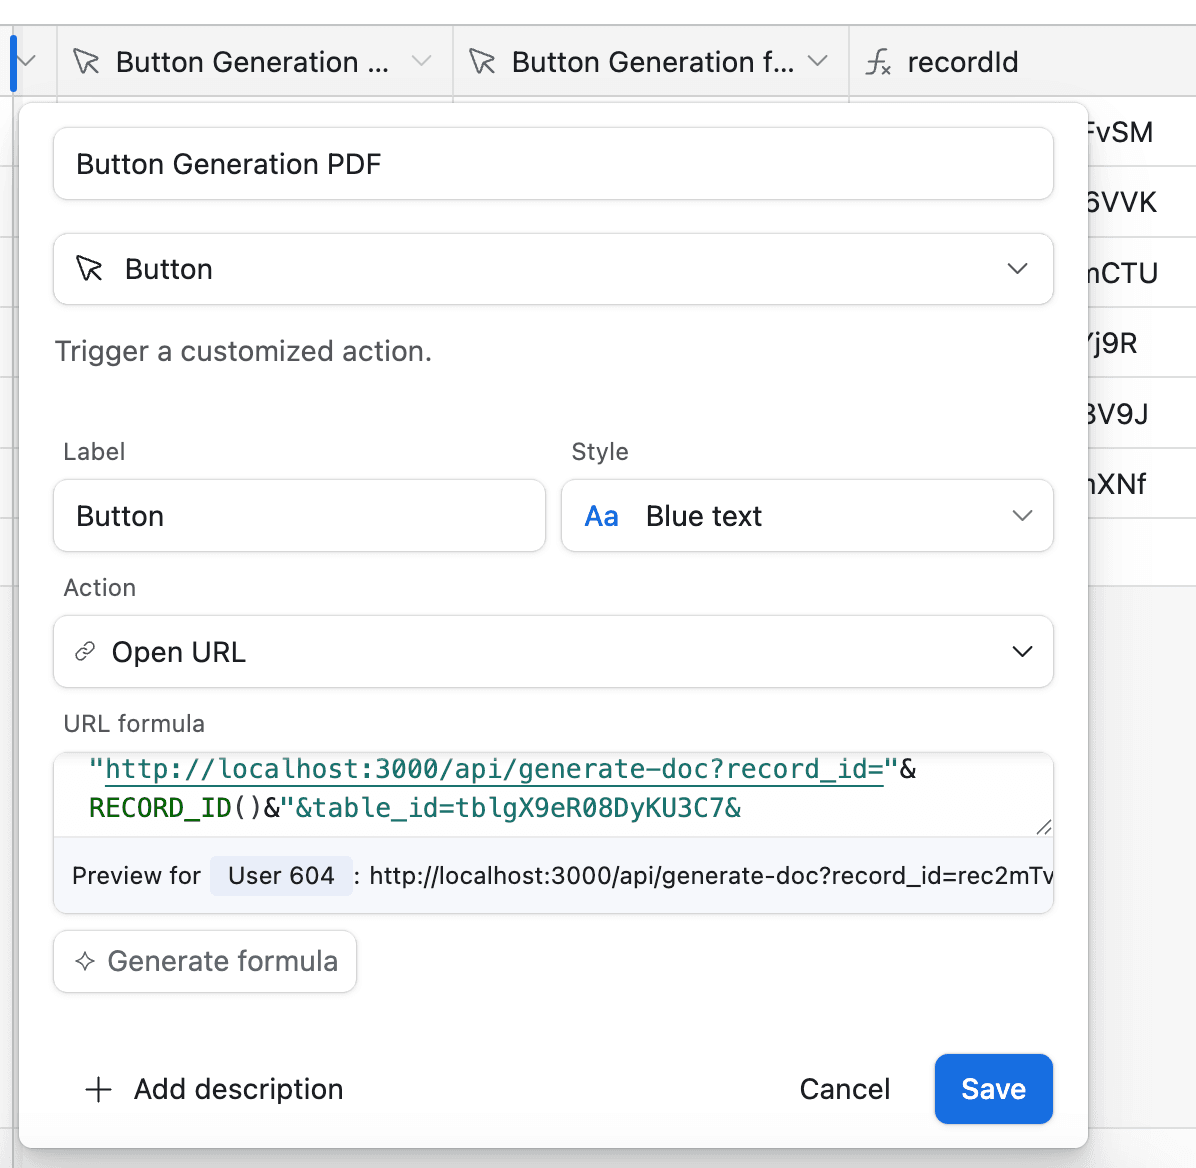
3. Go to your Airtable table, and create a new Button Field
4. Paste the copied URL and automatically Airtable generates an unique Button URL for each record
5. Go to Softr and visit your page detail configuration.
6. Implement a new button and pick the action to "Download File"
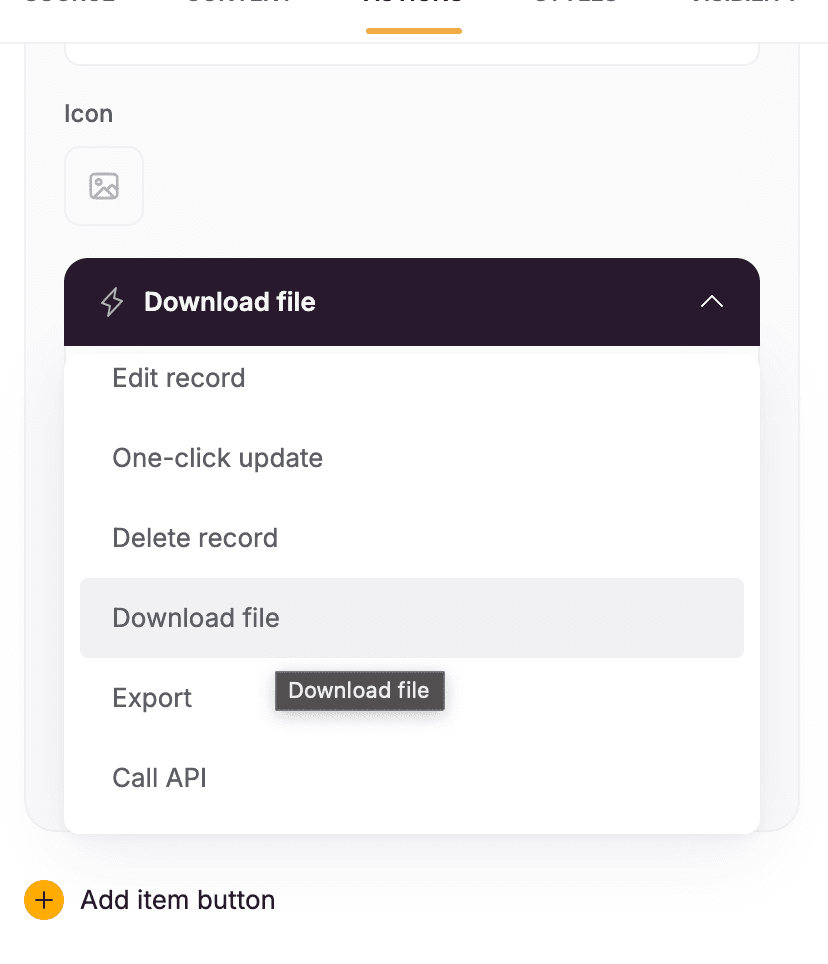
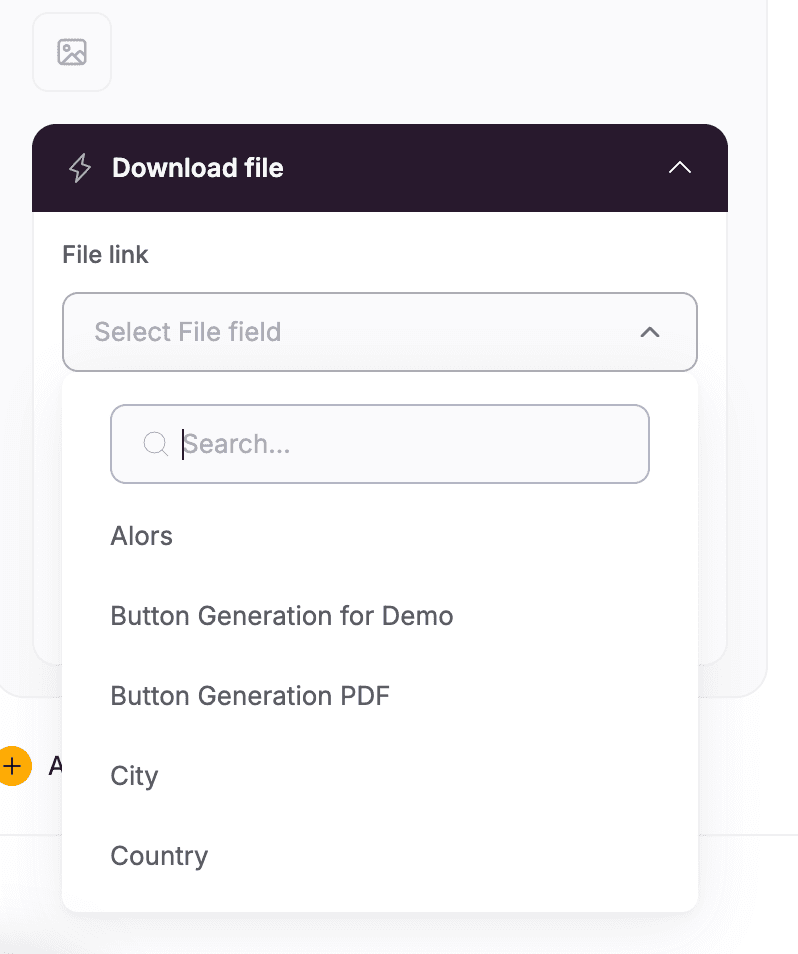
7. Pick the button field you created in Airtable, in my example "Button Generation PDF"
8. Publish your app
- Now whenever someone clicks on the Button, Download File, it will trigger the flow to generate a PDF
This flow is classic. You can't do follow-up action. So it's perfect for basic use case, but if you want something more advanced, it's better to use Make. But it requires at least a pro account with Softr.
Best Practices for Integration
Ensure smooth and efficient integration by following these proven best practices: Test and Verify
Before deploying your integration:
- Test with sample data across all platforms
- Verify field mapping accuracy between systems
- Check document generation quality with different data types
- Test user experience in Softr with actual users
- Monitor automation runs in Make to ensure reliability
Common Issues and Solutions
Connection Problems
If your tools aren't connecting properly:
- Verify your Google or Airtable account are connected to Typeflow
- Check for platform service interruptions
- Ensure correct permissions are set for each tool
- Test connections individually before full integration
- Use Make's connection debugger for detailed analysis
Data Mapping Issues
If your data isn't appearing correctly in documents or your Softr app:
- Verify field names match exactly between platforms
- Check for special characters or spaces in field names
- Confirm data types are compatible across platforms
- Test with known good data
- Use transformation steps in Make if needed
See what users say about TypeFlow on G2.

Kevin from TypeFlow
•AuthorKevin Rabesaotra is a growth engineer and automation specialist with 8+ years of experience building no-code solutions. As Founder & CEO of TypeFlow, he has helped hundreds of businesses automate document generation and streamline workflows with Airtable integrations. Previously, Kevin was a Product Lead specializing in growth engineering, running experiments to drive revenue, retention, and lead generation.
More articles
How to Print Labels from Airtable with Quantity Control (Step by Step)
Print multiple labels per Airtable record based on a quantity field. Step-by-step guide for linked records mode and quantity repeat mode with barcodes and Avery sheets.
Read articleHow to Print Avery Mailing Labels from Airtable
Print Avery mailing labels (5160, 5161, 5162) from Airtable without Word mail merge. Step-by-step guide with print label mode, automation, and bulk generation.
Read articleHow to Create Inventory Labels with Barcodes in Airtable
Create inventory labels with Code 128, EAN-13, or QR barcodes from Airtable. Step-by-step guide for warehouse, retail, and asset tracking with thermal and Avery printers.
Read article