PDF Form Filling
Automatically fill existing PDF forms with your Airtable data. Upload your PDF, map the fields, and generate filled documents in seconds.
Overview
PDF Form Filling lets you take any existing PDF form and populate it with data from your Airtable records. This is ideal for:
| Use Case | Example |
|---|---|
| Tax forms | W-9, W-4, 1099 |
| Credit applications | Bank or institution forms |
| Lease agreements | Rental and real estate forms |
| Compliance forms | ISO, quality management |
| HR documents | Onboarding, employee forms |
| Insurance forms | Claims, policy applications |
Two ways to map fields
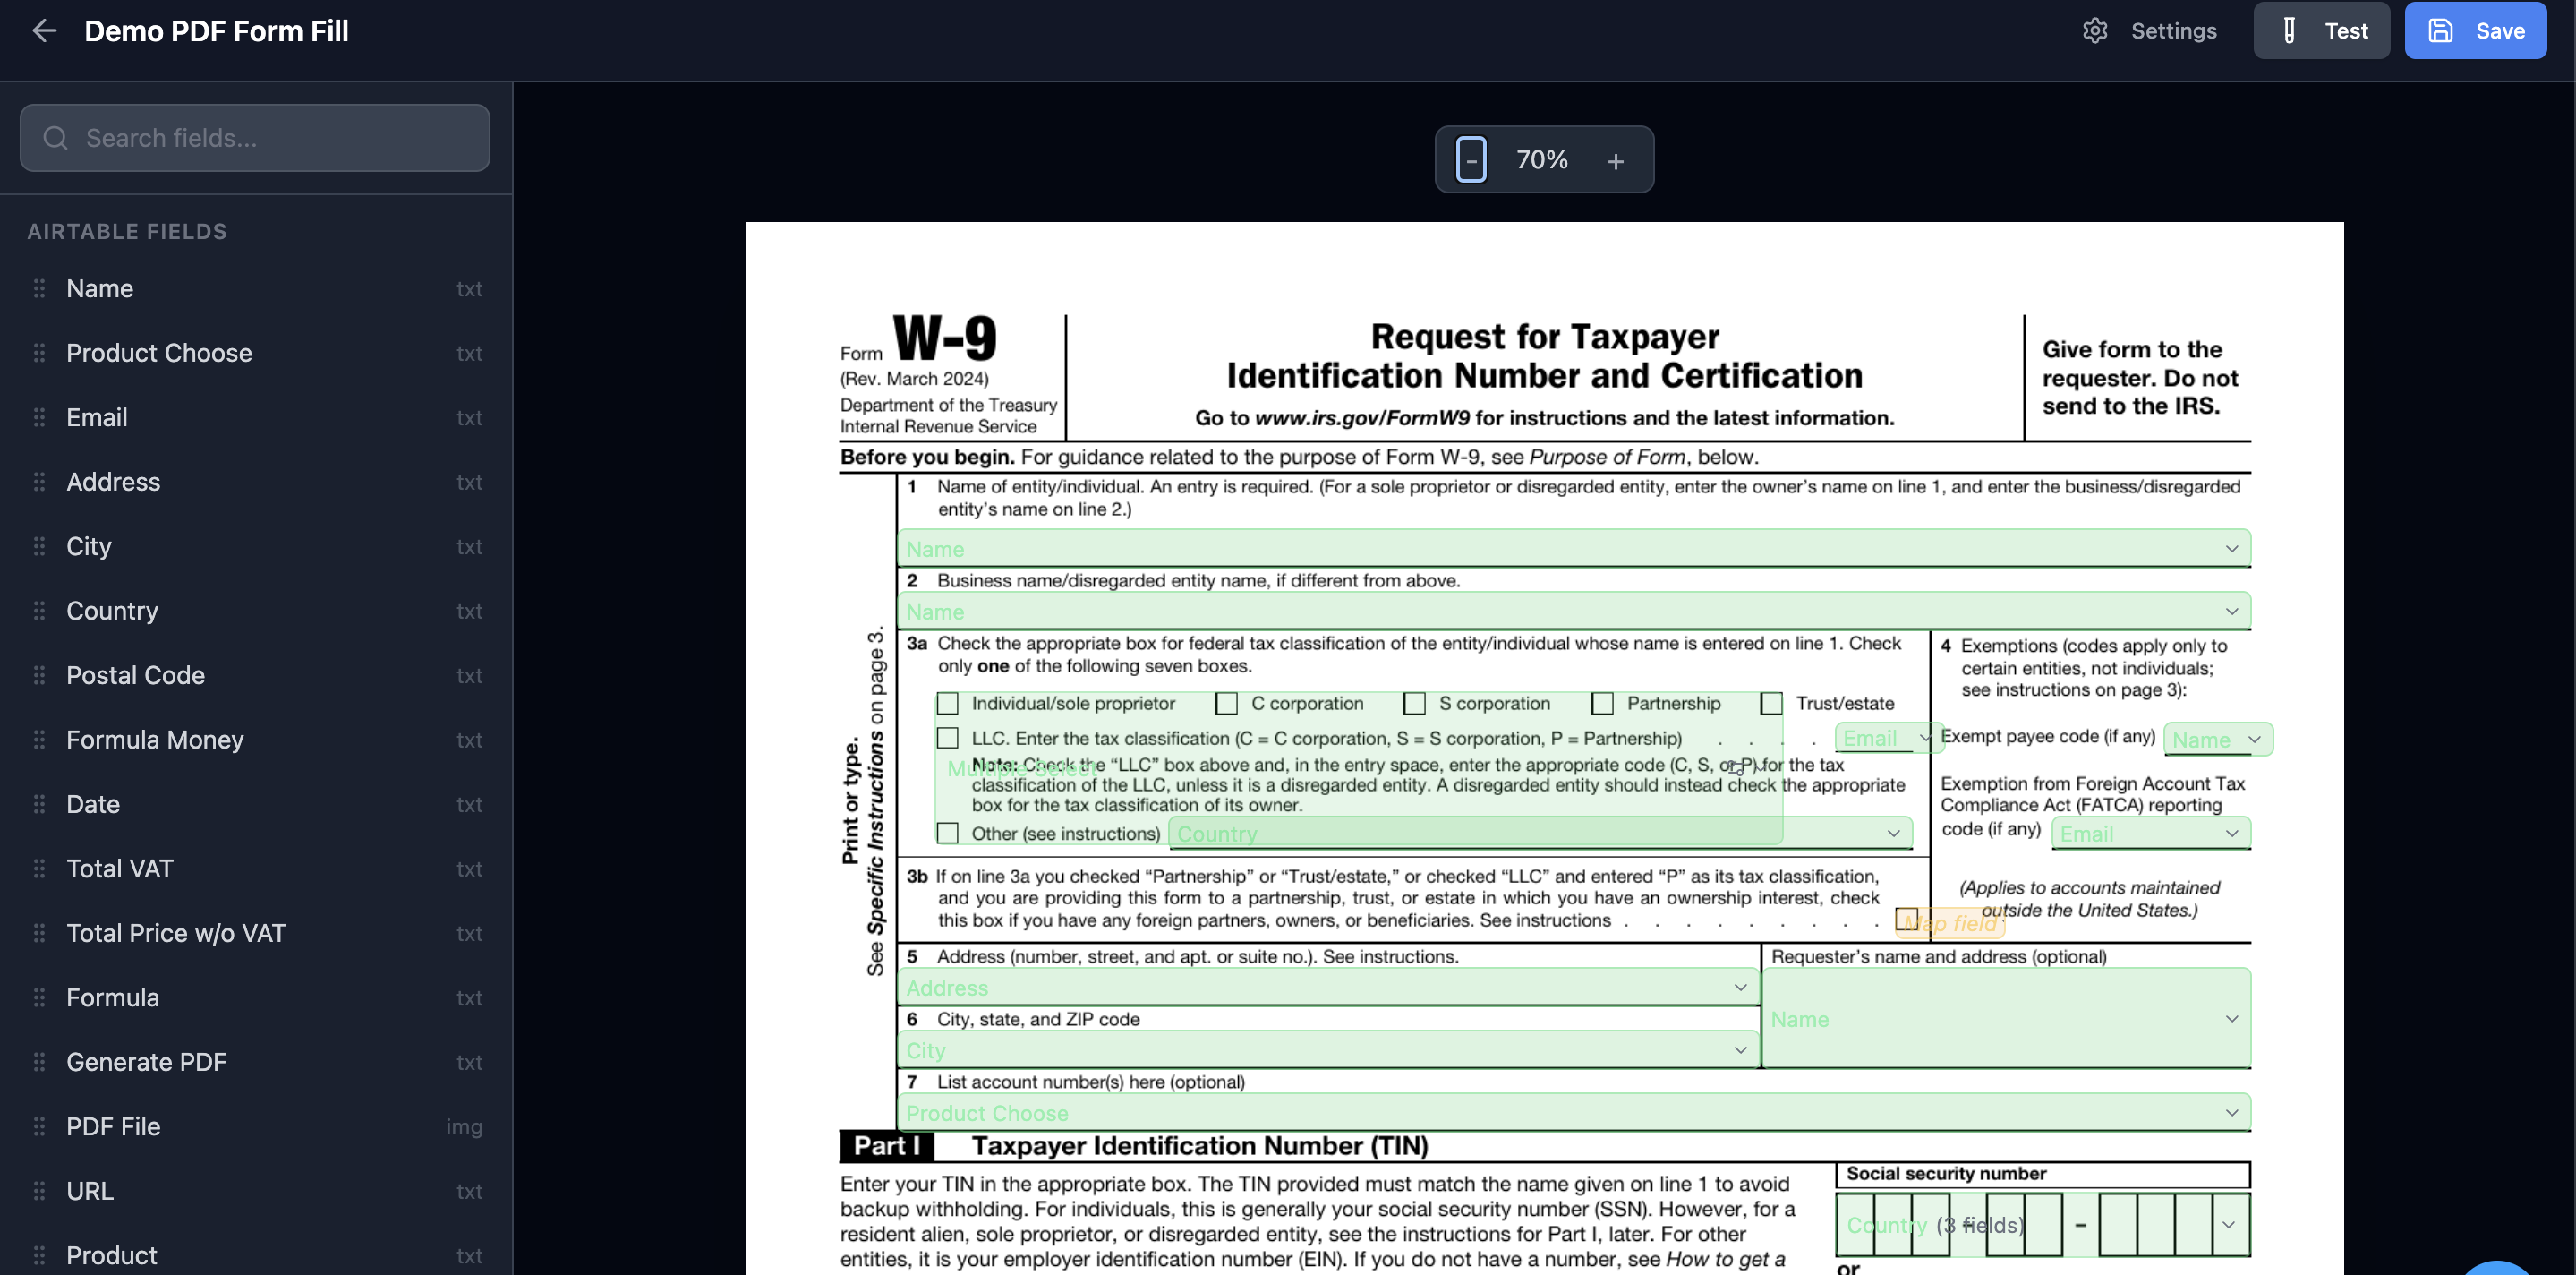
- Automatic detection - if your PDF has native form fields (created in Adobe Acrobat or similar), TypeFlow detects them and displays them on the PDF. You just select which Airtable field goes where.
- Manual placement - for flat PDFs or scanned documents, drag and drop your Airtable fields onto the PDF at the exact position you want.
Getting Started
Step 1: Create a New Flow
- Click New Flow in your dashboard
- Connect your Airtable base and select the table containing your data
- Choose your attachment field (where the filled PDF will be saved)
Step 2: Choose "Fill a PDF Form"
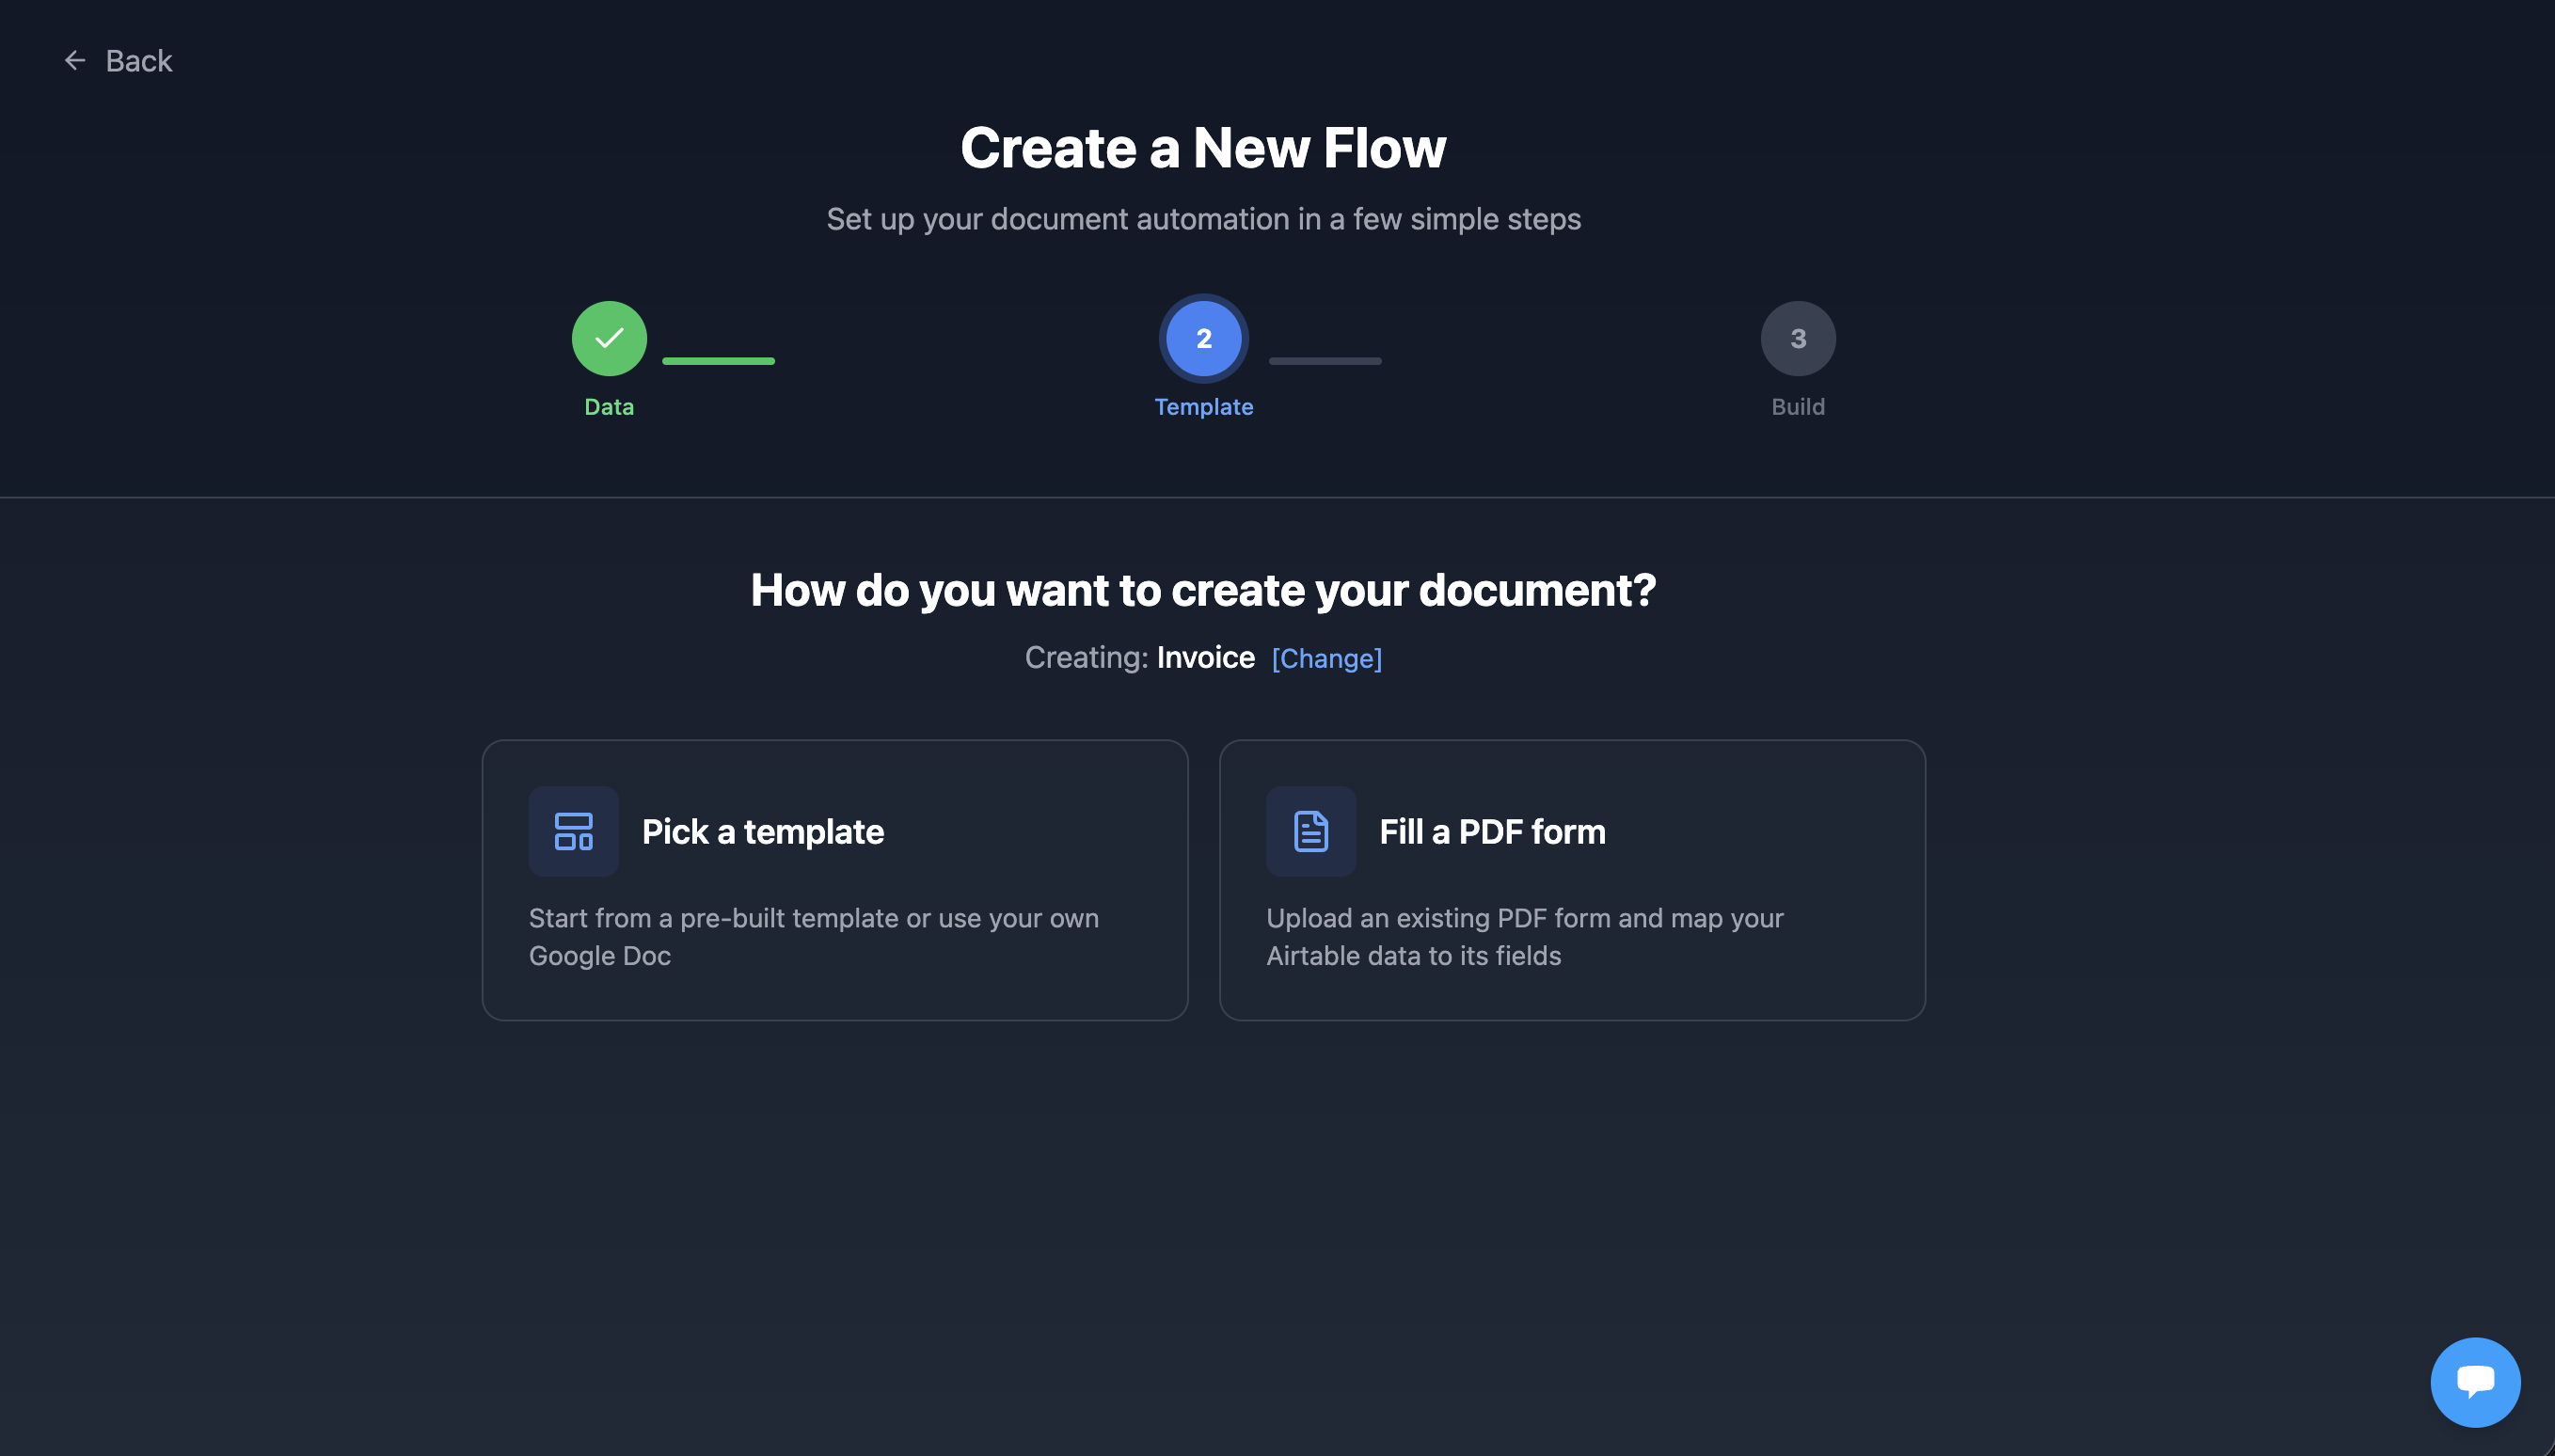
After selecting your document type, you will see two options:
- Pick a template - use a pre-built template or your own Google Doc
- Fill a PDF form - upload an existing PDF form
Select Fill a PDF form.
Step 3: Upload Your PDF
Drag and drop your PDF file or click to browse. Maximum file size is 20MB.
TypeFlow will:
- Convert each page to a visual preview
- Detect any native form fields (AcroForm)
- Redirect you to the PDF Editor
Mapping Fields
Auto-detected fields
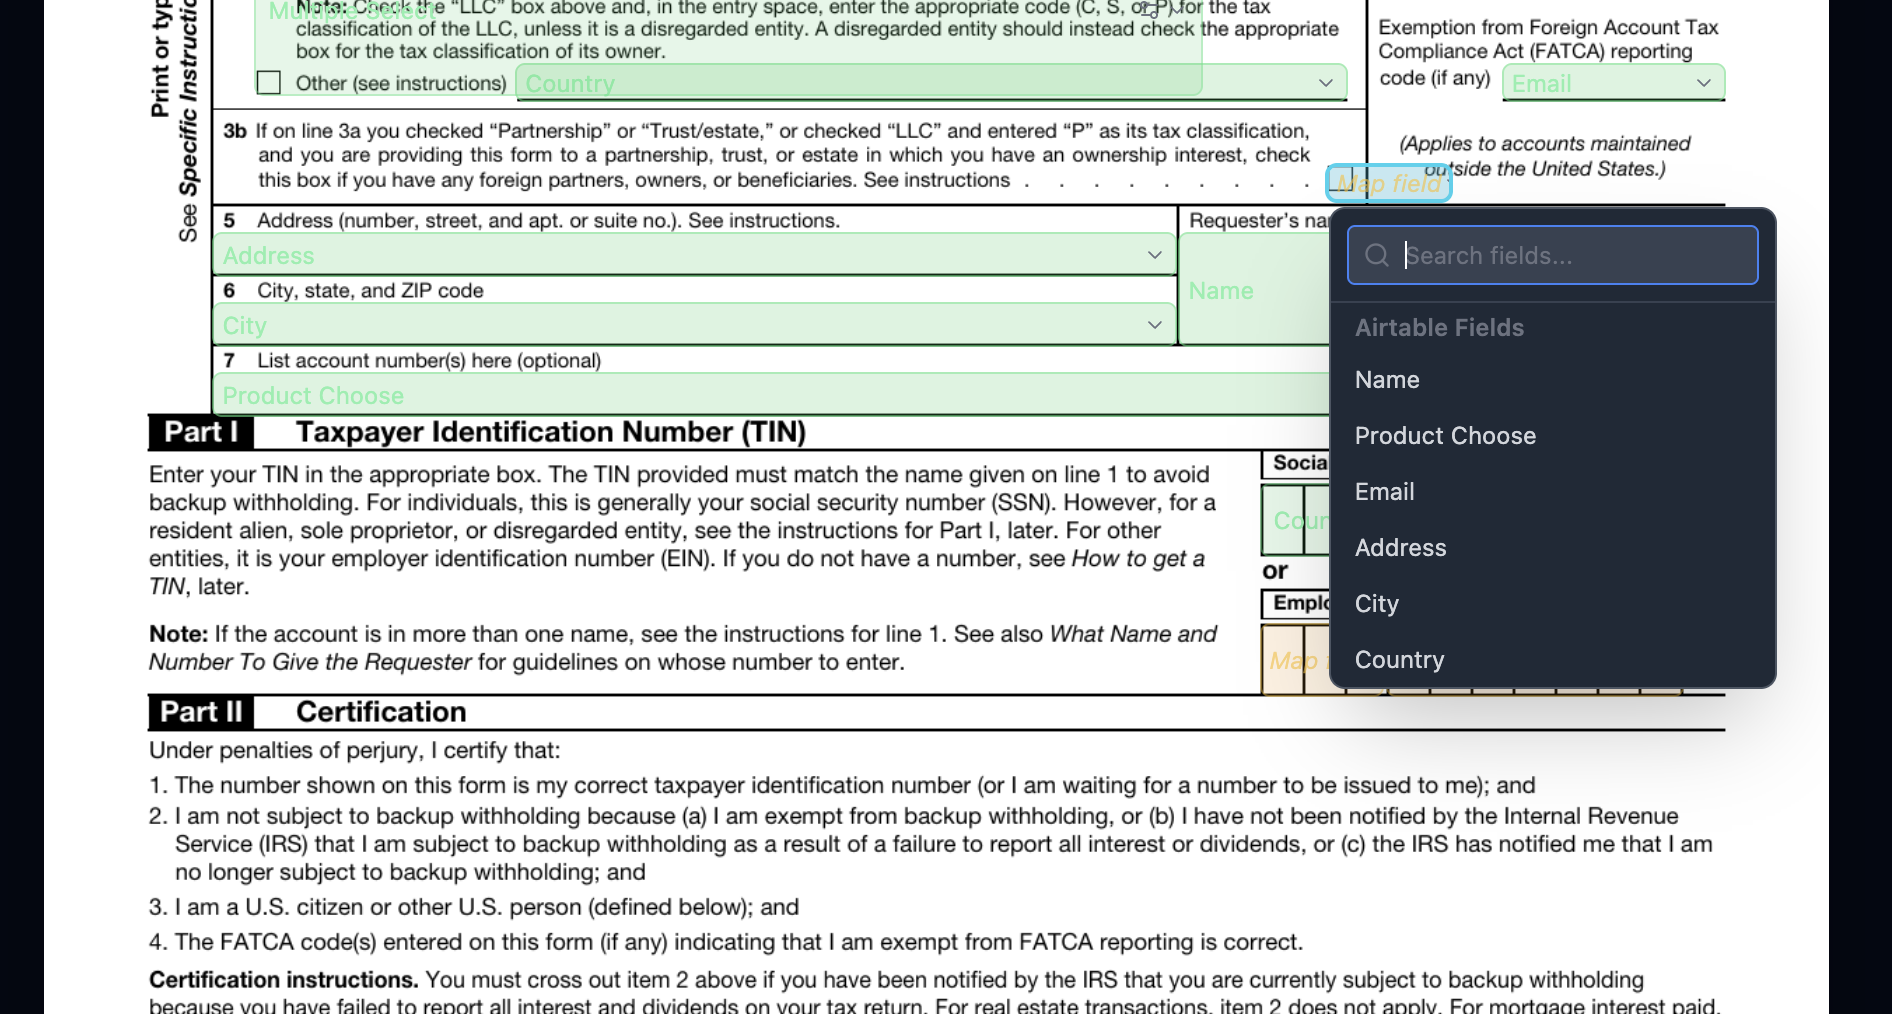
If your PDF has native form fields, they appear as amber-colored placeholders showing "Map field".
To map a field:
- Click on the placeholder
- A dropdown with search appears
- Type or scroll to find your Airtable field
- Select it
The placeholder turns green and shows the Airtable field name. To unmap, click again and select "Remove mapping".
Manual placement (drag and drop)
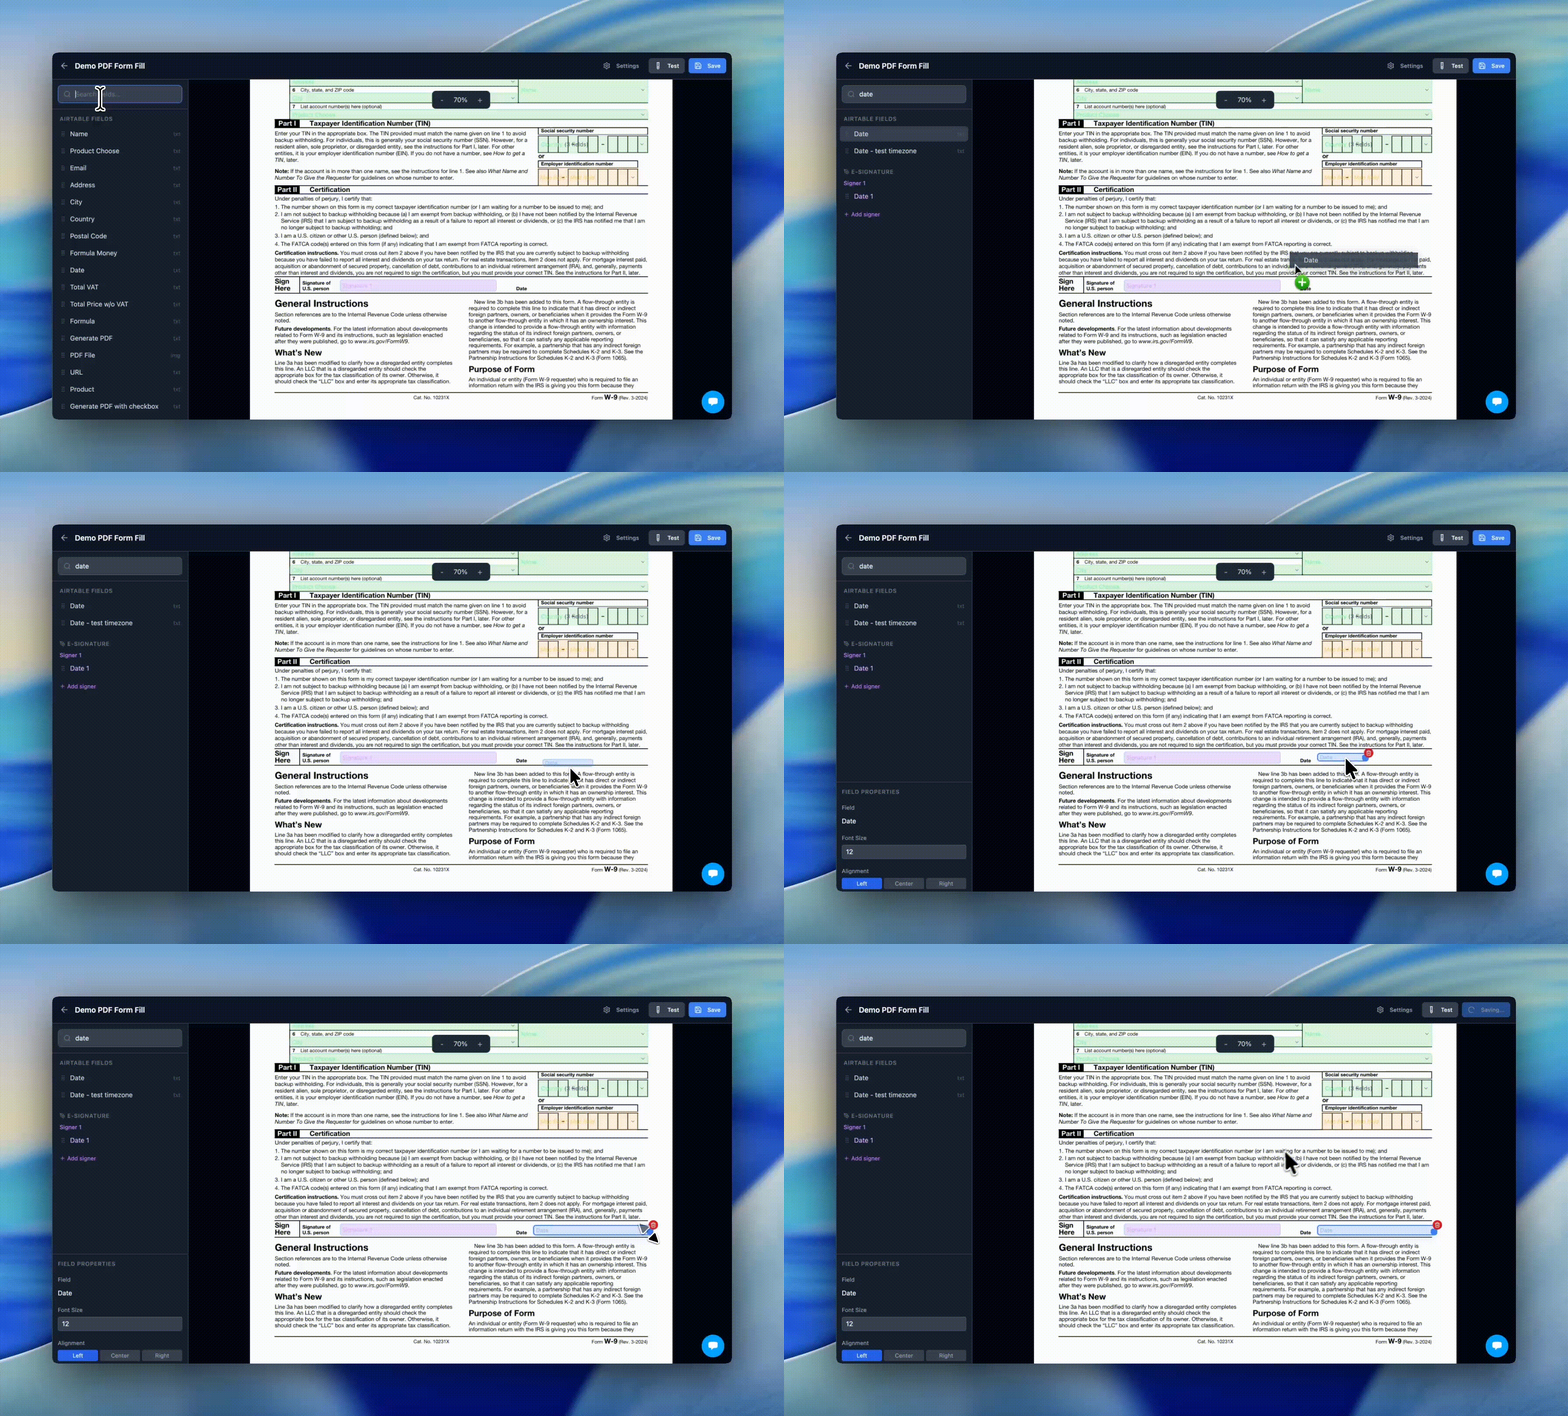
For PDFs without native form fields:
- Find the Airtable field in the left sidebar
- Drag it onto the PDF at the position you want
- Resize by dragging the corner handle
- Reposition by dragging the placeholder
Click a manually placed field to configure:
| Setting | Description |
|---|---|
| Font size | Adjust text size (6-72px) |
| Alignment | Left, center, or right |
To delete a field, select it and click the red delete button.
Supported field types
| Airtable Field | How it renders |
|---|---|
| Text fields (single line, long text, email, phone, URL) | Text |
| Number, currency, percent | Formatted number |
| Date, datetime | Formatted date |
| Checkbox | Checkmark or empty |
| Single select, multiple select | Text |
| Linked records | Display names (resolved automatically) |
| Lookups, rollups, formulas | Formatted based on result type |
| Attachment (image) | Image, scaled to fit |
All formatting (number precision, date format, currency symbol) uses your Airtable field settings automatically.
Checkbox Groups
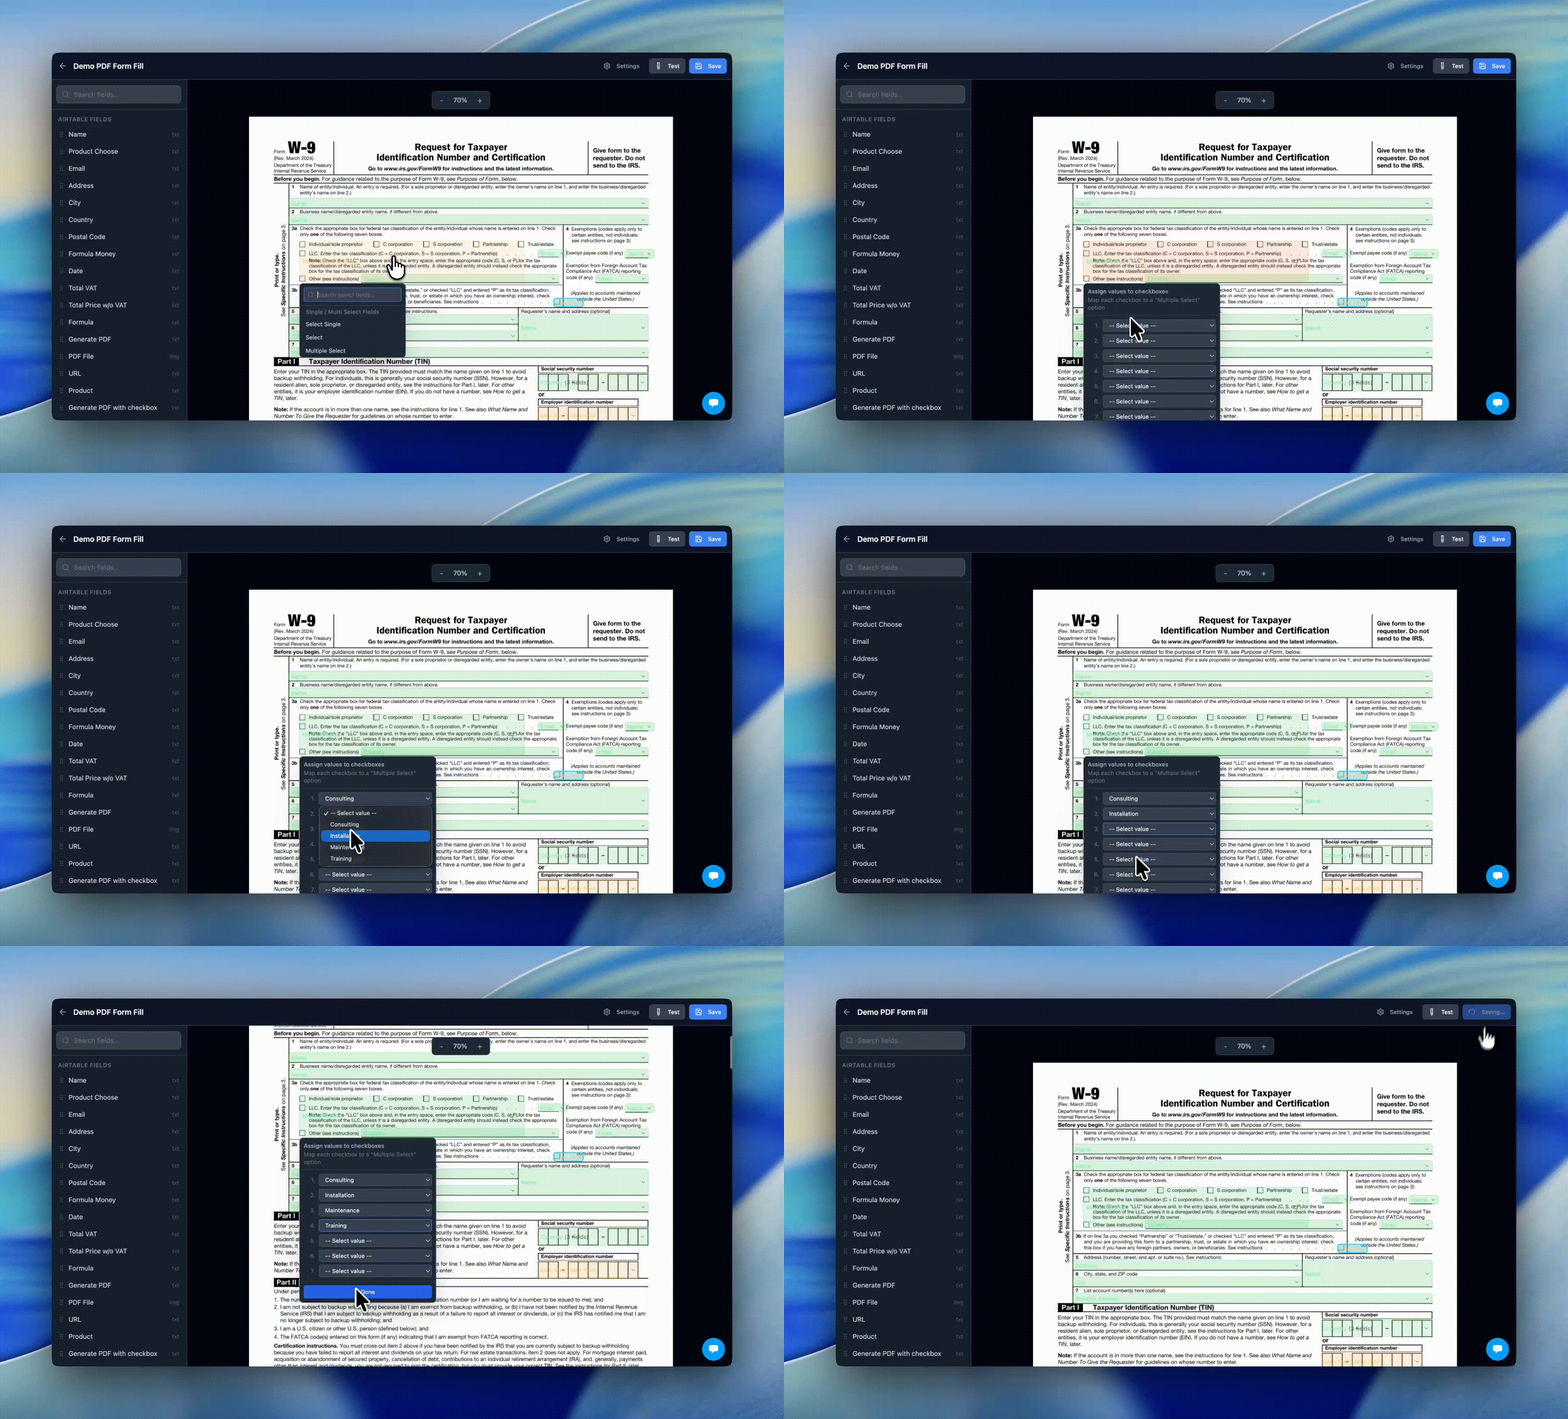
Some PDF forms have groups of checkboxes that represent a single choice (e.g. tax classification: Individual, C corporation, S corporation).
TypeFlow automatically groups checkboxes that share the same field name.
To configure:
- Click the checkbox group placeholder
- Select an Airtable Single Select or Multi Select field
- Click the settings icon to open the value remapping panel
- For each checkbox, select which option it corresponds to
At generation, TypeFlow reads the select value and checks the correct checkbox.
Split Fields
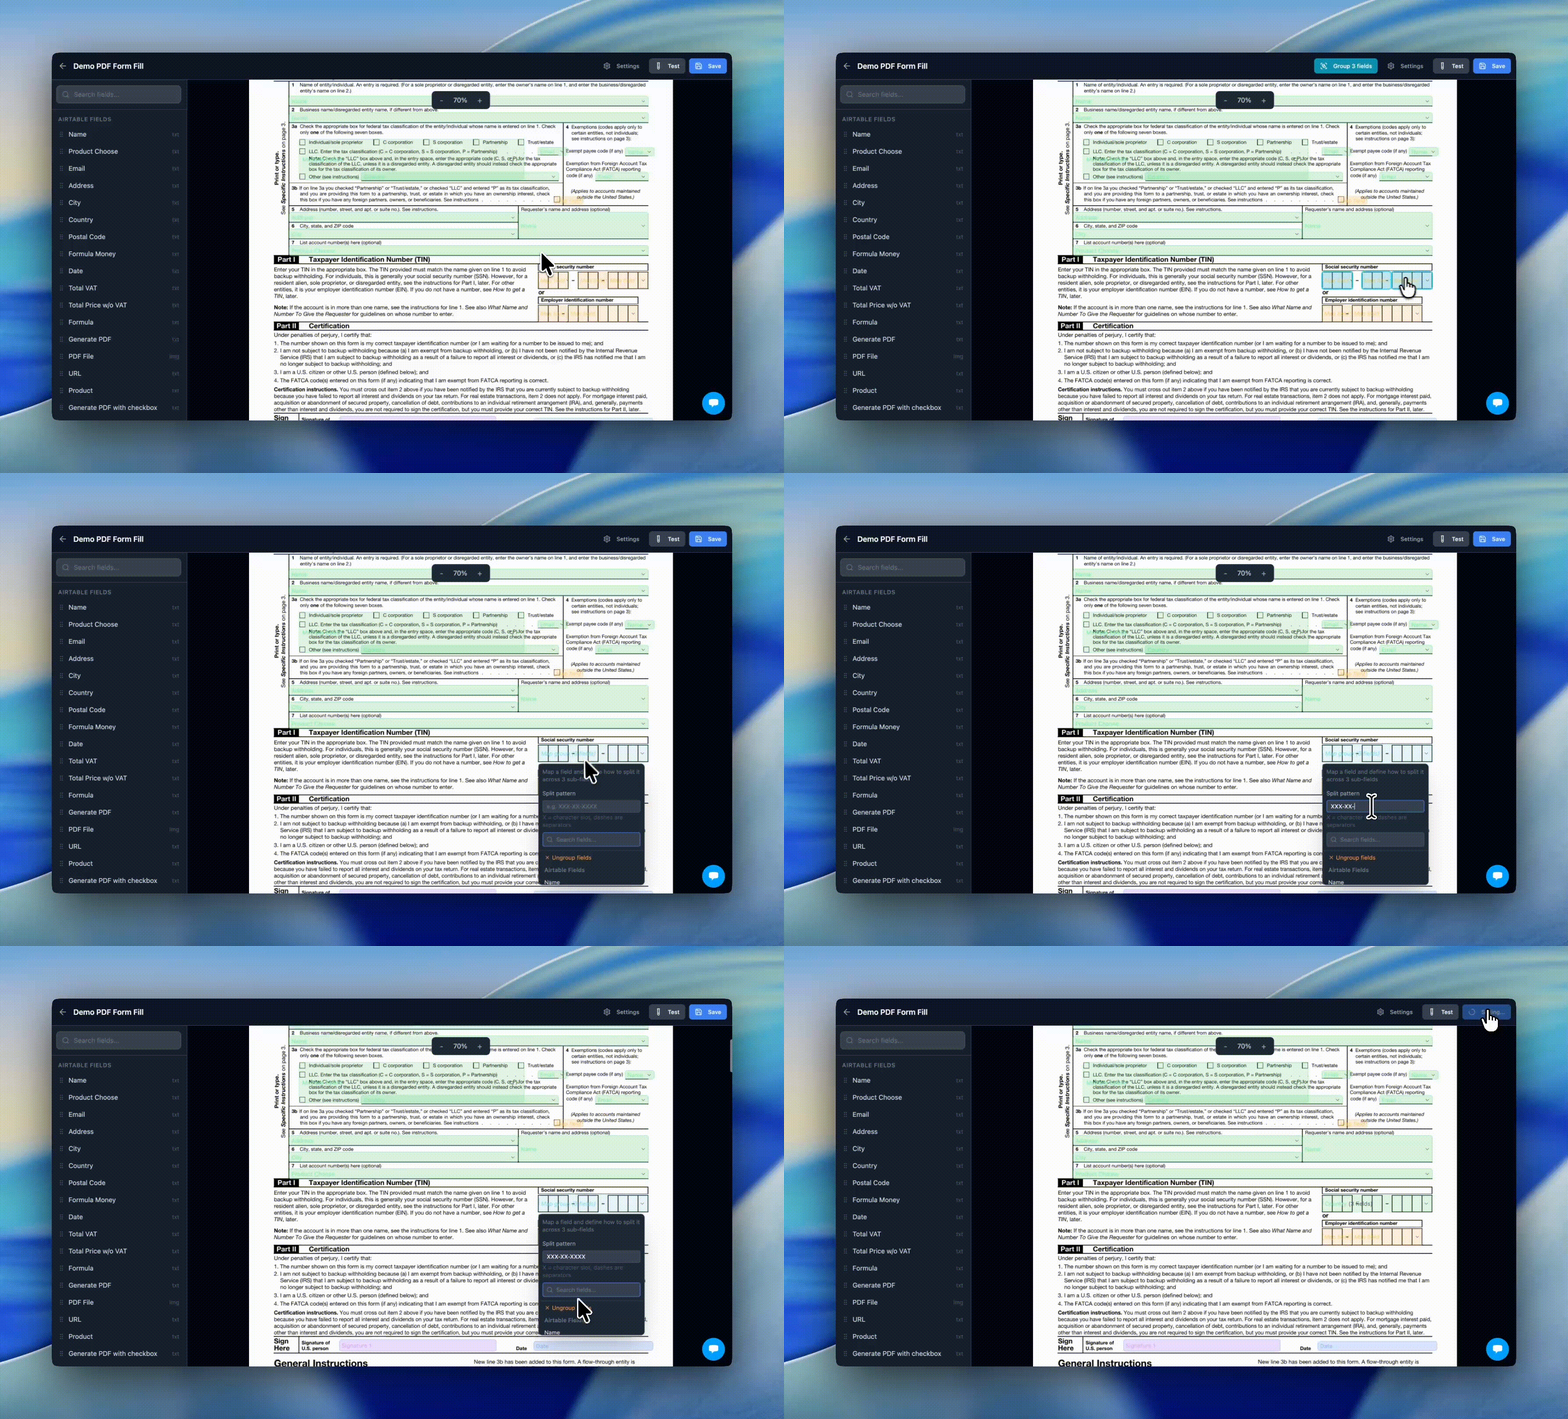
Some forms split a single value across multiple fields (e.g. Social Security Number as XXX-XX-XXXX in three separate boxes).
To group split fields:
- Shift+click on each field you want to group (they highlight in cyan)
- Click the "Group fields" button in the header
- The individual fields are replaced by a single group placeholder
To configure:
- Click the group placeholder
- Select the Airtable field containing the full value
- Enter the split pattern (e.g.
XXX-XX-XXXX)
X represents one character slot. Dashes and other characters are separators.
Example: Value 132-24-3459 with pattern XXX-XX-XXXX:
- Field 1:
132 - Field 2:
24 - Field 3:
3459
E-Signature
You can add e-signature fields to your PDF form so signers can sign the filled document. This works with TypeFlow's built-in e-signature feature.
Adding signature fields
In the left sidebar under E-Signature, drag any of these onto the PDF:
| Variable | Purpose |
|---|---|
| Signature | A signature field (drawn or typed) |
| Text | Text input (e.g. printed name) |
| Date | Auto-filled signing date |
| Checkbox | A consent checkbox |
Multiple signers
Click "+ Add signer" in the sidebar to add Signer 2, Signer 3, etc. Each signer gets their own set of variables.
Configuring signers
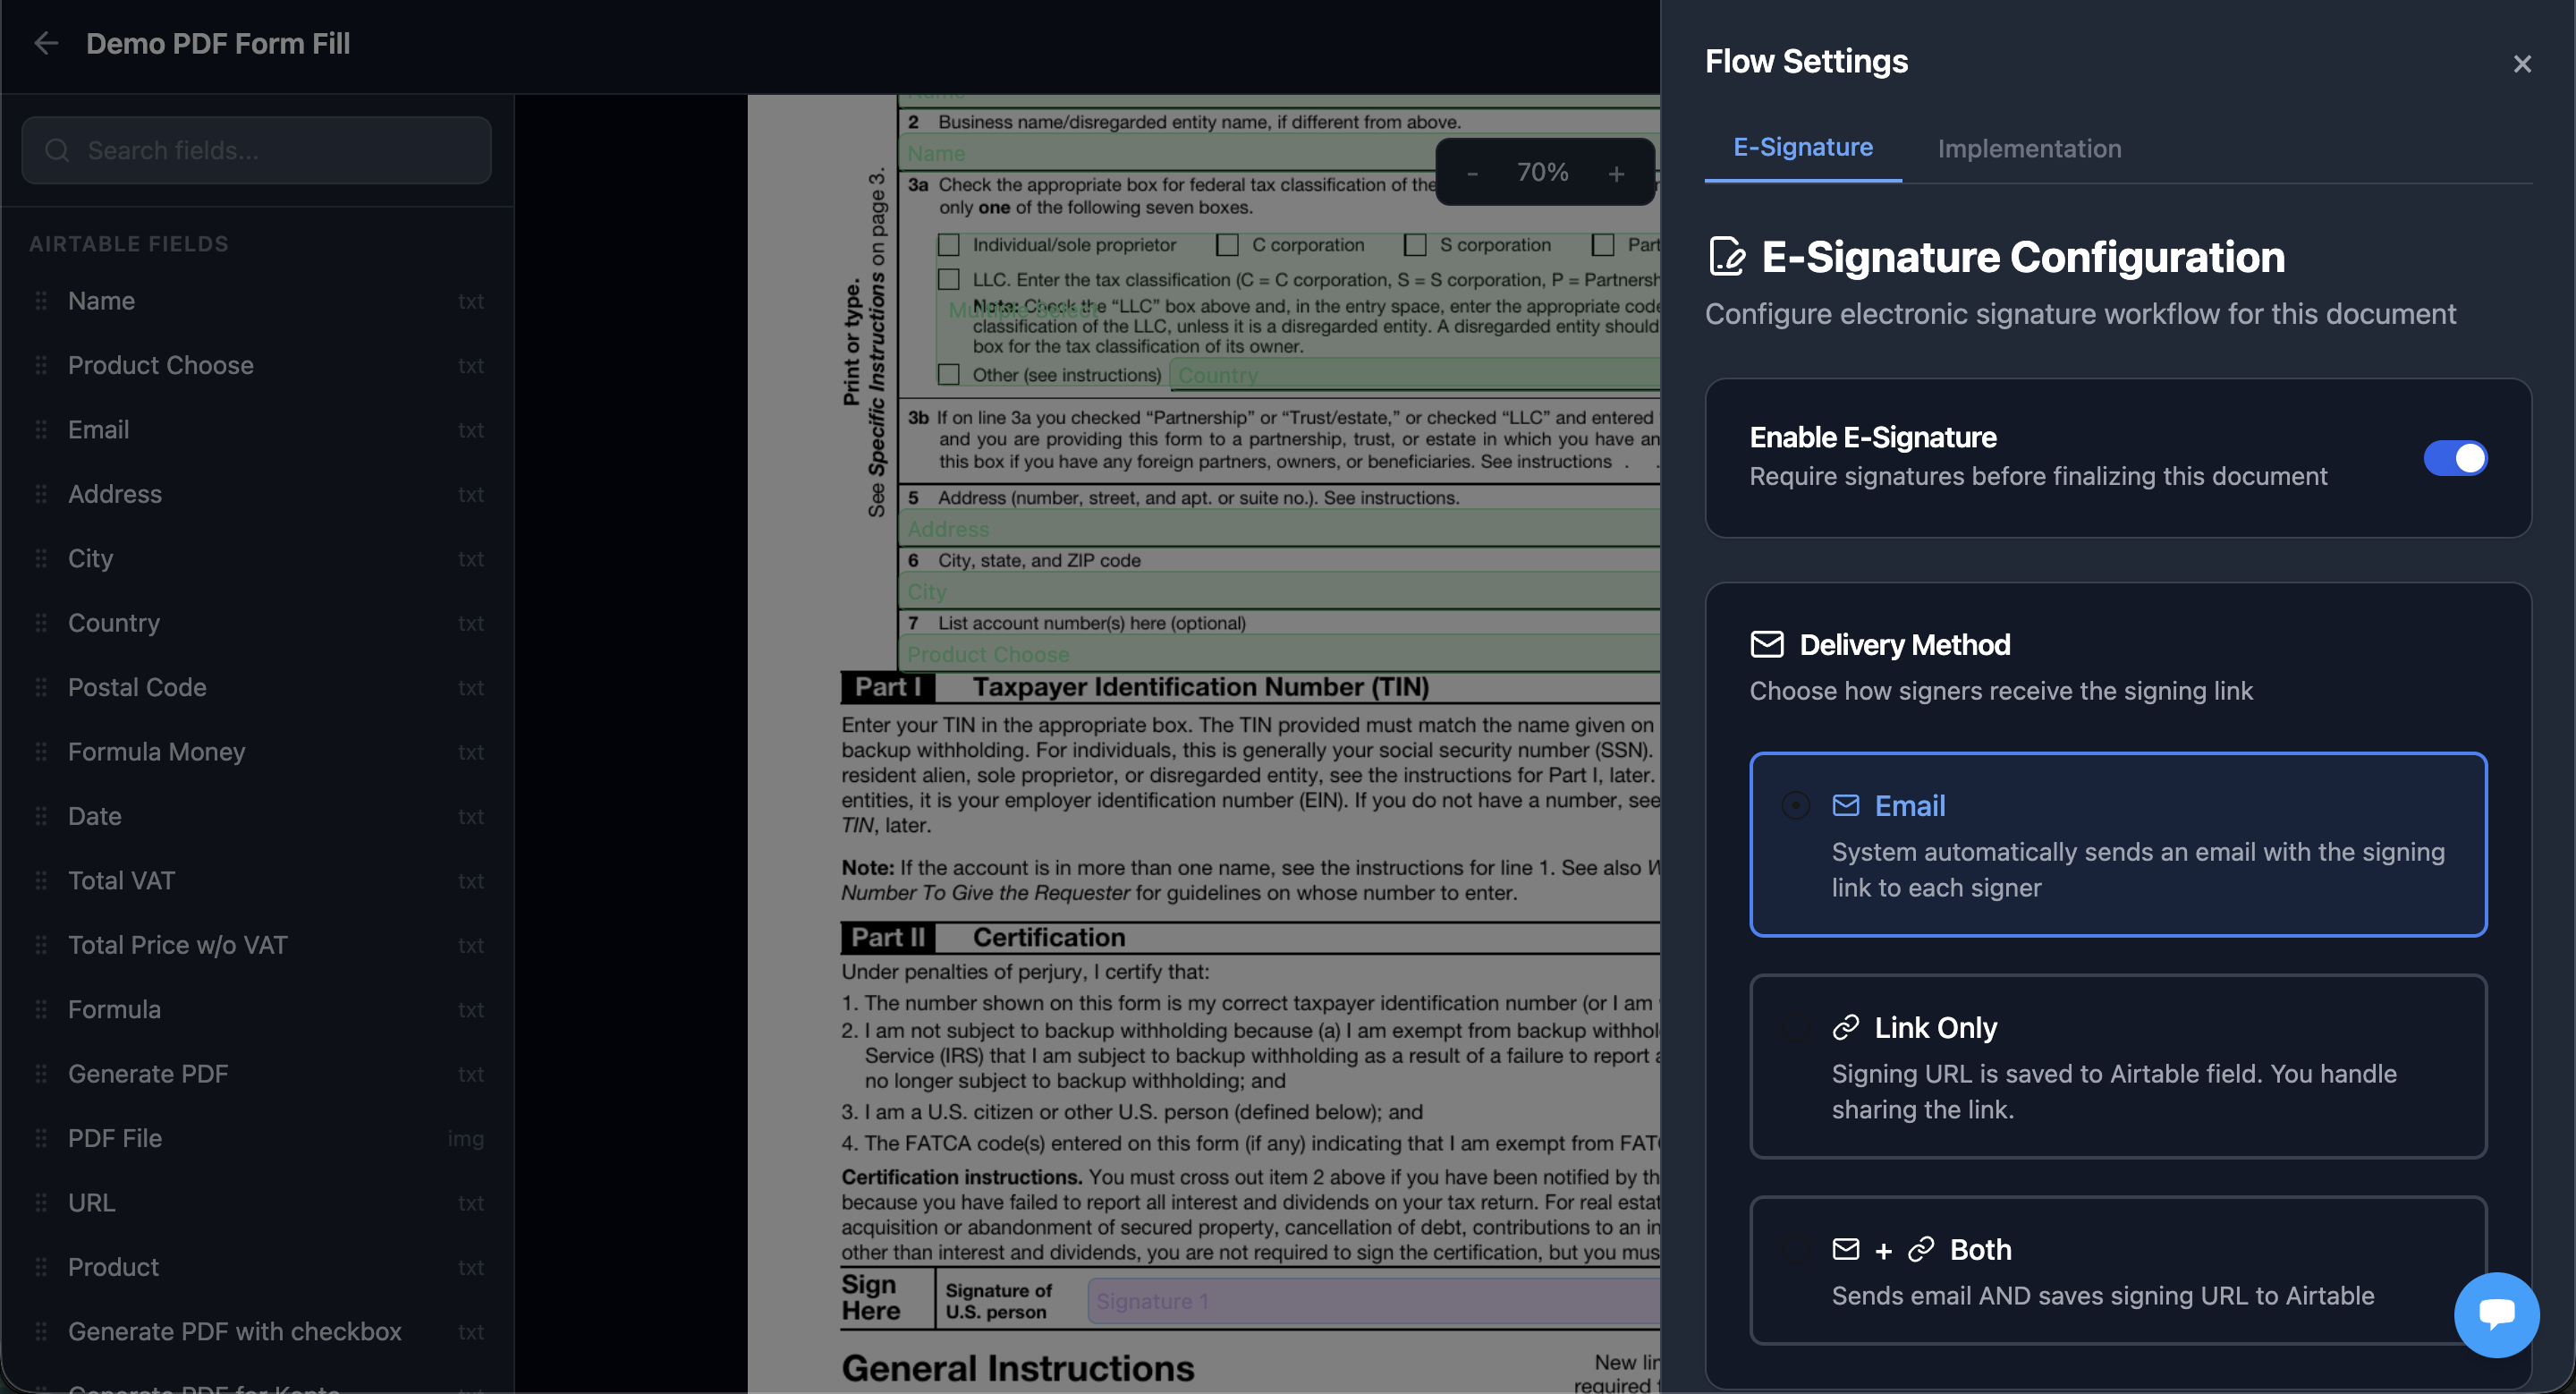
- Click Settings in the header
- Go to the E-Signature tab
- For each signer, configure their email (from an Airtable field or static), name, and signing mode
Testing
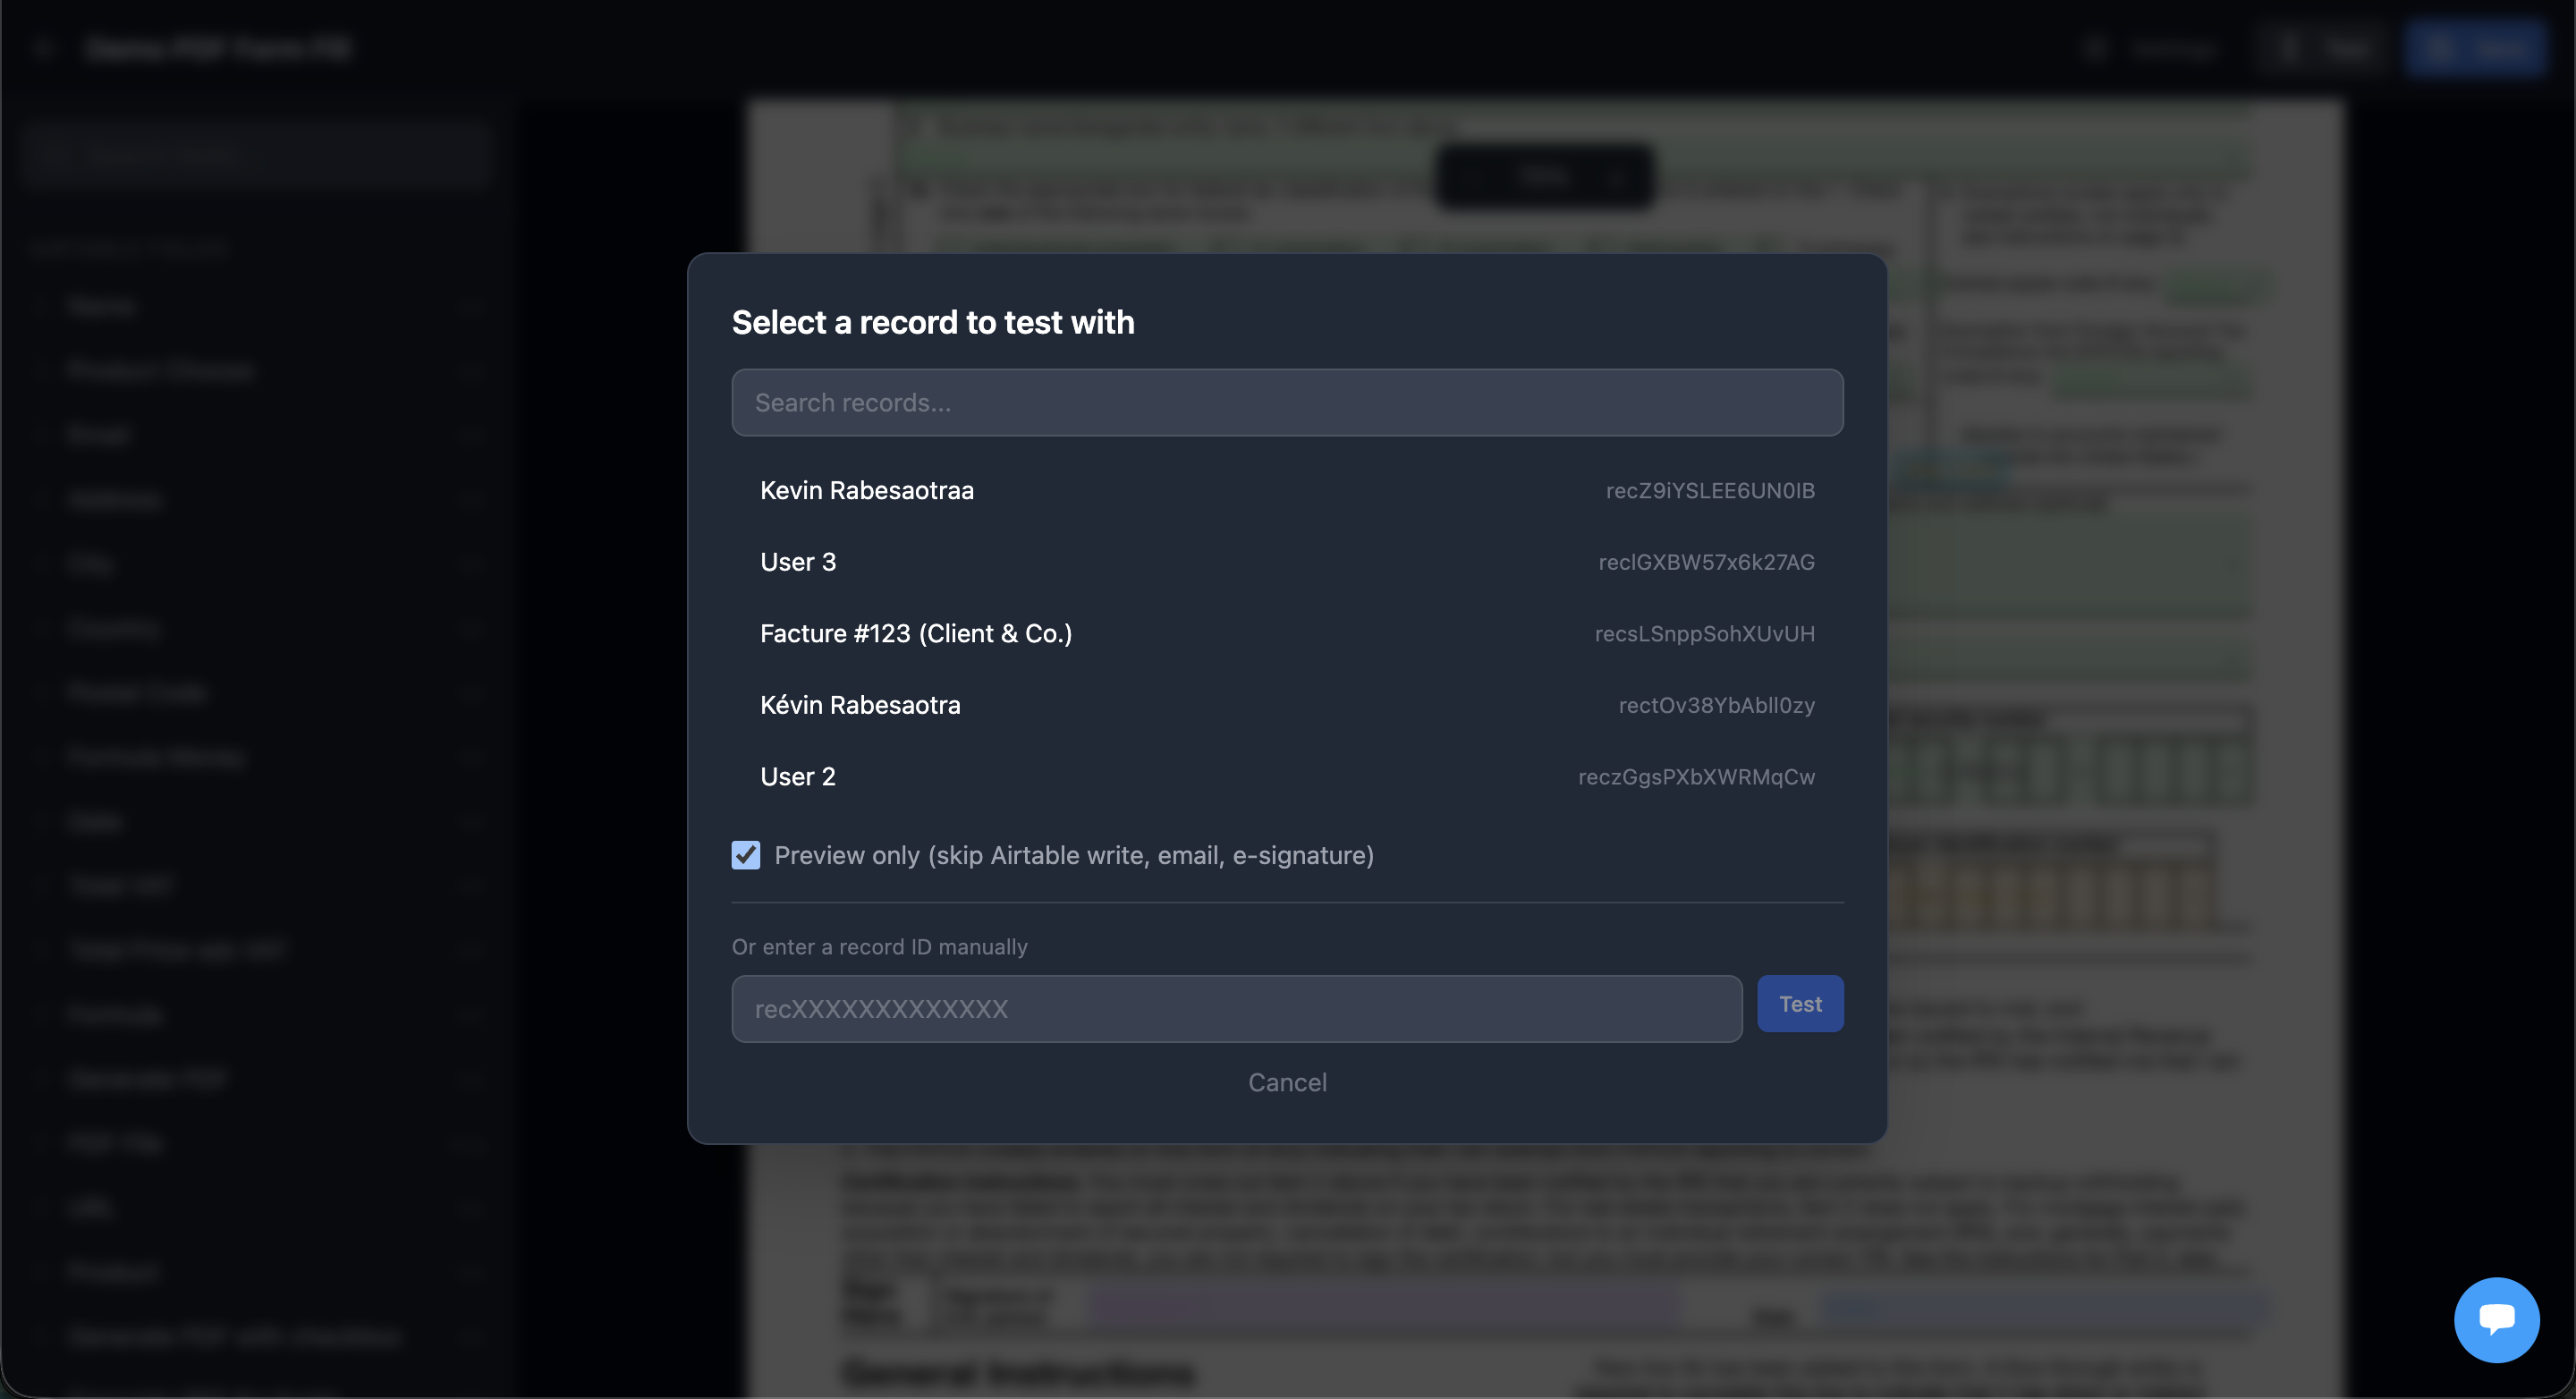
- Click the Test button in the header
- Select a record from the list or type a record ID
- Choose your test mode:
| Mode | What happens |
|---|---|
| Preview only (checked) | PDF generated with TYPEFLOW watermark. Nothing saved, no emails sent, no credits used. |
| Full test (unchecked) | PDF generated with watermark, saved to Airtable, e-signature triggered if configured. No credits used. |
The generated PDF opens in a new tab.
Triggering Generation
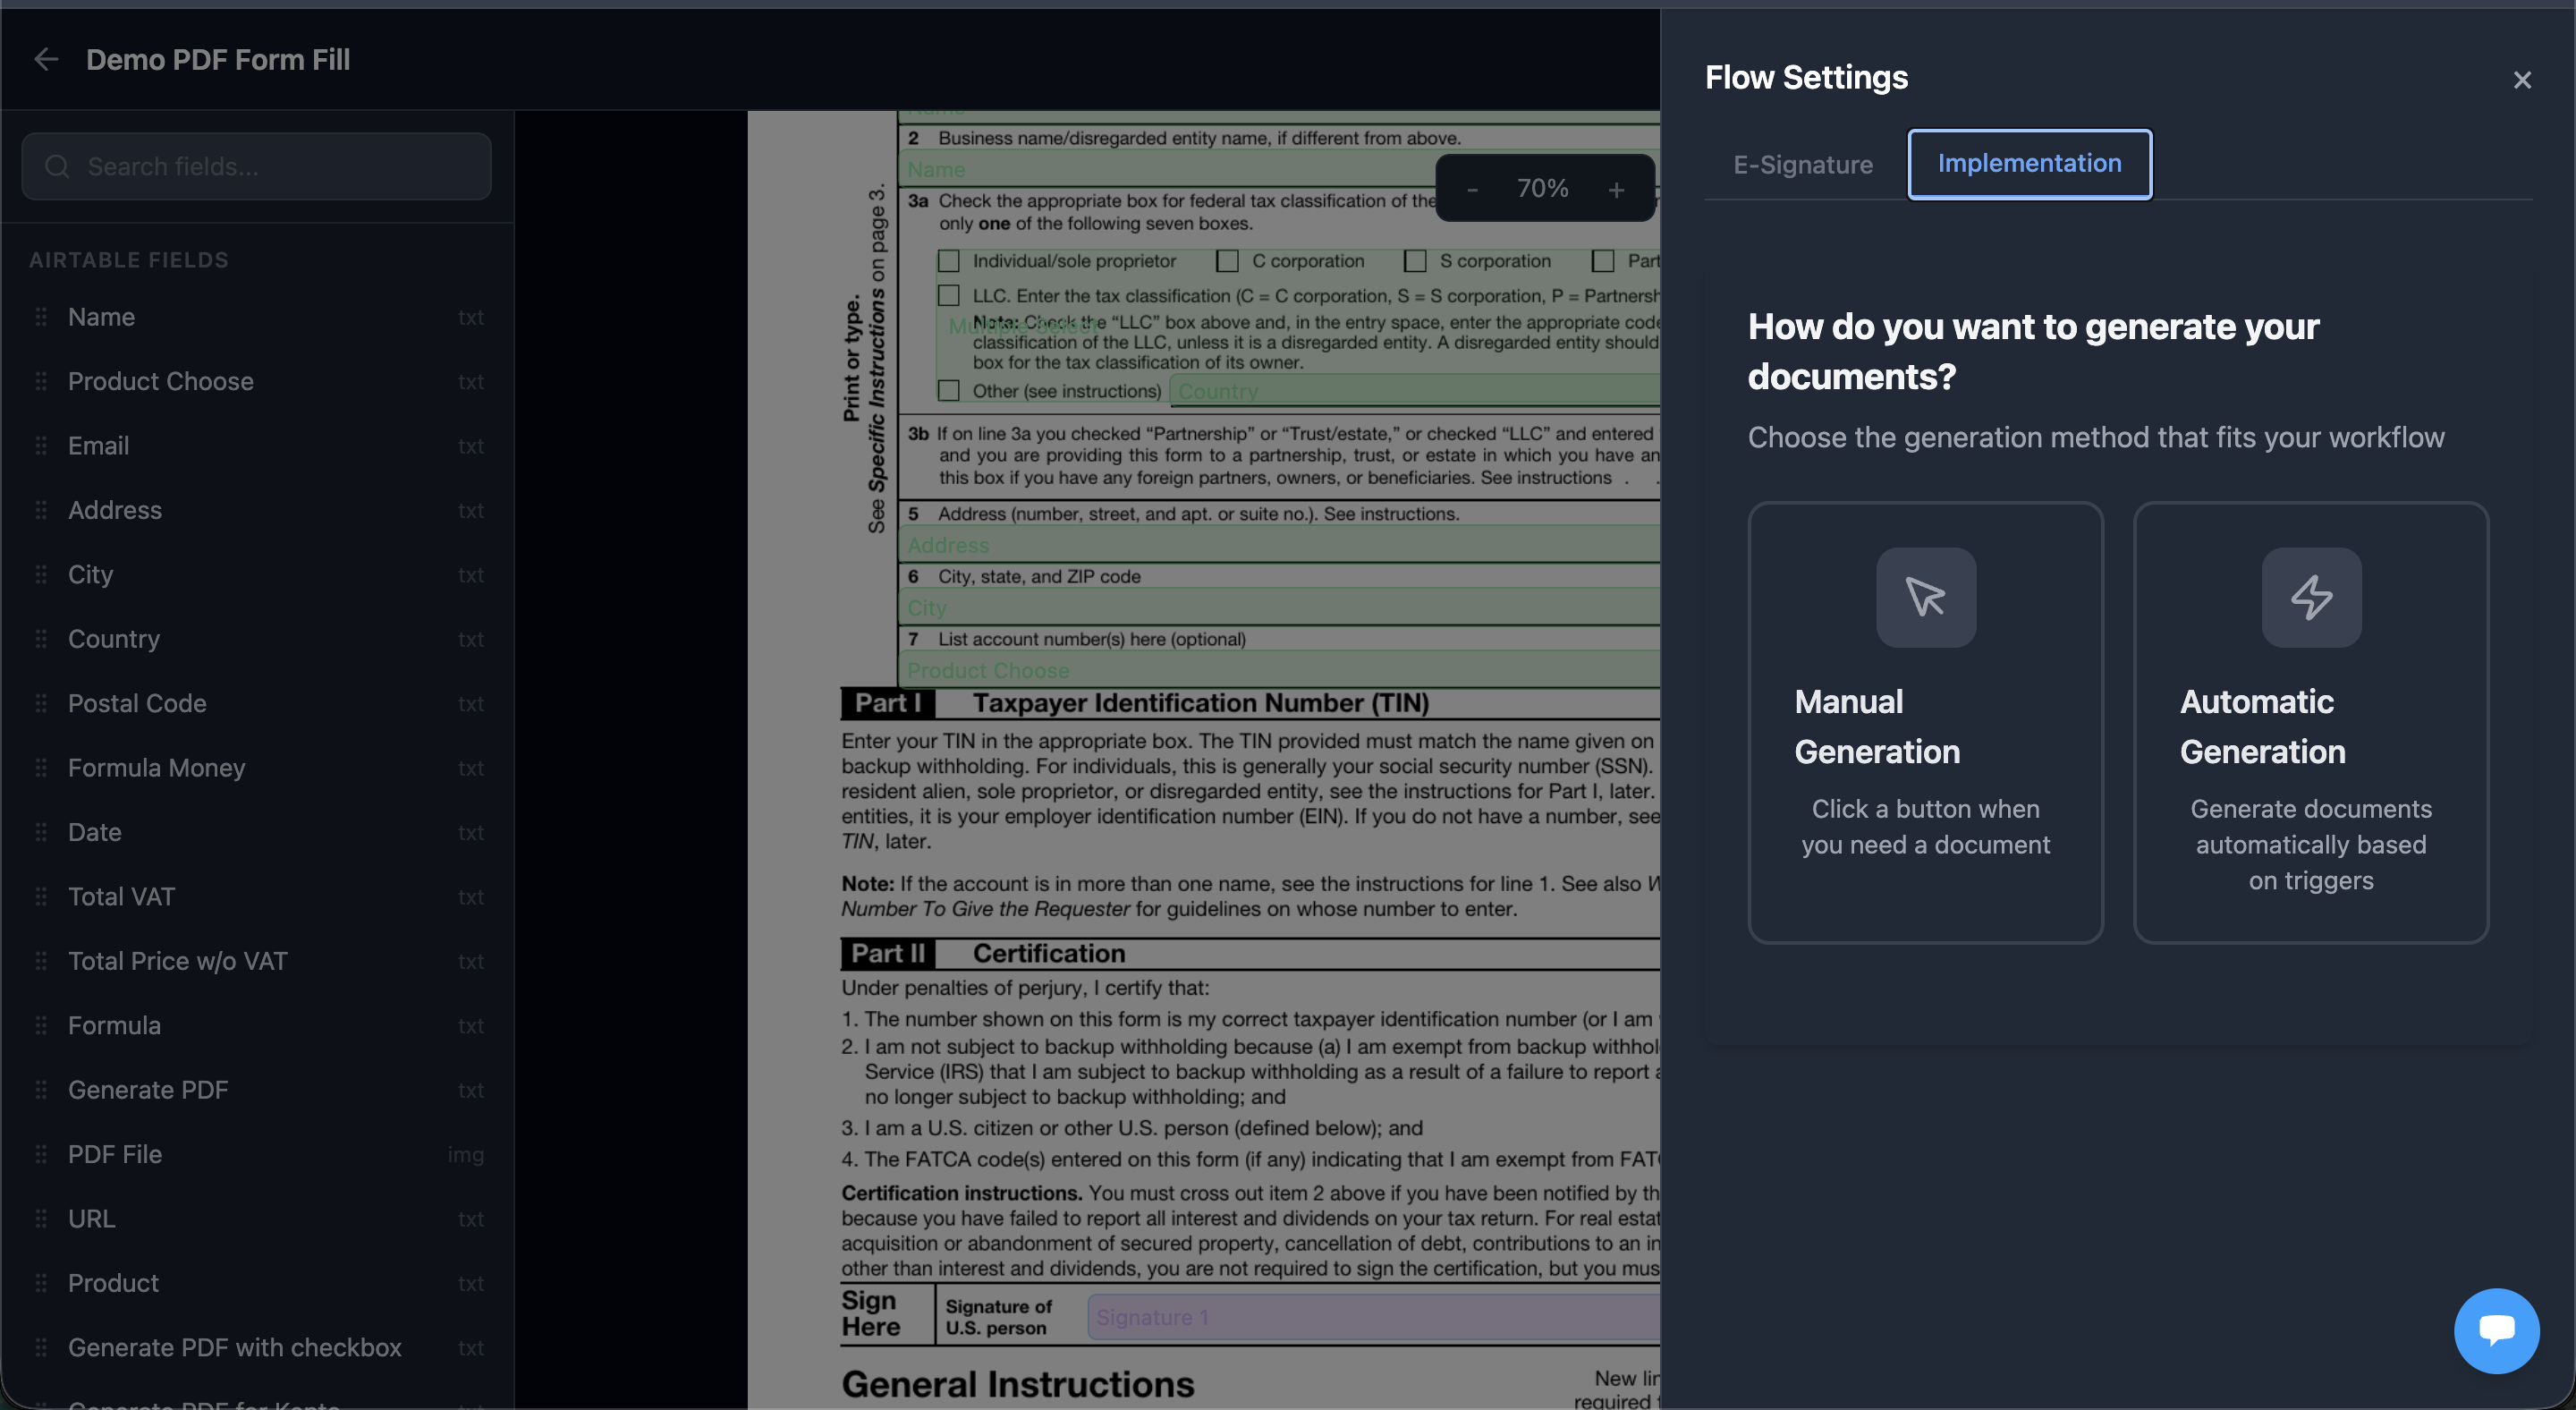
Once your flow is configured and tested, click Settings then the Implementation tab.
Manual generation
| Method | Description |
|---|---|
| Airtable Extension | Generate from the TypeFlow extension panel in Airtable |
| Button / Formula | Add a formula field with a clickable URL in your table |
| Interface Button | Add a button to your Airtable Interface |
Automatic generation
| Method | Description |
|---|---|
| TypeFlow Automation | Zero-code - triggers when a field value changes |
| Airtable Automation | Use native Airtable automations with a script |
| Make / Zapier | Connect to external automation platforms |
Each method shows step-by-step instructions with copy-paste code and URLs.
Related
- How to Set the Document Name for PDF Form Flows - Customize the output filename with Airtable variables