Updated November 18, 2026 · By TypeFlow
Add a Record With Each Scan: Linked Records, Quantities and Cart
With A record is added to another table, each scan adds a record linked to the scanned one: a quantity counted at the station, fields picked before scanning, a question asked at the scan. A cart records several codes at once.
This page is part of Scan to Update. The example is a stock movement: each scan of an item's label adds a line in a Movements table. The scan can also change the scanned item, see Update the scanned record.
What you get
Two buttons at the station:
| Button | Picked before scanning | Counted | Movement added |
|---|---|---|---|
| Check Out | Customer, Location | Quantity out: 3 | Type = Out, Quantity = -3, Date = scan time |
| Check In | Location | (nothing) | Type asked at the scan (Out, In, Serviced), Date = scan time |
In Airtable
Two tables, linked:
Equipment (or Products): the items that carry a label.
| Field | Type | Role |
|---|---|---|
| Unit Number | Single line text | printed as the barcode |
| Stock | Rollup: SUM(Quantity) of Movements | the stock, always up to date |
Movements: one record per scan.
| Field | Type | Role |
|---|---|---|
| Equipment | Link to Equipment | the scanned item (filled by TypeFlow) |
| Quantity | Number | counted at the station |
| Type | Single select: Out, In, Serviced | set or asked by the button |
| Date | Date with time | the scan time |
| Customer, Location | Links to other tables | picked at the station before scanning |
| TypeFlow scan id | Single line text | added by TypeFlow, so a retry never adds a movement twice |
On the label
In the Template Builder, add {{barcode:Unit Number}} to the label. Any barcode built from a field can be scanned: Code 128, QR Code or EAN-13. You can keep the codes you already use, such as a SKU or a supplier barcode: TypeFlow finds the item by the field's value. It also works on labels printed several times from a quantity, because every copy carries the same Unit Number.
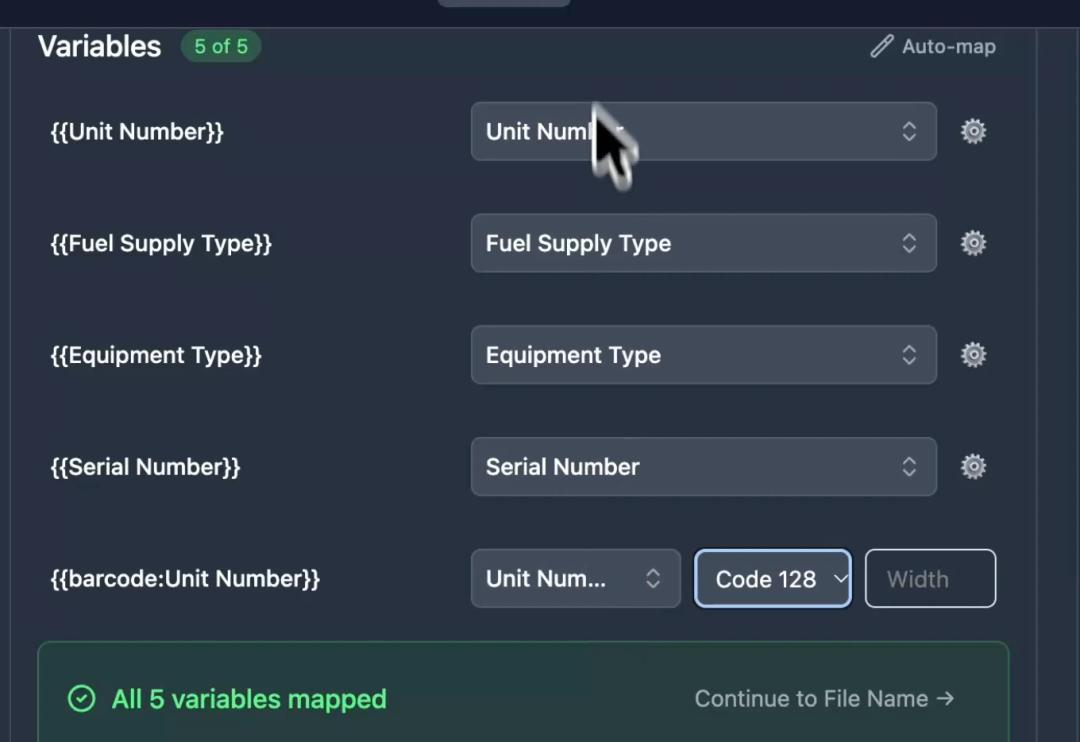
Set up the scan
In the Actions tab, open When a code is scanned. The station is drawn on the right and changes as you set it up.
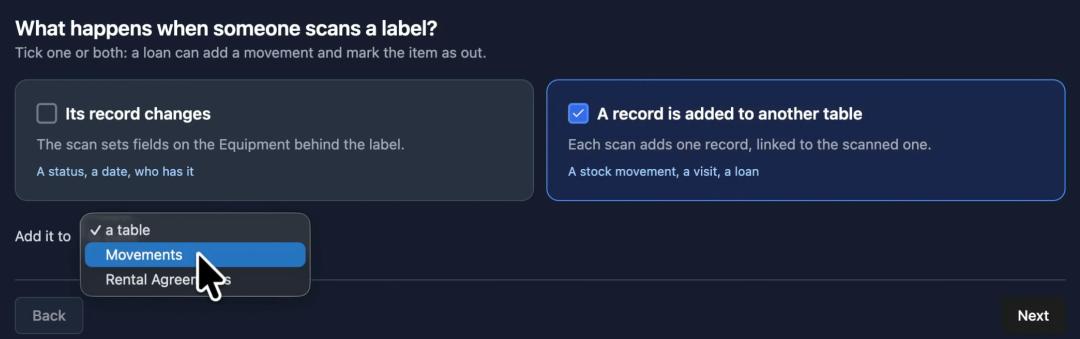
1. What a scan does
- Tick A record is added to another table, then choose Add it to: Movements.
- Also tick Its record changes if the scan should change the item itself, for example its Status. Otherwise leave it unticked.
2. Buttons
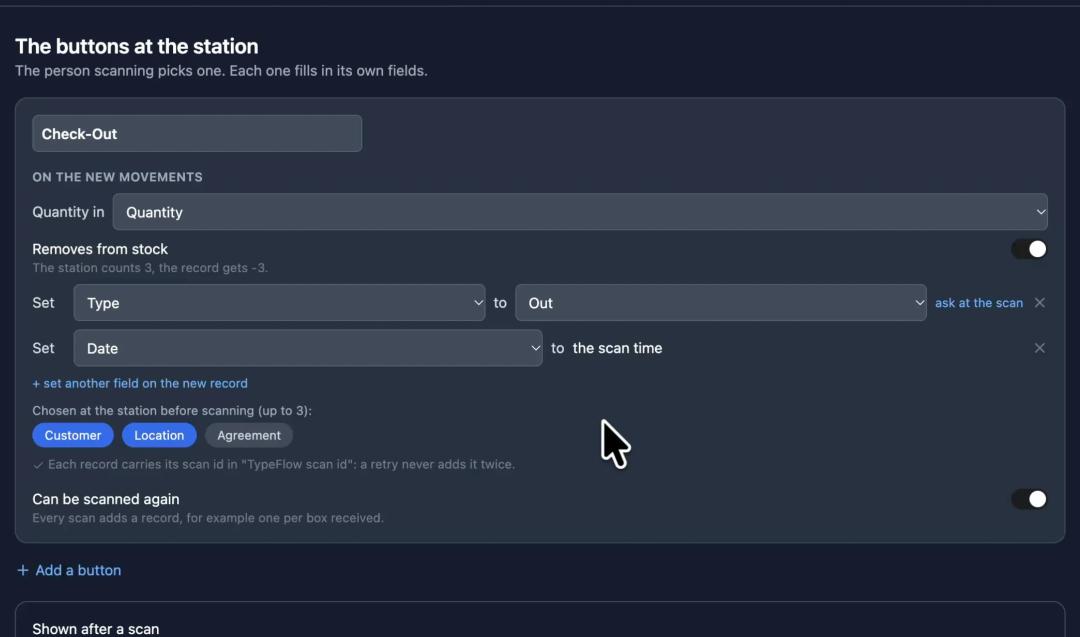
Check Out. Type the name, then under On the new Movements:
- Quantity in: Quantity. Turn on Removes from stock: the station counts 3, the movement gets -3.
- Set Type to Out.
- Set Date to the scan time.
- Chosen at the station before scanning: click Customer and Location.
If the panel says a text field is needed, click Add "TypeFlow scan id". It is added to Movements once, for every button.
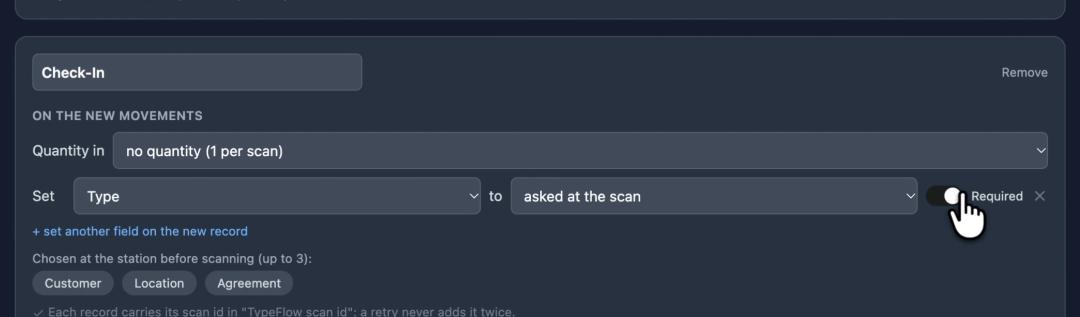
Check In. Click + Add a button, name it, then:
- Quantity in: leave no quantity (1 per scan).
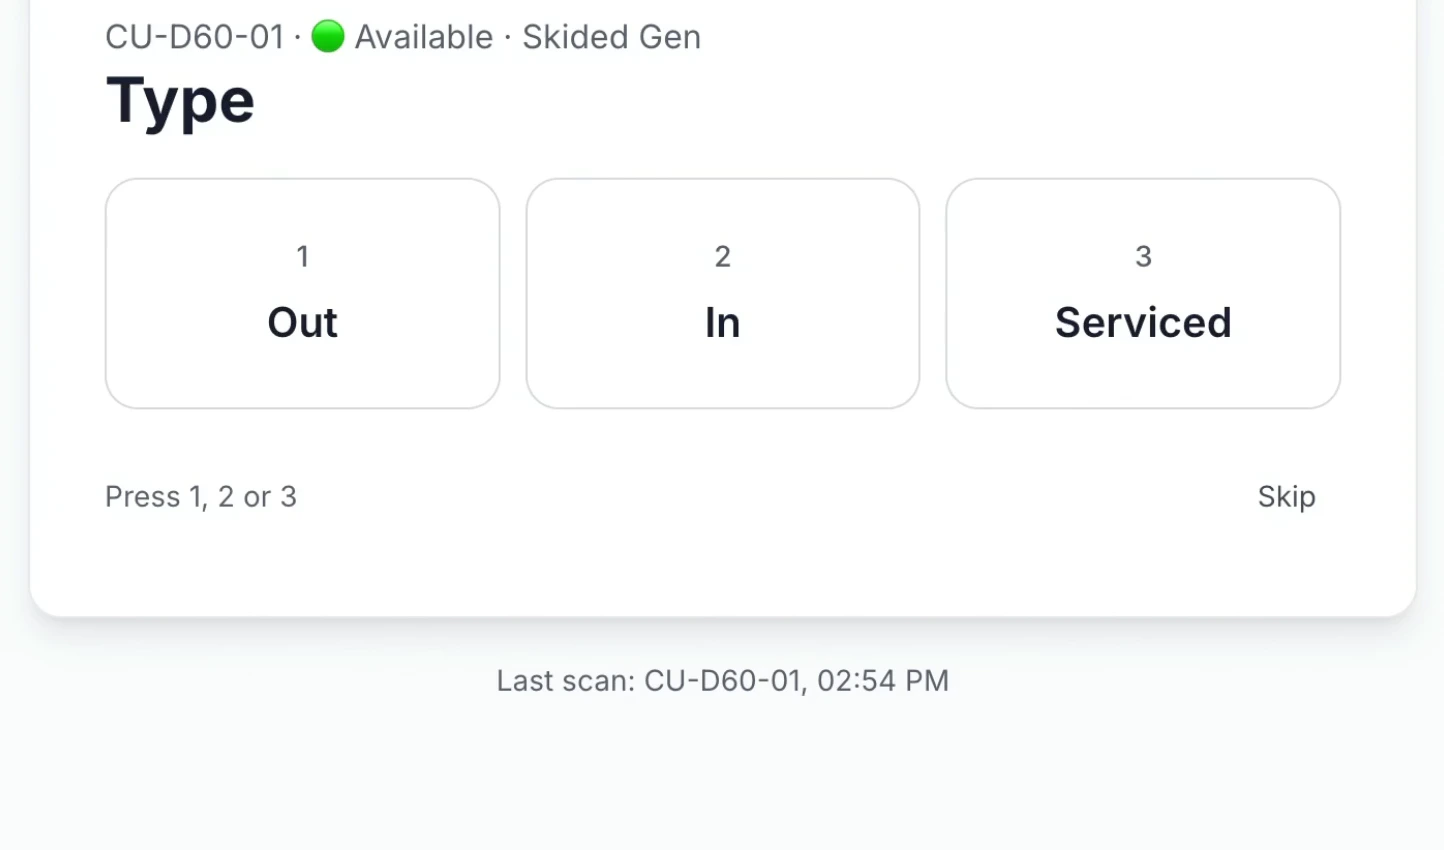
- Set Type to: click ask at the scan. The station asks Out, In or Serviced after each scan. Turn off Required to allow Skip.
- Set Date to the scan time.
- Chosen at the station before scanning: Location.
Then:
- Can be scanned again: keep it on, so each scan adds a movement.
- Shown after a scan: Unit Number, Equipment Type, Status.
3. Station
Copy the Link and the PIN, then click Turn on scanning. Generate the labels after that: only labels generated while scanning is on are recognised.
At the station
- Open the station link and type the PIN and a name, for example "Dock".
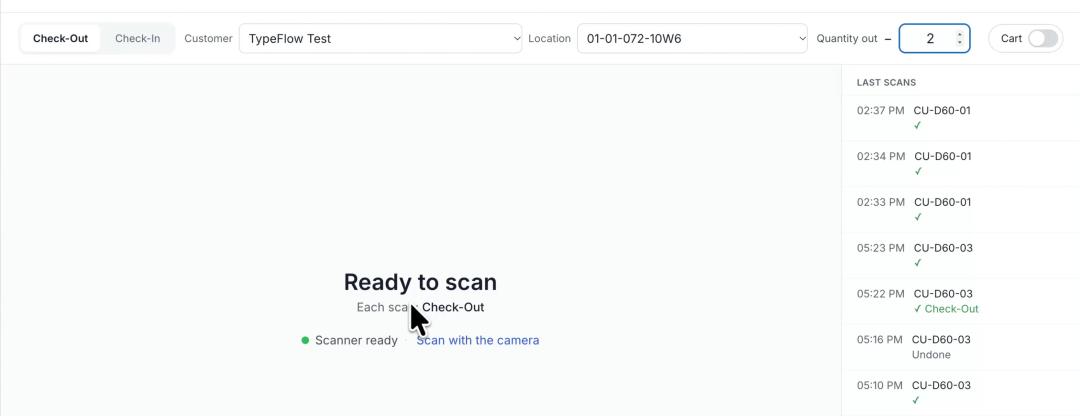
- Pick the button (Check Out), then the Customer and Location. They stay chosen for every scan until you change them.
- Type the quantity in Quantity out, then scan the label.
- On Check In, the station asks the Type after the scan: tap the answer, or press 1, 2 or 3 on the computer.
On a computer with a handheld scanner, Last scans on the right lists the 10 latest scans of this station.
Scan a whole delivery
Buttons that add a record show a Cart switch at the station.
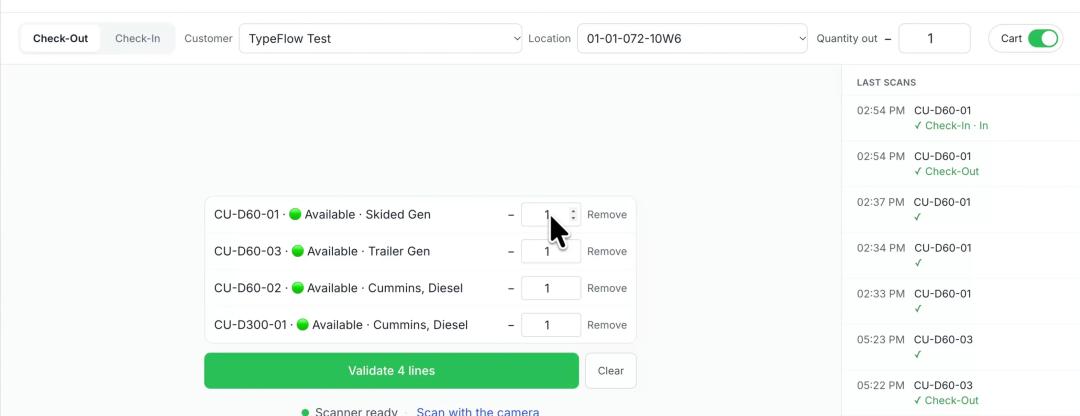
- Turn on Cart.
- Scan every label. Each one is a line, with its quantity editable. An unknown code is flagged on its line before anything is recorded.
- Press Validate N lines. A question asked at the scan is asked once, for the whole cart.
Every movement is in History > Scans. Undo deletes a movement added by mistake, a single line or a whole cart.