View Report Beta
Export entire Airtable views as PDF reports. Generate on demand or schedule recurring reports with automations.
This feature is currently in beta and available to select users. Contact us at support@typeflow.us to request access.
Overview
The View Report feature allows you to export any Airtable view as a formatted PDF table.
Key features:
| Feature | Description |
|---|---|
| Export any view | Grid, Kanban, Gallery - any view type works |
| Respect view settings | Visible columns, column order, filters, sorts |
| Linked records | Automatically resolves linked record values |
| Email delivery | Receive PDF directly in your inbox |
| Automation ready | Schedule recurring reports or trigger from buttons |
Access View Report
- Open the TypeFlow extension in Airtable
- Click the "Generate Report" or "Automation Report" tab
Generate Report
Use this when you want to generate a report immediately and receive it by email.
Step 1: Select a View
- Go to the "Generate Report" tab
- Make sure you're on the correct table in Airtable
- Select the view you want to export

The PDF includes only the columns visible in your view, in the same order they appear.
Step 2: Enter Email
Enter the email address where you want to receive the PDF.
Step 3: Generate
Click "Generate Report". You'll see the progress:
- "Starting report generation..."
- "Generating report... (X records)"
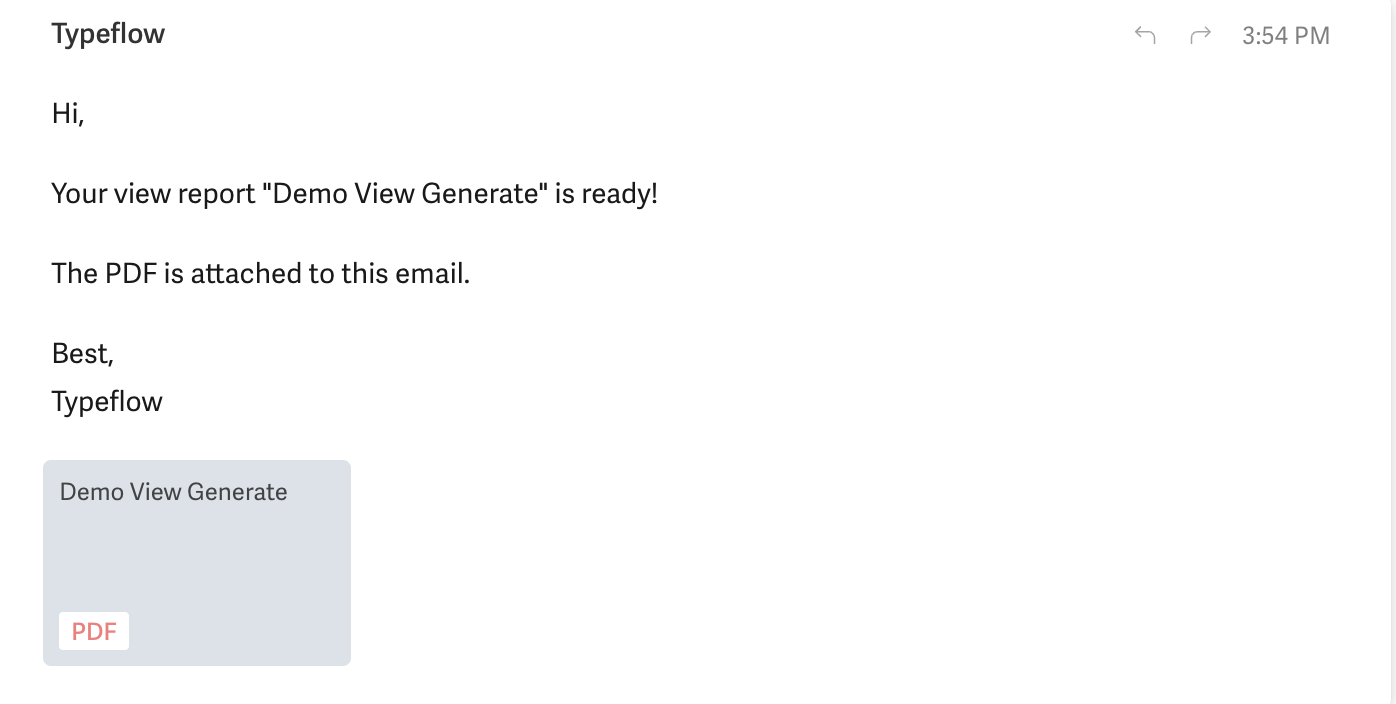
- "Report sent to your@email.com!"
Check your inbox for the PDF attachment.
What's Included
| Element | Description |
|---|---|
| Title | The view name |
| Columns | Only visible columns from your view |
| Column Order | Same order as your view |
| Records | All records matching view filters/sorts |
| Linked Records | Resolved to display the primary field value |
| Attachments | Shows filename (images not embedded) |
Automation Report
Use this to schedule recurring reports or trigger them from Interface buttons.
How It Works
- Save a configuration - The extension captures view settings (columns, order)
- Trigger later - Via URL or automation script
- Receive PDF - Sent to the configured email
This two-step process exists because Airtable's API doesn't expose view column settings. The extension captures this information when you save.
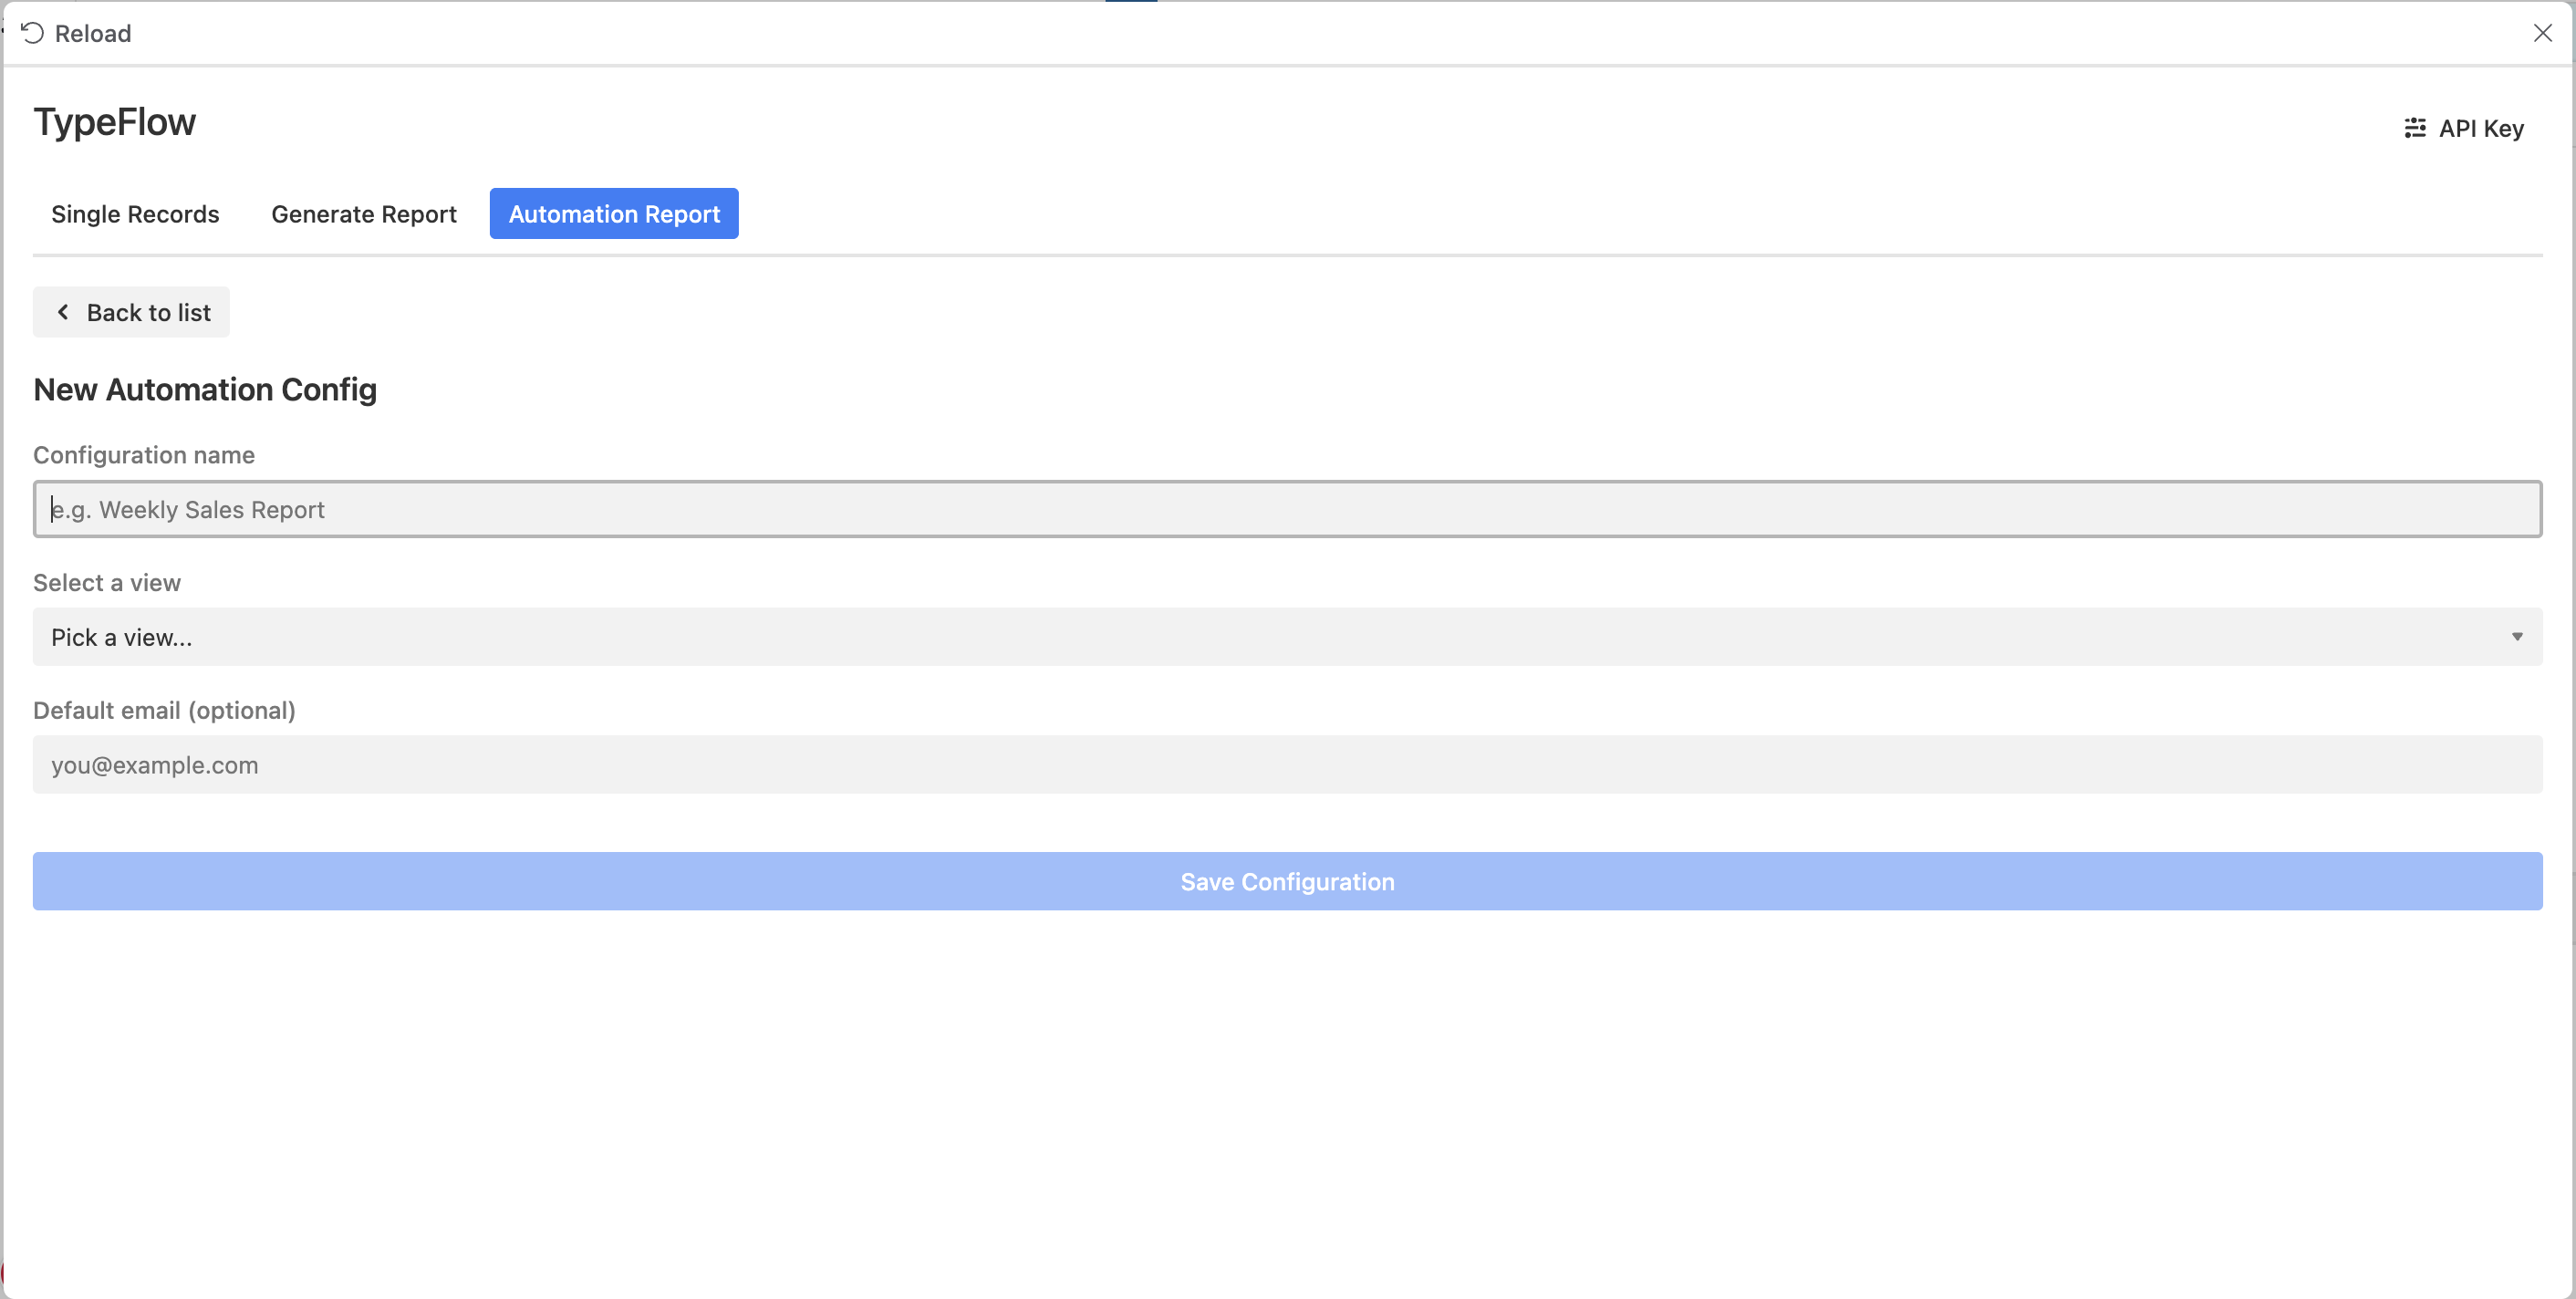
Create a Configuration
- Go to "Automation Report" tab
- Click "+ New Configuration"
- Fill in the form:
| Field | Description |
|---|---|
| Configuration name | A friendly name (e.g., "Weekly Sales Report") |
| Select a view | The view to export |
| Default email | Where to send reports (can be overridden) |
- Click "Save Configuration"
Get Trigger URL or Script
After saving, click your configuration to see:
- Interface Button URL - For Airtable Interface buttons
- Automation Script - For Airtable Automations
Interface Buttons
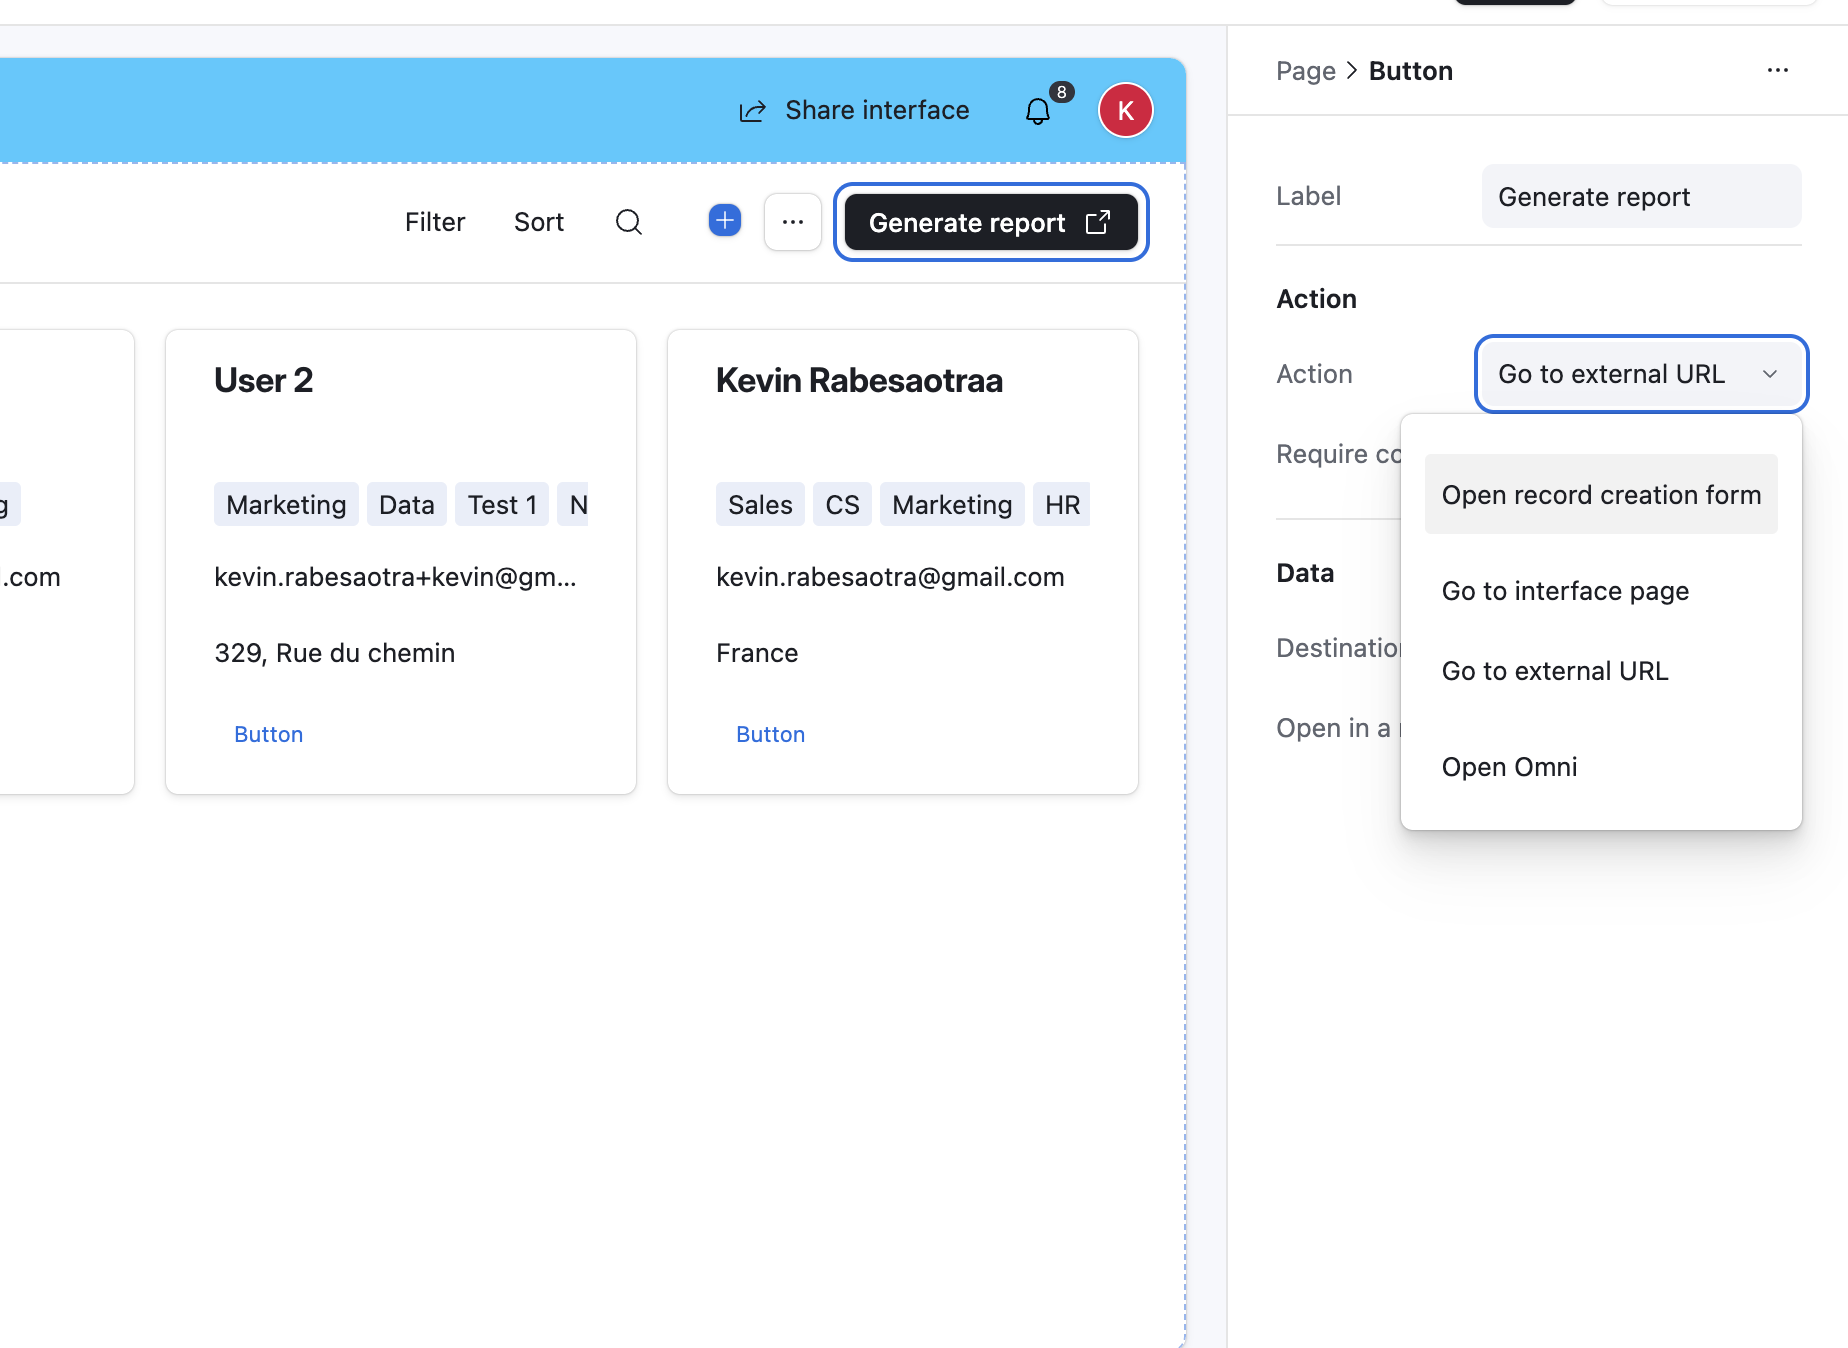
Trigger reports from a button in an Airtable Interface.
Step 1: Copy the URL
In your configuration details, copy the Interface Button URL:
https://typeflow-worker.railway.app/api/trigger-view-report/{config_id}?api_key={your_api_key}
Step 2: Add Button to Interface
- Open your Airtable Interface in edit mode
- Add a Button element
- Configure the button:
- Action: "Go to external URL"
- URL: Paste the URL you copied
- Save the Interface
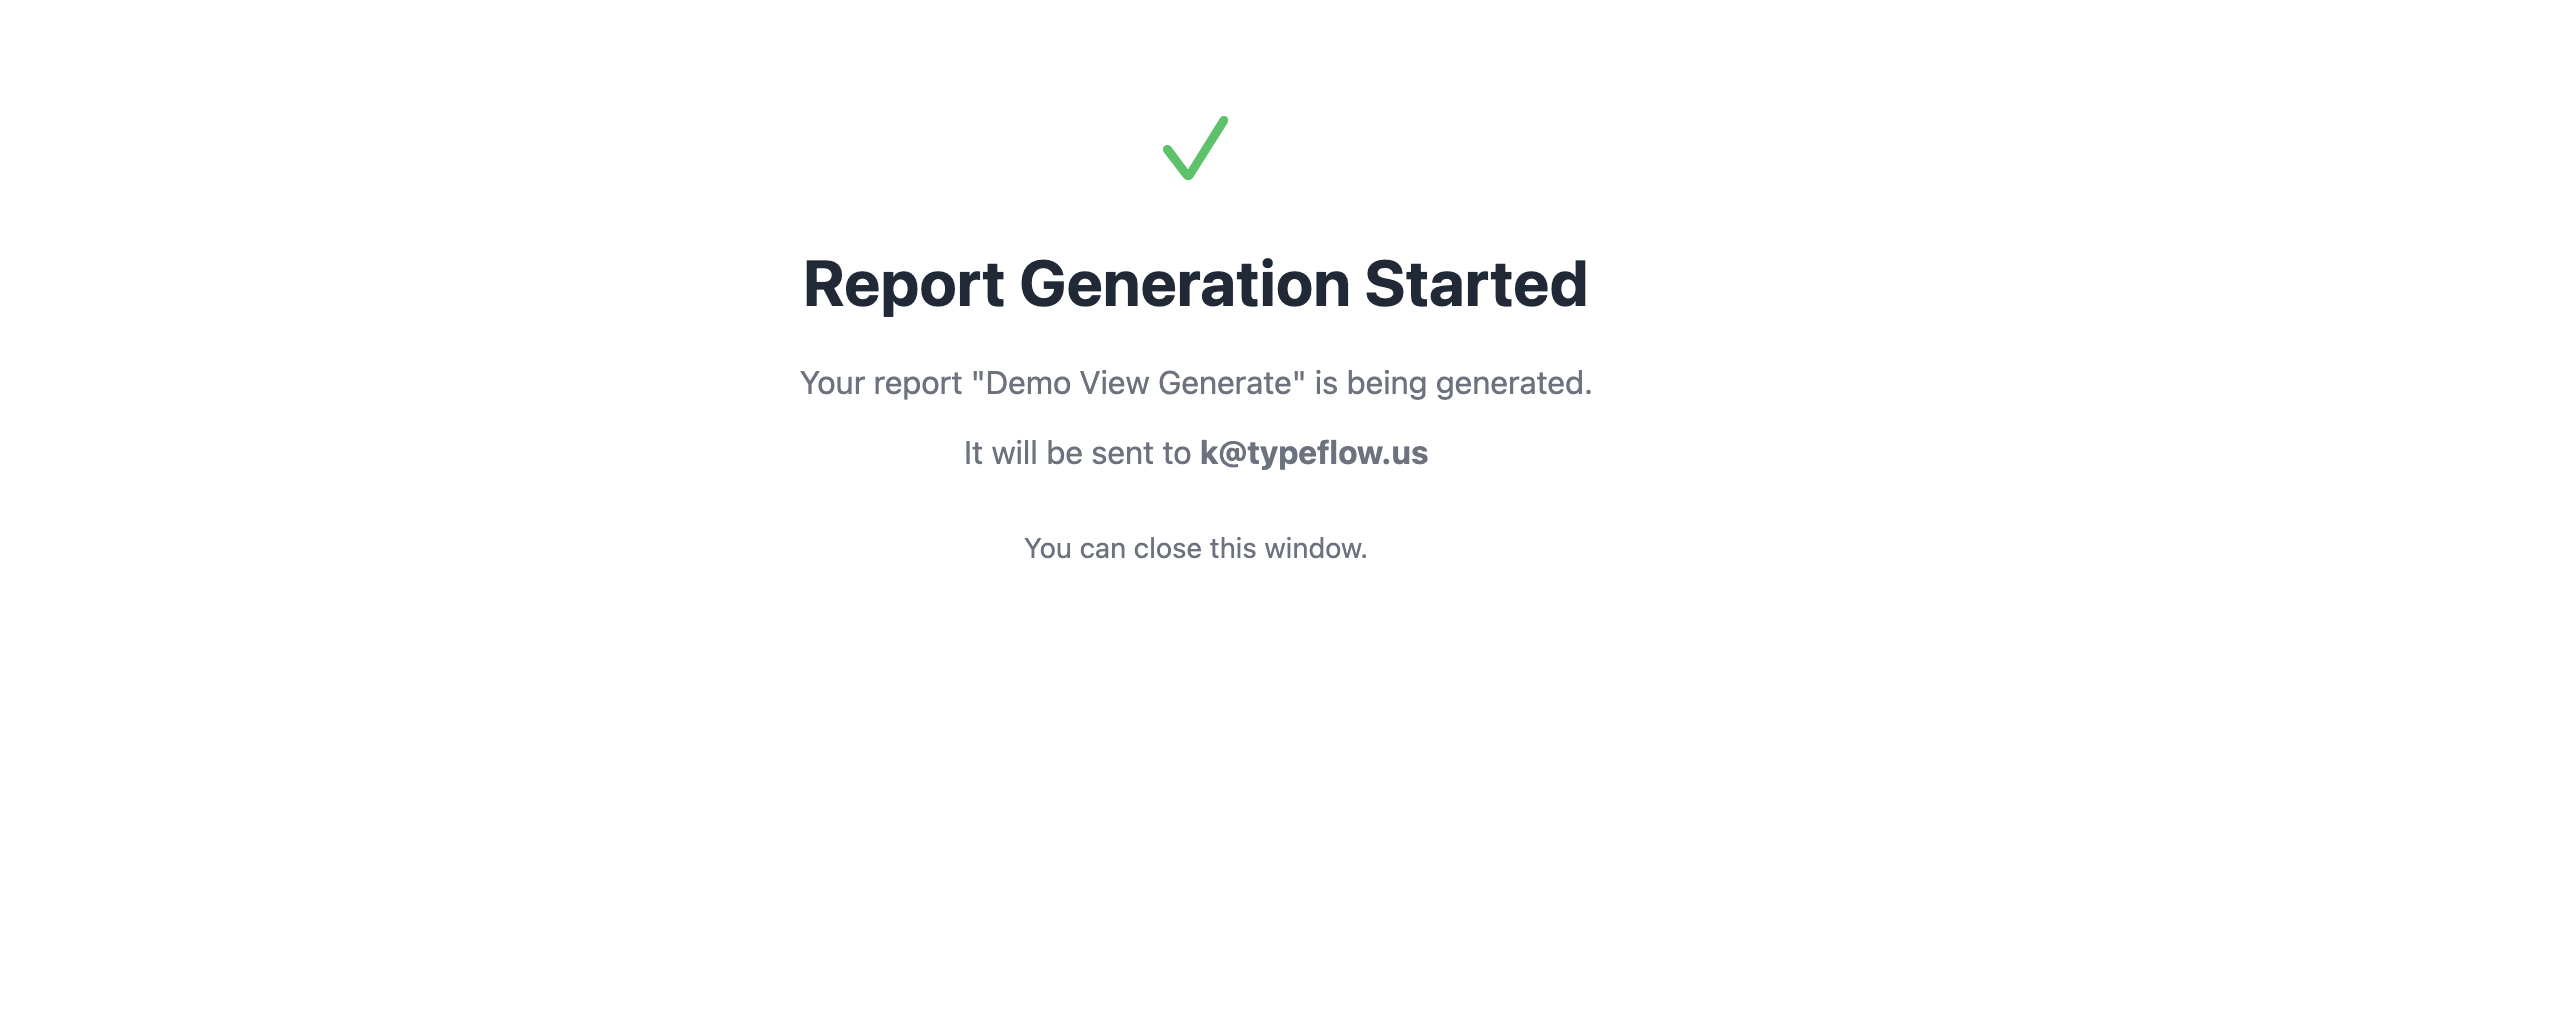
Step 3: Test
Click the button. A new tab opens confirming the report is being generated:
Override Email
Add &email=other@email.com to the URL to send to a different address:
https://typeflow-worker.railway.app/api/trigger-view-report/{config_id}?api_key={key}&email=other@email.com
Airtable Automations
Schedule reports or trigger them based on conditions.
Step 1: Copy the Script
In your configuration details, copy the Automation Script.
Step 2: Create Automation
- Go to Automations in your Airtable base
- Click "Create automation"
- Choose a trigger:
| Trigger | Use Case |
|---|---|
| At a scheduled time | Daily, weekly, or monthly reports |
| When a button is pressed | Manual trigger from table |
| When record matches conditions | Conditional reports |
Step 3: Add Script Action
- Add action: "Run a script"
- Paste the script:
const response = await fetch('https://typeflow-worker.railway.app/api/generate-from-view', {
    method: 'POST',
    headers: {
        'Content-Type': 'application/json',
        'Authorization': 'Bearer YOUR_API_KEY'
    },
    body: JSON.stringify({
        config_id: 'YOUR_CONFIG_ID'
        // email: 'override@example.com' // Optional
    })
});
const result = await response.json();
console.log(result);
Step 4: Test and Activate
- Click "Test" to run the automation
- Check console for
{ success: true, job_id: "..." } - Verify you receive the email
- Activate the automation
Example: Weekly Report
| Setting | Value |
|---|---|
| Trigger | At a scheduled time |
| Frequency | Weekly |
| Day | Monday |
| Time | 8:00 AM |
| Action | Run the script |
Managing Configurations
View All Configurations
Go to "Automation Report" tab to see all saved configurations for the current base.
Update a Configuration
If you change your view (add/remove columns), update the configuration:
- Go to "Automation Report" tab
- Click "+ New Configuration"
- Select the same view - it will update the existing config
One config per view: Configurations are unique per view. If you save a config for a view that already has one, it will update the existing config (not create a duplicate). This keeps your config list clean and ensures the automation URL stays the same.
FAQ
Why do I need to save a configuration for automations?
Airtable's REST API doesn't expose which columns are visible in a view or their order. The extension captures this information when you save the config, so automations can use it later.
What if I change my view columns?
You need to update the configuration by saving it again in the extension. Otherwise, the report will use the old column settings.
Can I send to multiple email addresses?
Not directly. You can create multiple configurations with different default emails, or use an email forwarding rule.
How many records can a report handle?
Reports can handle thousands of records. Very large views (10,000+ records) may take longer to generate.
Can I customize the PDF design?
Not currently. The PDF uses a clean table format with the view name as title. Custom styling is on our roadmap.
Does it work with filtered views?
Yes! The report respects all view filters and sorts. Only records visible in the view are included.
Troubleshooting
| Issue | Solution |
|---|---|
| "Configuration not found" | Config ID is invalid or belongs to another user. Re-save the config. |
| "No email configured" | Add default email when saving, or add &email= to URL |
| "Invalid API key" | Check your API key in extension settings |
| Wrong columns in report | View changed since config was saved. Update the config. |
| Email not received | Check spam folder. Verify email address. |
| Button opens blank page | Ensure URL includes api_key parameter |
Related Articles
- Email Delivery - Configure email delivery for documents
- Variables & Field Mapping - Understanding variables
Need More Help?
- Email: support@typeflow.us
- Chat: Click the chat icon in the app