TypeFlow - Airtable Document Generator
Creating professional documents from your Airtable data can be a challenge. TypeFlow solves this by letting you automatically generate custom PDFs using simple Google Docs templates-no coding required.
Airtable Page Designer Limitations
Airtable's native Page Designer is limited to creating simple, single-page documents and lacks the automation and advanced formatting features needed for most business workflows. This makes it unsuitable for generating invoices, reports, or contracts at scale.
Key limitations include:
Single-Page Output
You cannot create multi-page documents like reports or contracts.
No Dynamic Data
It cannot generate itemized lists (line items) for invoices or packing slips.
Manual Process
Document generation is a manual, one-at-a-time process with no automation triggers.
No Signature Capture
Airtable doesn't offer built-in signature capture functionality for contracts or agreements.
Basic Formatting
You have very limited control over layout, branding, and design.
Why Use TypeFlow for Airtable Document Generation
TypeFlow is designed specifically to overcome the limitations of Airtable's native tools. It offers professional document generation without the complexity or expensive per-document fees of other solutions.
Here's why teams choose TypeFlow:
Google Docs Templates
You use a familiar tool that anyone can edit. No proprietary builders to learn.
Advanced Features
Easily handle invoices with line items, create multi-level groupings, and use conditional logic.
Unlimited Generation
A flat monthly rate means no surprise bills. Generate as many documents as you need.
Native Airtable Integration
Set up is fast and seamless directly from the Airtable Marketplace.
Document Generation Tools for Airtable
Understanding your options for PDF creation from Airtable data
Native Airtable Solutions
Airtable offers limited built-in document generation through Page Designer, but it lacks advanced features like dynamic line items, conditional sections, and automated distribution.
Limitations:
Limited to single-page documents
No conditional sections
Manual PDF creation only
No signature capture functionality
Third-Party Integration Options
Most third-party document generation tools require complex setup, proprietary template builders, and charge per-document fees that add up quickly.
Limitations:
Complex setup required (days of configuration)
Limited template flexibility
Per-document pricing can get expensive
Proprietary template builders to learn
Limited support (AI chatbots)
Why TypeFlow Works Better with Airtable
Professional document generation without the complexity or per-document fees
Native Airtable marketplace integration
Seamless setup directly from Airtable Marketplace
Google Docs templates
Anyone can edit and maintain templates without learning new software
Advanced features
Nested line items, multi-level grouping, conditional sections
Unlimited PDF generation
Flat monthly rate without per-document fees
Direct integration
Works seamlessly with Airtable automations and workflows
20 free documents • No credit card required
Signature Collection Options for Airtable
If you need electronic signatures with your Airtable workflow, you have a few options. Third-party tools like DocuSign, PandaDoc, or HelloSign can integrate with Airtable through Zapier or Make. However, these often require complex workflows and per-signature pricing.
TypeFlow's Native E-Signature Solution
TypeFlow offers a simpler approach - generate documents from Airtable and send them for legally binding signature in one workflow. No per-signature fees, no complex integrations.
Legally Binding
Compliant with ESIGN Act (US), UETA, and eIDAS Regulation (EU)
Certificate of Completion
Every signed document includes a certificate with signer details, timestamps, and audit trail
Document Integrity
SHA-256 hash verification ensures documents haven't been tampered with
Multi-Signer Support
Sequential or parallel signing with unique secure links per signer
Complete Audit Trail
IP address, location, browser, timestamps captured for legal compliance
No Per-Signature Fees
Unlimited signatures included in your TypeFlow plan
What you can do with TypeFlow + Airtable
Three pillars of document automation
Generate
TypeFlow creates professional documents from your Airtable data
- Invoices with line items from Airtable
- Contracts with signatures from Airtable
- Certificates and badges from Airtable
- Quotes and proposals from Airtable
- Reports and summaries from Airtable
- Packing slips and labels from Airtable
Automate
TypeFlow triggers PDF generation from Airtable without manual work
- TypeFlow Button field in Airtable
- On Airtable record creation
- On Airtable record update
- Via Airtable automation
- Via Make (Integromat) or Zapier with TypeFlow
- Via TypeFlow API (custom workflows)
Customize
TypeFlow gives you full control over document design and branding
- Use Google Docs templates with TypeFlow
- Custom fonts and colors in TypeFlow
- Your branding and logos in TypeFlow PDFs
- TypeFlow conditional sections
- TypeFlow dynamic images from Airtable
- Multi-language support in TypeFlow
All powered by your existing Airtable data and Google Docs templates
How to Generate Documents from Airtable with TypeFlow
In this short tutorial, we'll show you how to generate your first document. You can have a working setup in about 15 minutes.
Step 1: Create Your Google Docs Template
First, create your template in Google Docs. Add merge tags like {{Field Name}} and control branding with your own fonts and logos.
Step 2: Connect TypeFlow to Airtable
Install the TypeFlow app from the Airtable Marketplace. One-time setup takes less than a minute.
Step 3: Map Airtable Fields to Your Template
Paste your Google Docs template URL and match your tags to Airtable fields.
Step 4: Generate Your PDF
Click the generate button. PDF appears in under 2 seconds and saves to Airtable.
"Once you've set it up, it's set and forget. I generate 3,000+ PDFs per month and never think about it."
TypeFlow Features for Airtable Document Generation
TypeFlow includes advanced capabilities designed to handle any document workflow you can imagine.
Dynamic Line Items
Handle invoices, reports, and any kind of itemized lists from Airtable effortlessly with this powerful TypeFlow feature
Nested Line Items
TypeFlow supports multi-level line items from Airtable for complex documents like detailed quotations
Sorting & 3-Level Grouping
TypeFlow organizes Airtable data with up to three levels of grouping in your templates
Linked Fields
TypeFlow accesses data from Airtable linked records without creating rollup fields in Airtable
Bulk Generation
TypeFlow Airtable Extension generates hundreds of PDFs from Airtable records at once
Form Builder
TypeFlow creates forms with signature capture and automatic PDF generation saved to Airtable
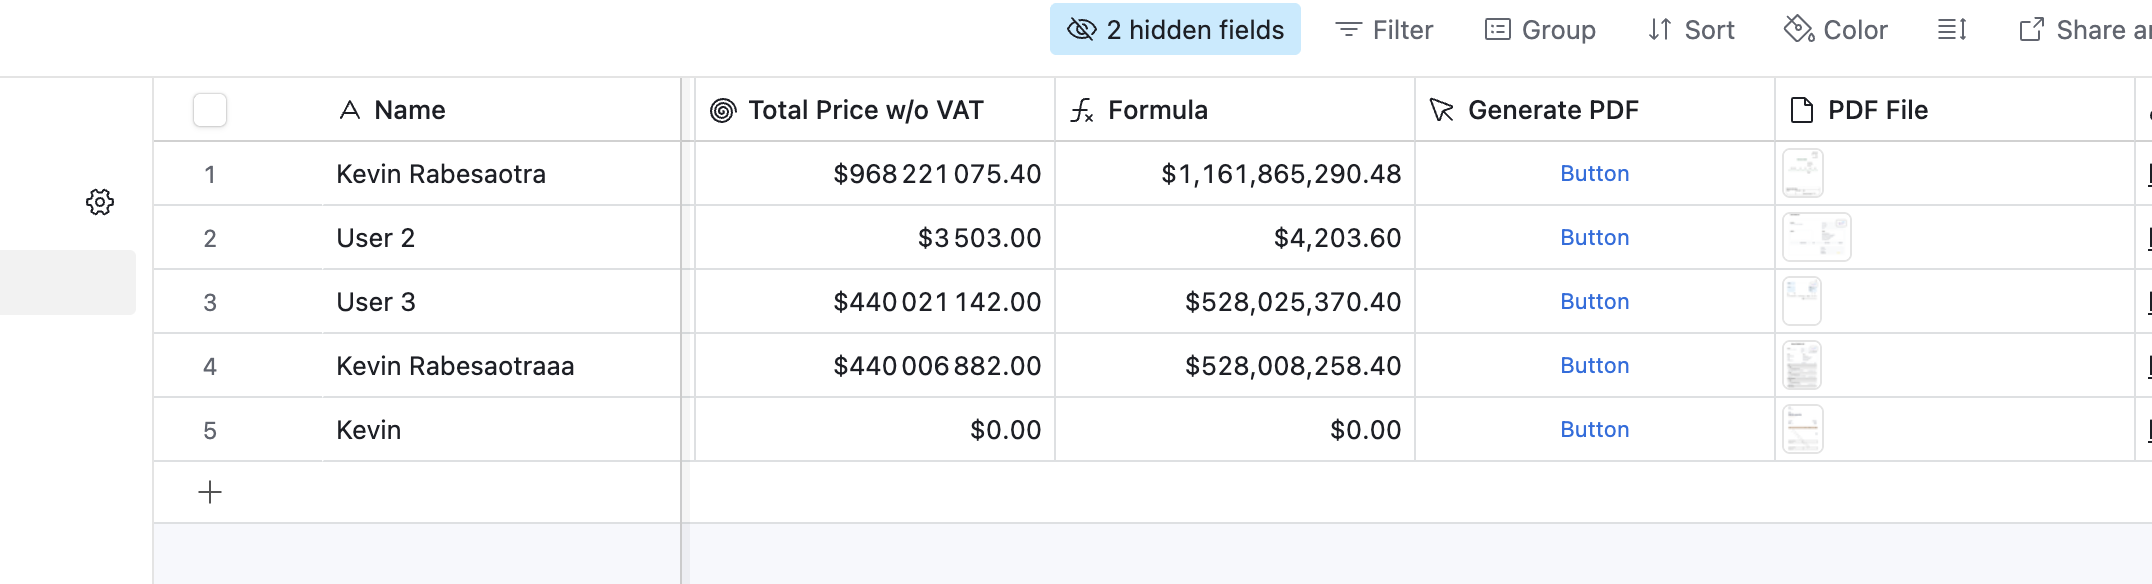
One Click Button
Import a TypeFlow button into Airtable and generate PDFs with a single click directly in Airtable
Save as Google Doc
TypeFlow let you save your generated documents as Google Docs for easy editing
Plus 30+ more features
All Airtable field types, automation options, output formats, and more
Complete feature list
Every capability TypeFlow offers with Airtable
Ready to use all these features with your Airtable data?
Start free trialAirtable Document Generation Automation Options
Automating your document creation is where you'll save the most time. TypeFlow offers several ways to trigger generation, so you can choose the method that fits your exact workflow.
Button Field
Manual one-click PDF generation
Add a TypeFlow button field in your Airtable base that generates a PDF with a single click. Perfect for when you need manual control over when TypeFlow generates PDFs from Airtable.
Best for:
- Manual control over TypeFlow PDF generation
- Testing and previewing TypeFlow templates
- One-off document creation from Airtable
- Users who prefer click-to-generate with TypeFlow
Airtable Automation
Fully automated workflows
Use Airtable's native automation to trigger TypeFlow PDF generation when Airtable records are created or updated. Set up TypeFlow once and forget it.
Best for:
- Fully automated workflows
- When Airtable record is created/updated
- Scheduled PDF generation
- Zero manual intervention

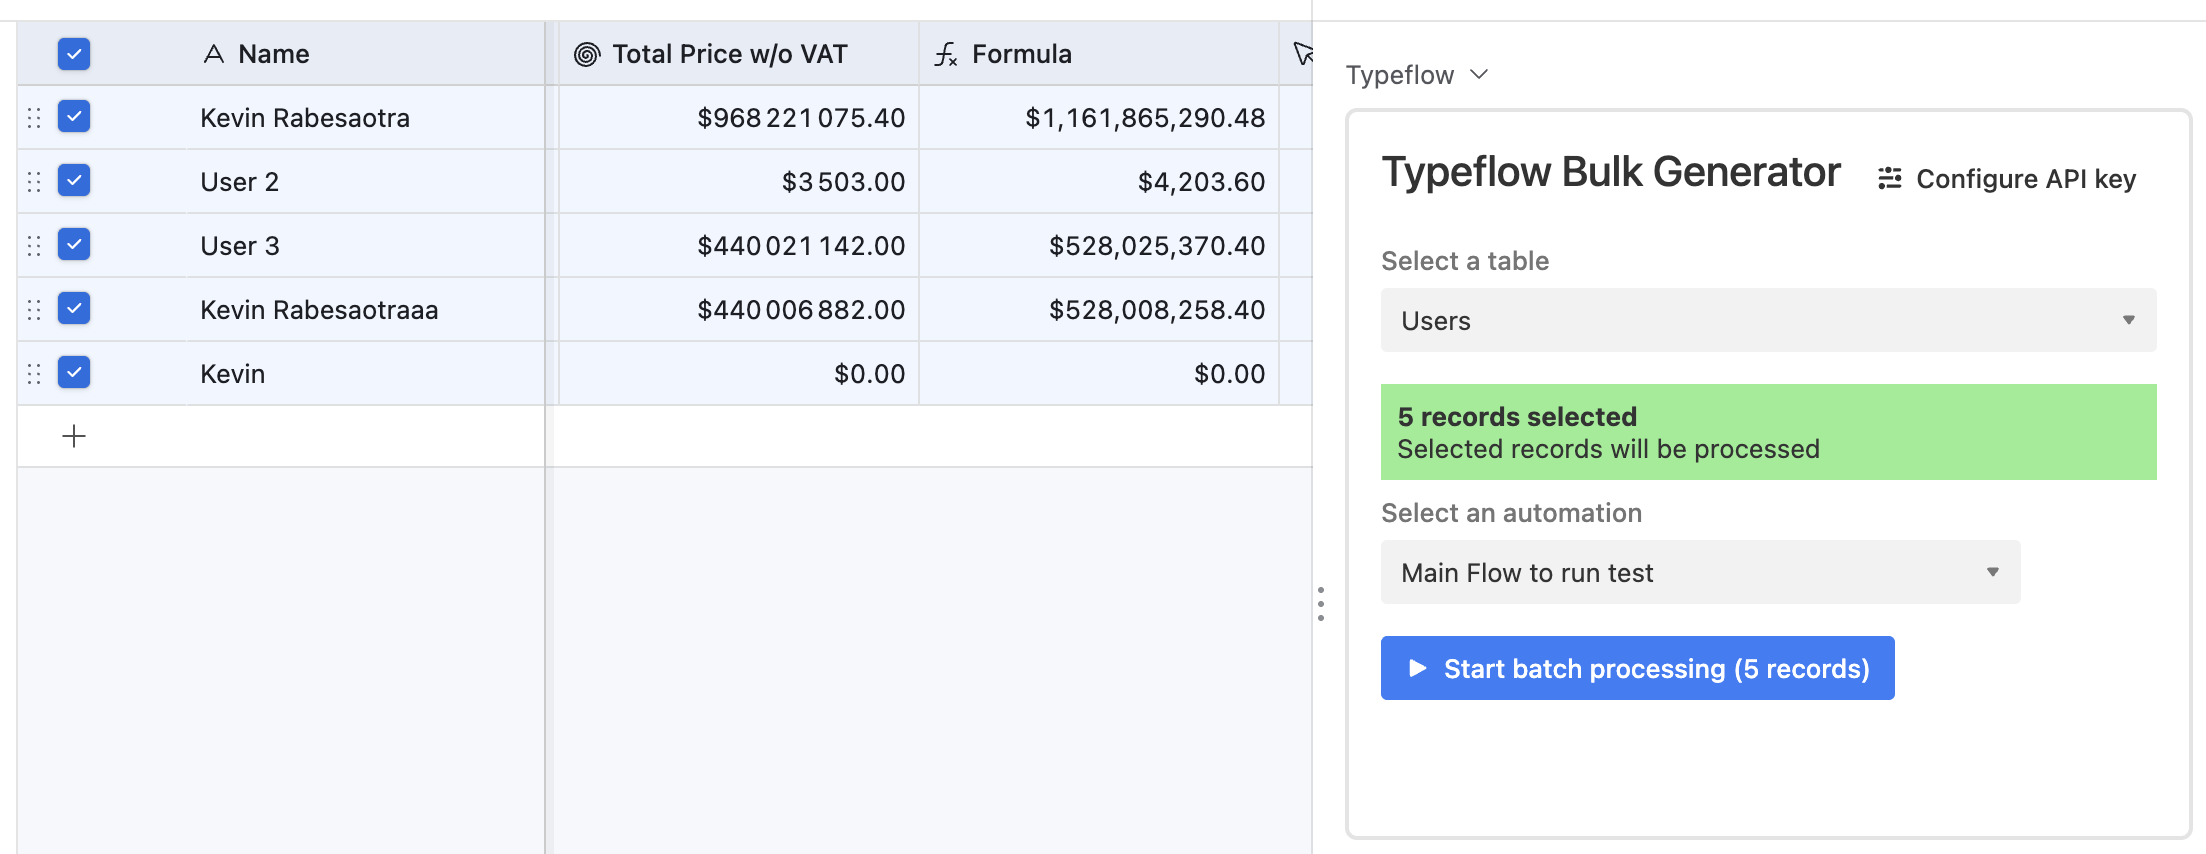
Bulk Generation
Generate hundreds of PDFs at once
Use the TypeFlow Airtable Extension to select multiple Airtable records and generate all their PDFs at once with TypeFlow. Perfect for end-of-month batch processing from Airtable.
Best for:
- Monthly invoicing runs from Airtable
- Batch certificate generation with TypeFlow
- Mass mailing campaigns from Airtable data
- Processing 100s of Airtable records with TypeFlow
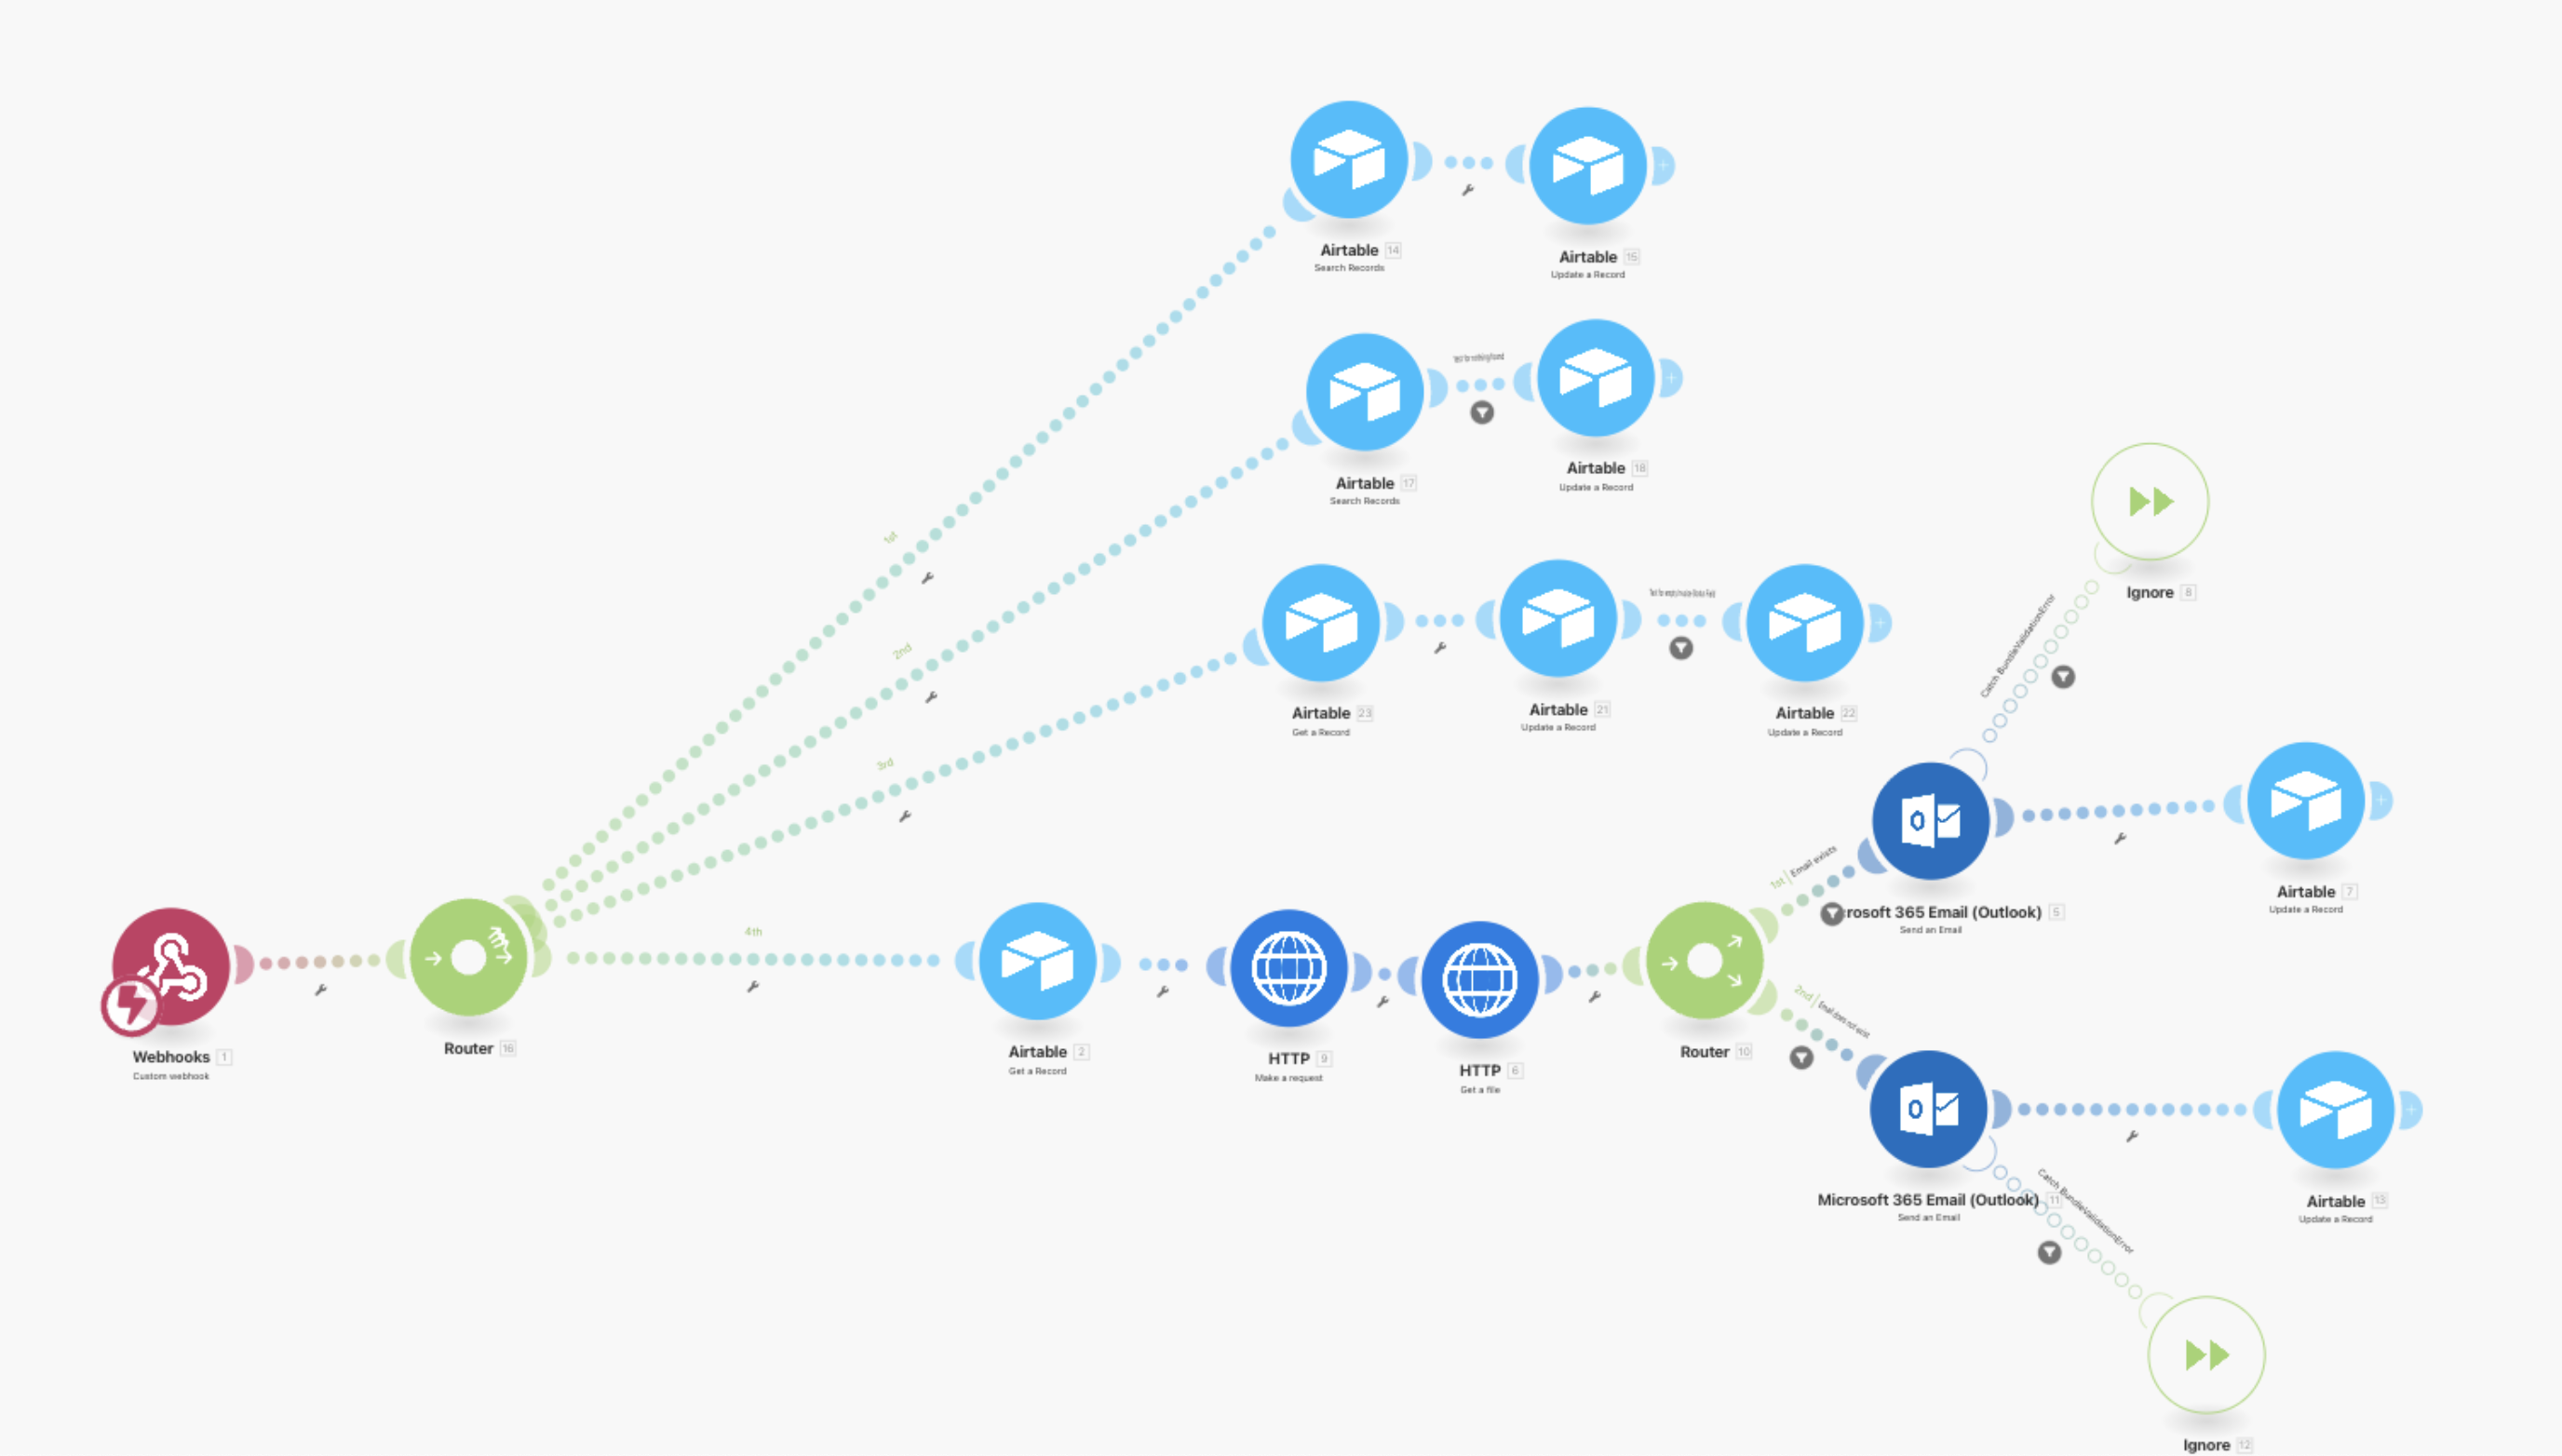
Make / Zapier
Connect TypeFlow to 1000+ apps
Integrate TypeFlow with Make (Integromat) or Zapier to trigger TypeFlow PDF generation from any app - Stripe, Gmail, Slack, and 1000+ more. TypeFlow works seamlessly with both platforms.
Best for:
- Multi-app workflows with TypeFlow
- Trigger TypeFlow from external events
- Complex automation scenarios using TypeFlow
- No-code integrations with TypeFlow and Airtable
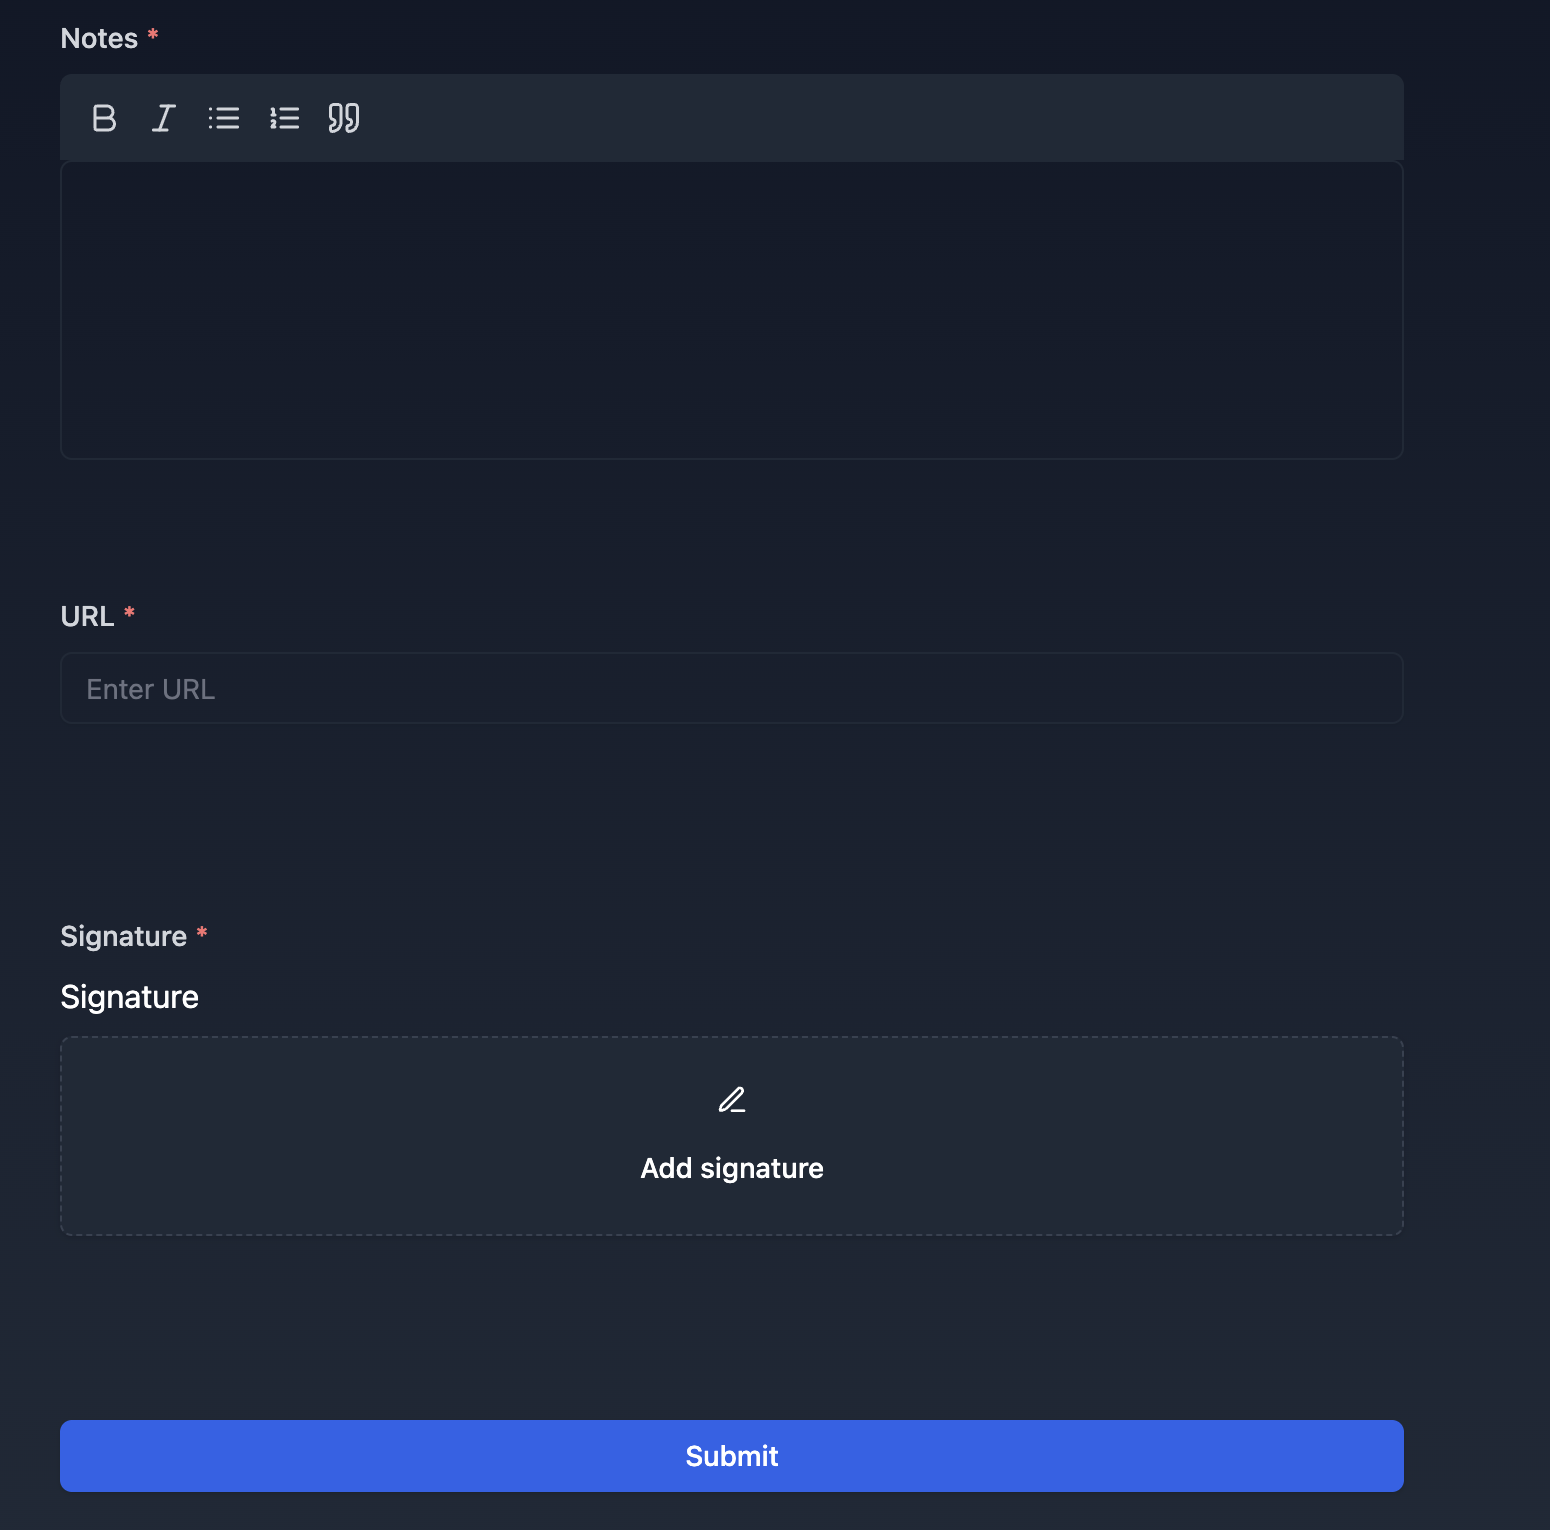
TypeFlow Form Builder
Client-facing forms with TypeFlow
Create TypeFlow forms with signature capture that automatically generate PDFs and save to Airtable. Perfect for contracts and agreements that need to flow into Airtable.
Best for:
- Client-facing documents with TypeFlow
- Contracts with signatures saved to Airtable
- External data collection with TypeFlow forms
- Quote request forms connected to Airtable
Real Teams Using TypeFlow for Airtable Documents
See how real teams get results with TypeFlow and Airtable.
Benedict
Owner at Chocablock
35 staff • Australia
"Once I got it right, I didn't have to come back to it. It's been really set and forget."
The Challenge
Chocablock needed to automatically generate daily packing slips from Airtable for their production team after migrating from Pipedrive.
The Solution
- Connected existing Google Docs templates to TypeFlow
- Set up automated workflow to generate slips from Airtable order data
- A reliable 'set and forget' system that automates daily packing slips for 35 staff members
The Results
Diederick
Founder at Custom Furniture Company
Small team • Rotterdam, Netherlands
"I got further in 15 minutes with TypeFlow than I ever got with Documint after days of trying."
The Challenge
The team was manually creating 150-200 quotes per month using Excel, a slow and error-prone process.
The Solution
- Created quotation template with dynamic line items in TypeFlow
- Integrated with Airtable for furniture specifications and pricing
- They now generate professional quotes with the click of a button, getting a working solution in just 15 minutes
The Results
Samantha
Operations Manager at Family Logistics Company
Mid-size team • United States
"When I could tell it was a human and not an AI chatbot, I was like, oh, this is great."
The Challenge
They were creating multi-page compliance documents by hand, as Airtable's Page Designer couldn't handle their needs.
The Solution
- Found TypeFlow in the Airtable marketplace
- Implemented workflow for multi-page certificates with responsive human support
- Manual work was eliminated, multi-page documents are now automated, and they get support from a real person in under an hour
The Results
Want to see your story here?
Start your free trialFrequently Asked Questions
Get answers to the most common questions about using TypeFlow with Airtable.
Most Popular Questions
More Questions
Still have questions?
Start Generating Professional Documents from Airtable
Join 2,000+ teams generating professional documents in minutes, not hours. Start your free trial today.