Build a Template with AI
Describe the document you want in plain language. TypeFlow AI reads your Airtable schema, generates a professional template, and lets you refine it through conversation - no HTML or CSS needed.
Overview
Build with AI is the fastest way to create a template in TypeFlow. Instead of designing in an HTML editor, you describe what you want and the AI builds it from your Airtable data.
The AI knows your Airtable schema - your tables, fields, linked records, and attachments. It uses the exact field names so the template auto-maps when you use it.
What you can create:
- Invoices, contracts, quotes, reports
- Product catalogs with one page per item
- Documents with line items, grouped data, nested tables
- Templates with logos, images, e-signatures
- Any page format: A4, Letter, landscape, labels
How to Build a Template with AI
- Create a new flow and connect your Airtable base
- At the template selection step, click Build with AI (the recommended option)
- You will see a setup screen with your document type and source table pre-filled
- Describe what you want in the text area
- Click Generate template
- Review the preview and iterate with changes
- Click Use this template when satisfied
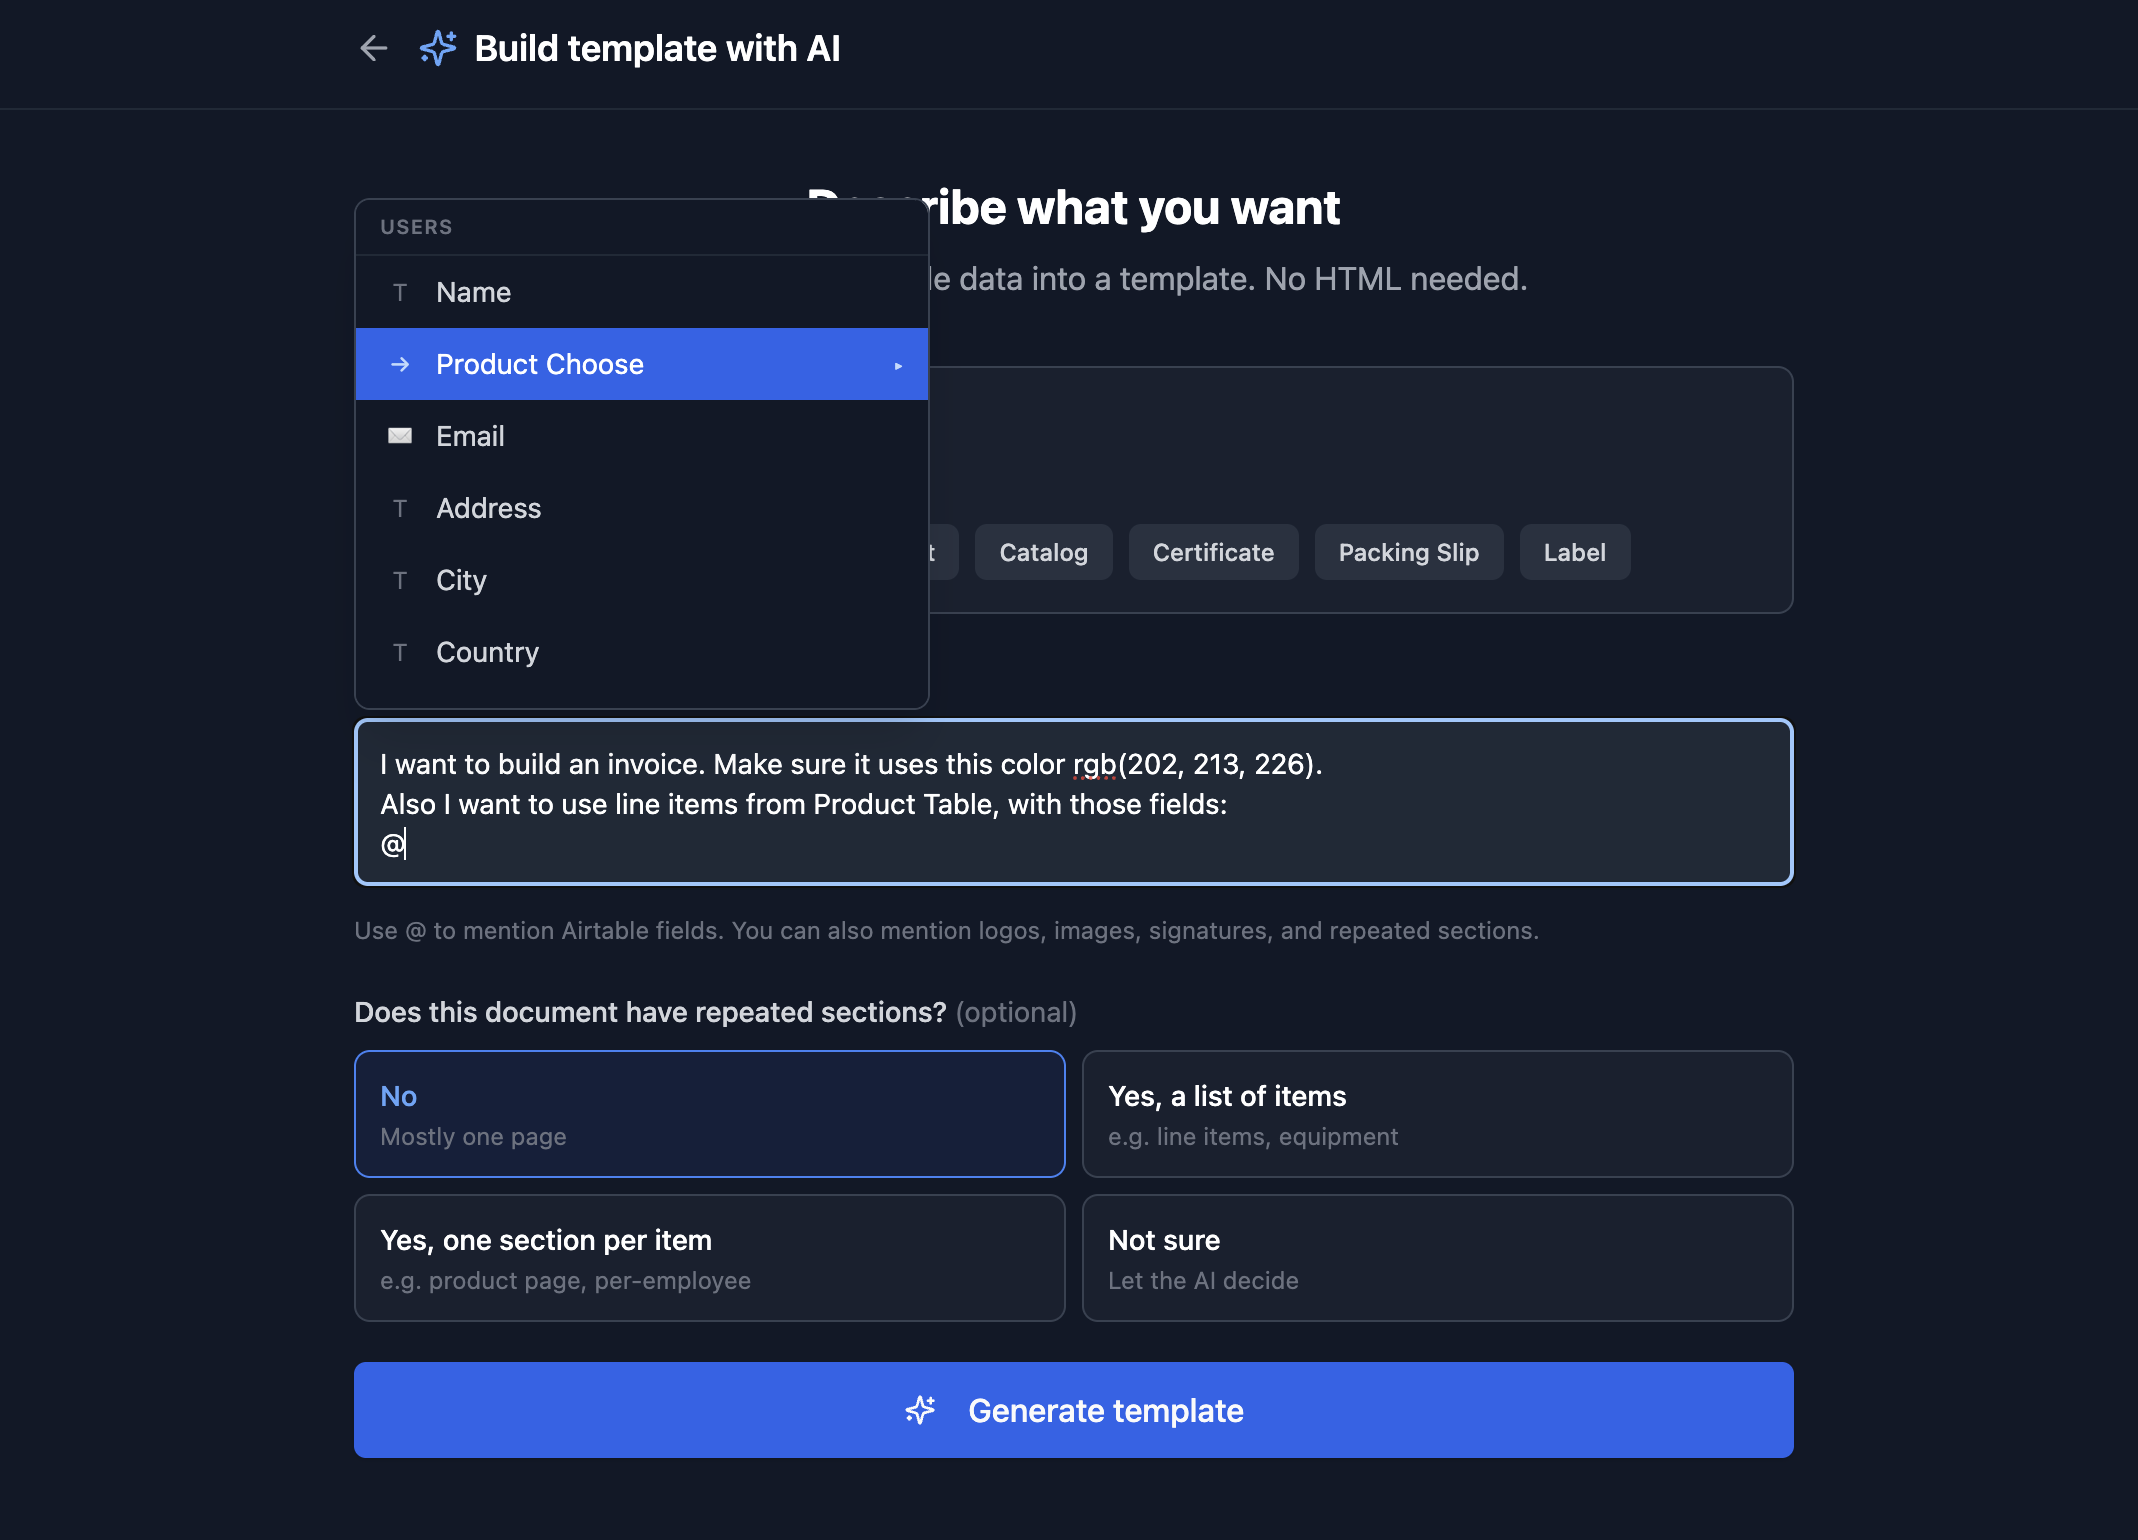
Describing Your Document
The text area is where you tell the AI what to build. Be as specific or as general as you want.
Simple example:
"An invoice with customer name, address, line items table, and totals at the bottom"
Detailed example:
"Blue header with company logo on the right. Customer billing address below. A table of line items showing @Product Choose > Name, @Product Choose > Price w/o VAT, and @Product Choose > Total. Subtotal, VAT, and total due at the bottom right. Notes section. Signature area."
The more specific you are, the closer the first draft will be to what you want. But you can always iterate after.
Tips:
- Mention colors, layout preferences, and sections you want
- Reference specific fields using @ (see below)
- Mention "landscape" or "label" if you need a different page format
- Say "with e-signatures" if you need signing fields
Using @ to Mention Fields
Type @ in any text field to browse your Airtable fields. A dropdown appears with all fields from your source table.
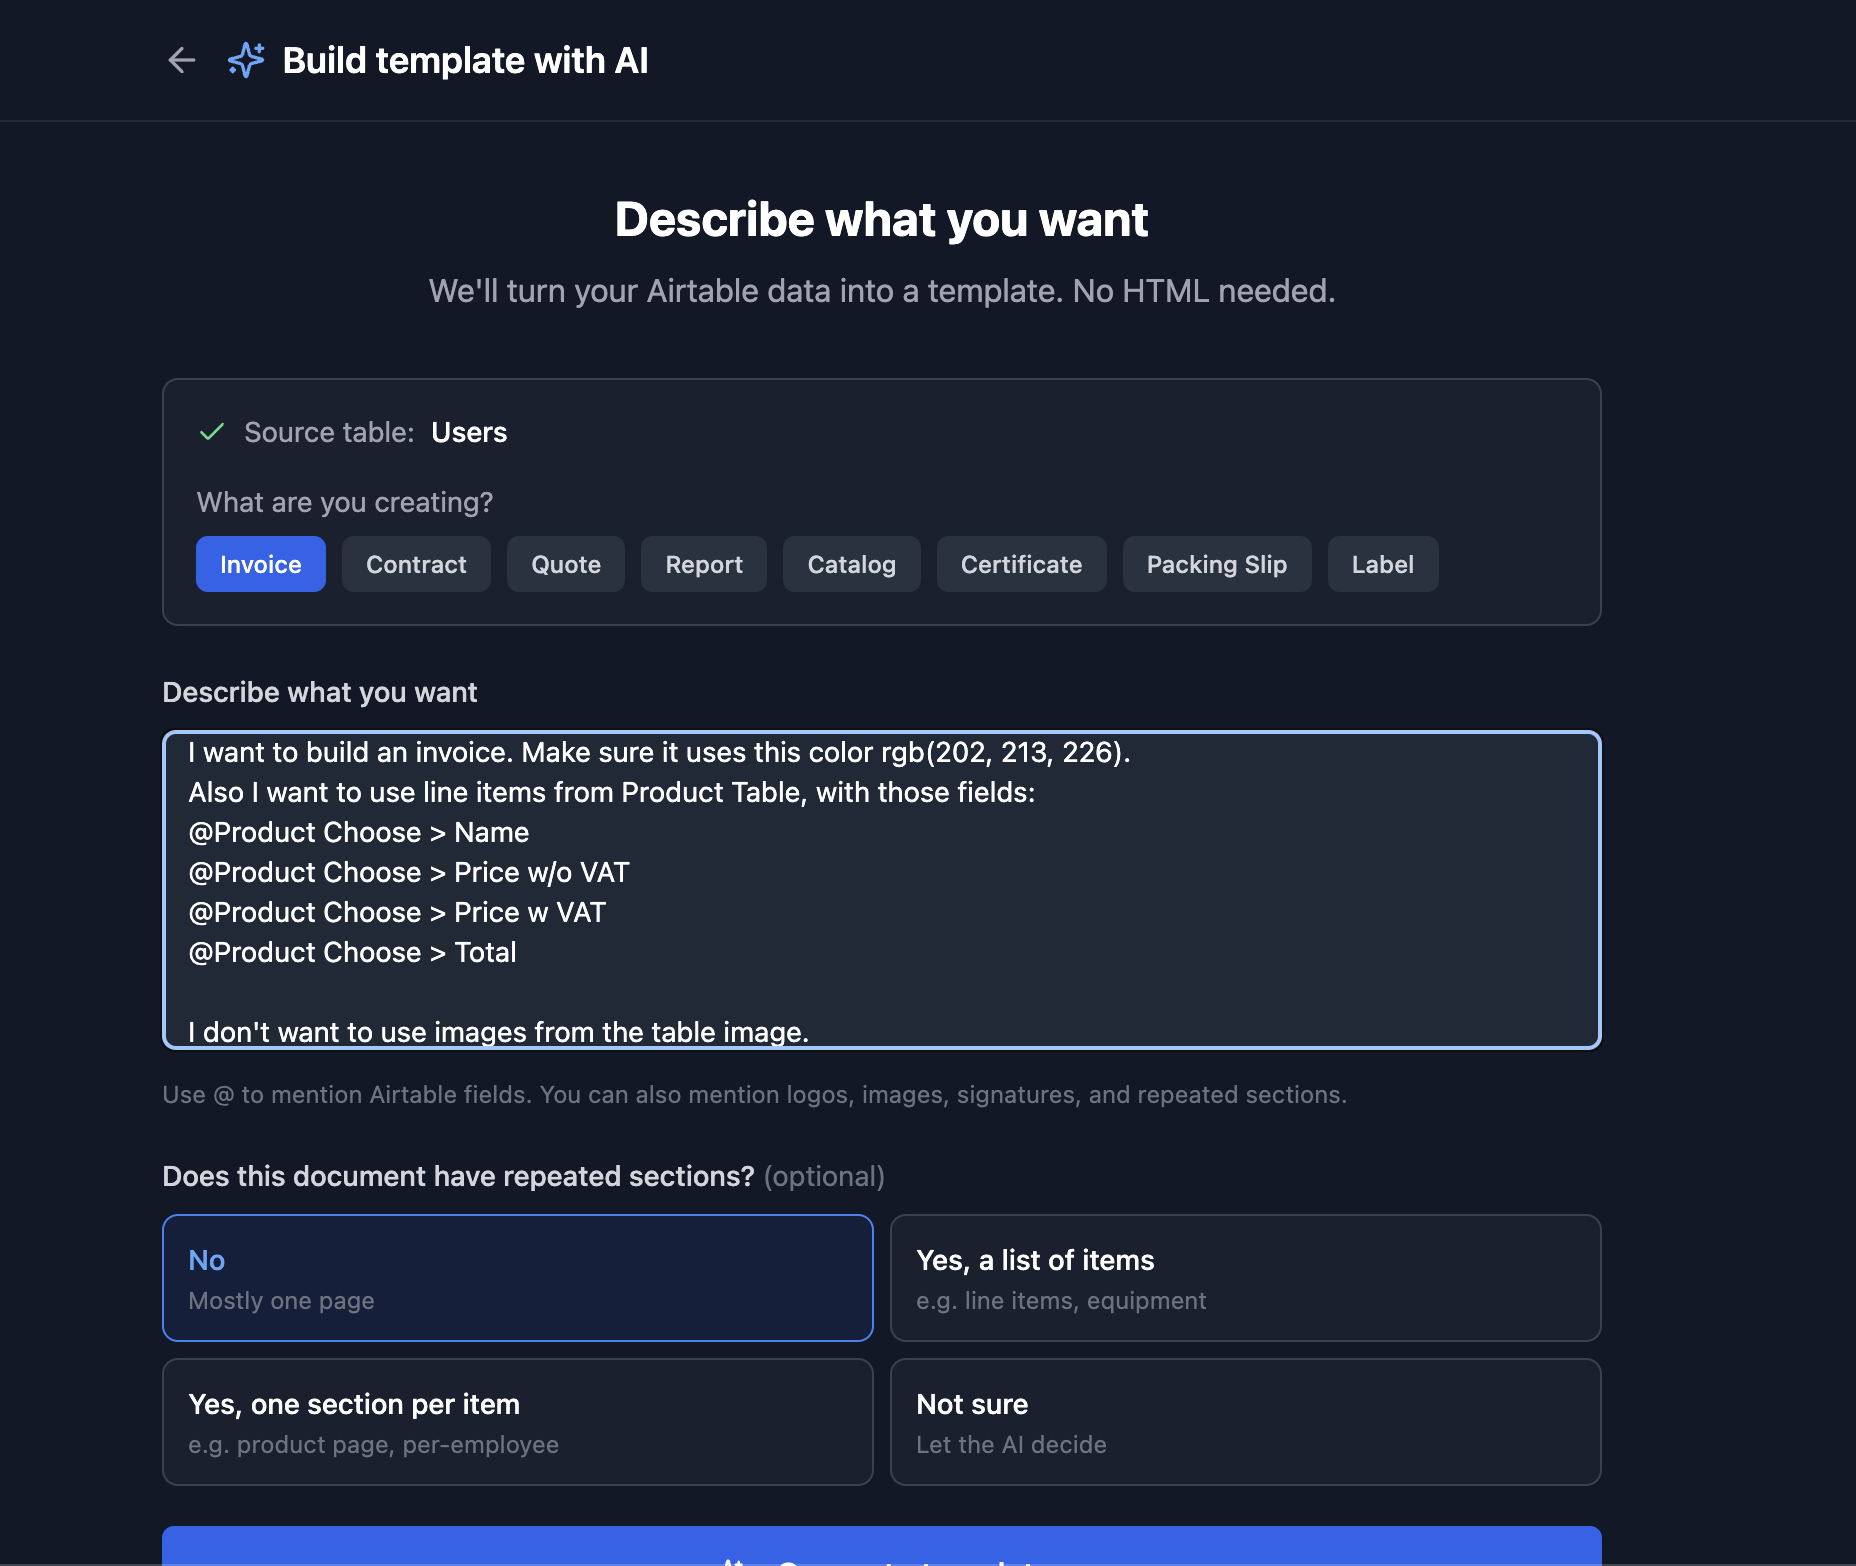
Navigating linked tables:
- Fields from your source table appear first
- Linked record fields show an arrow (→) - click to see the fields of the linked table
- Click "Back" to return to the parent table
Example:
"Add @Line Items > Equipment Reference and @Line Items > Price to the table"
The AI understands which table and field you mean and uses the correct TypeFlow variable syntax.
Iterating on Your Template
After the first draft is generated, you see a 2-column view:
- Left: conversation panel with chat input and quick actions
- Right: live preview of your template
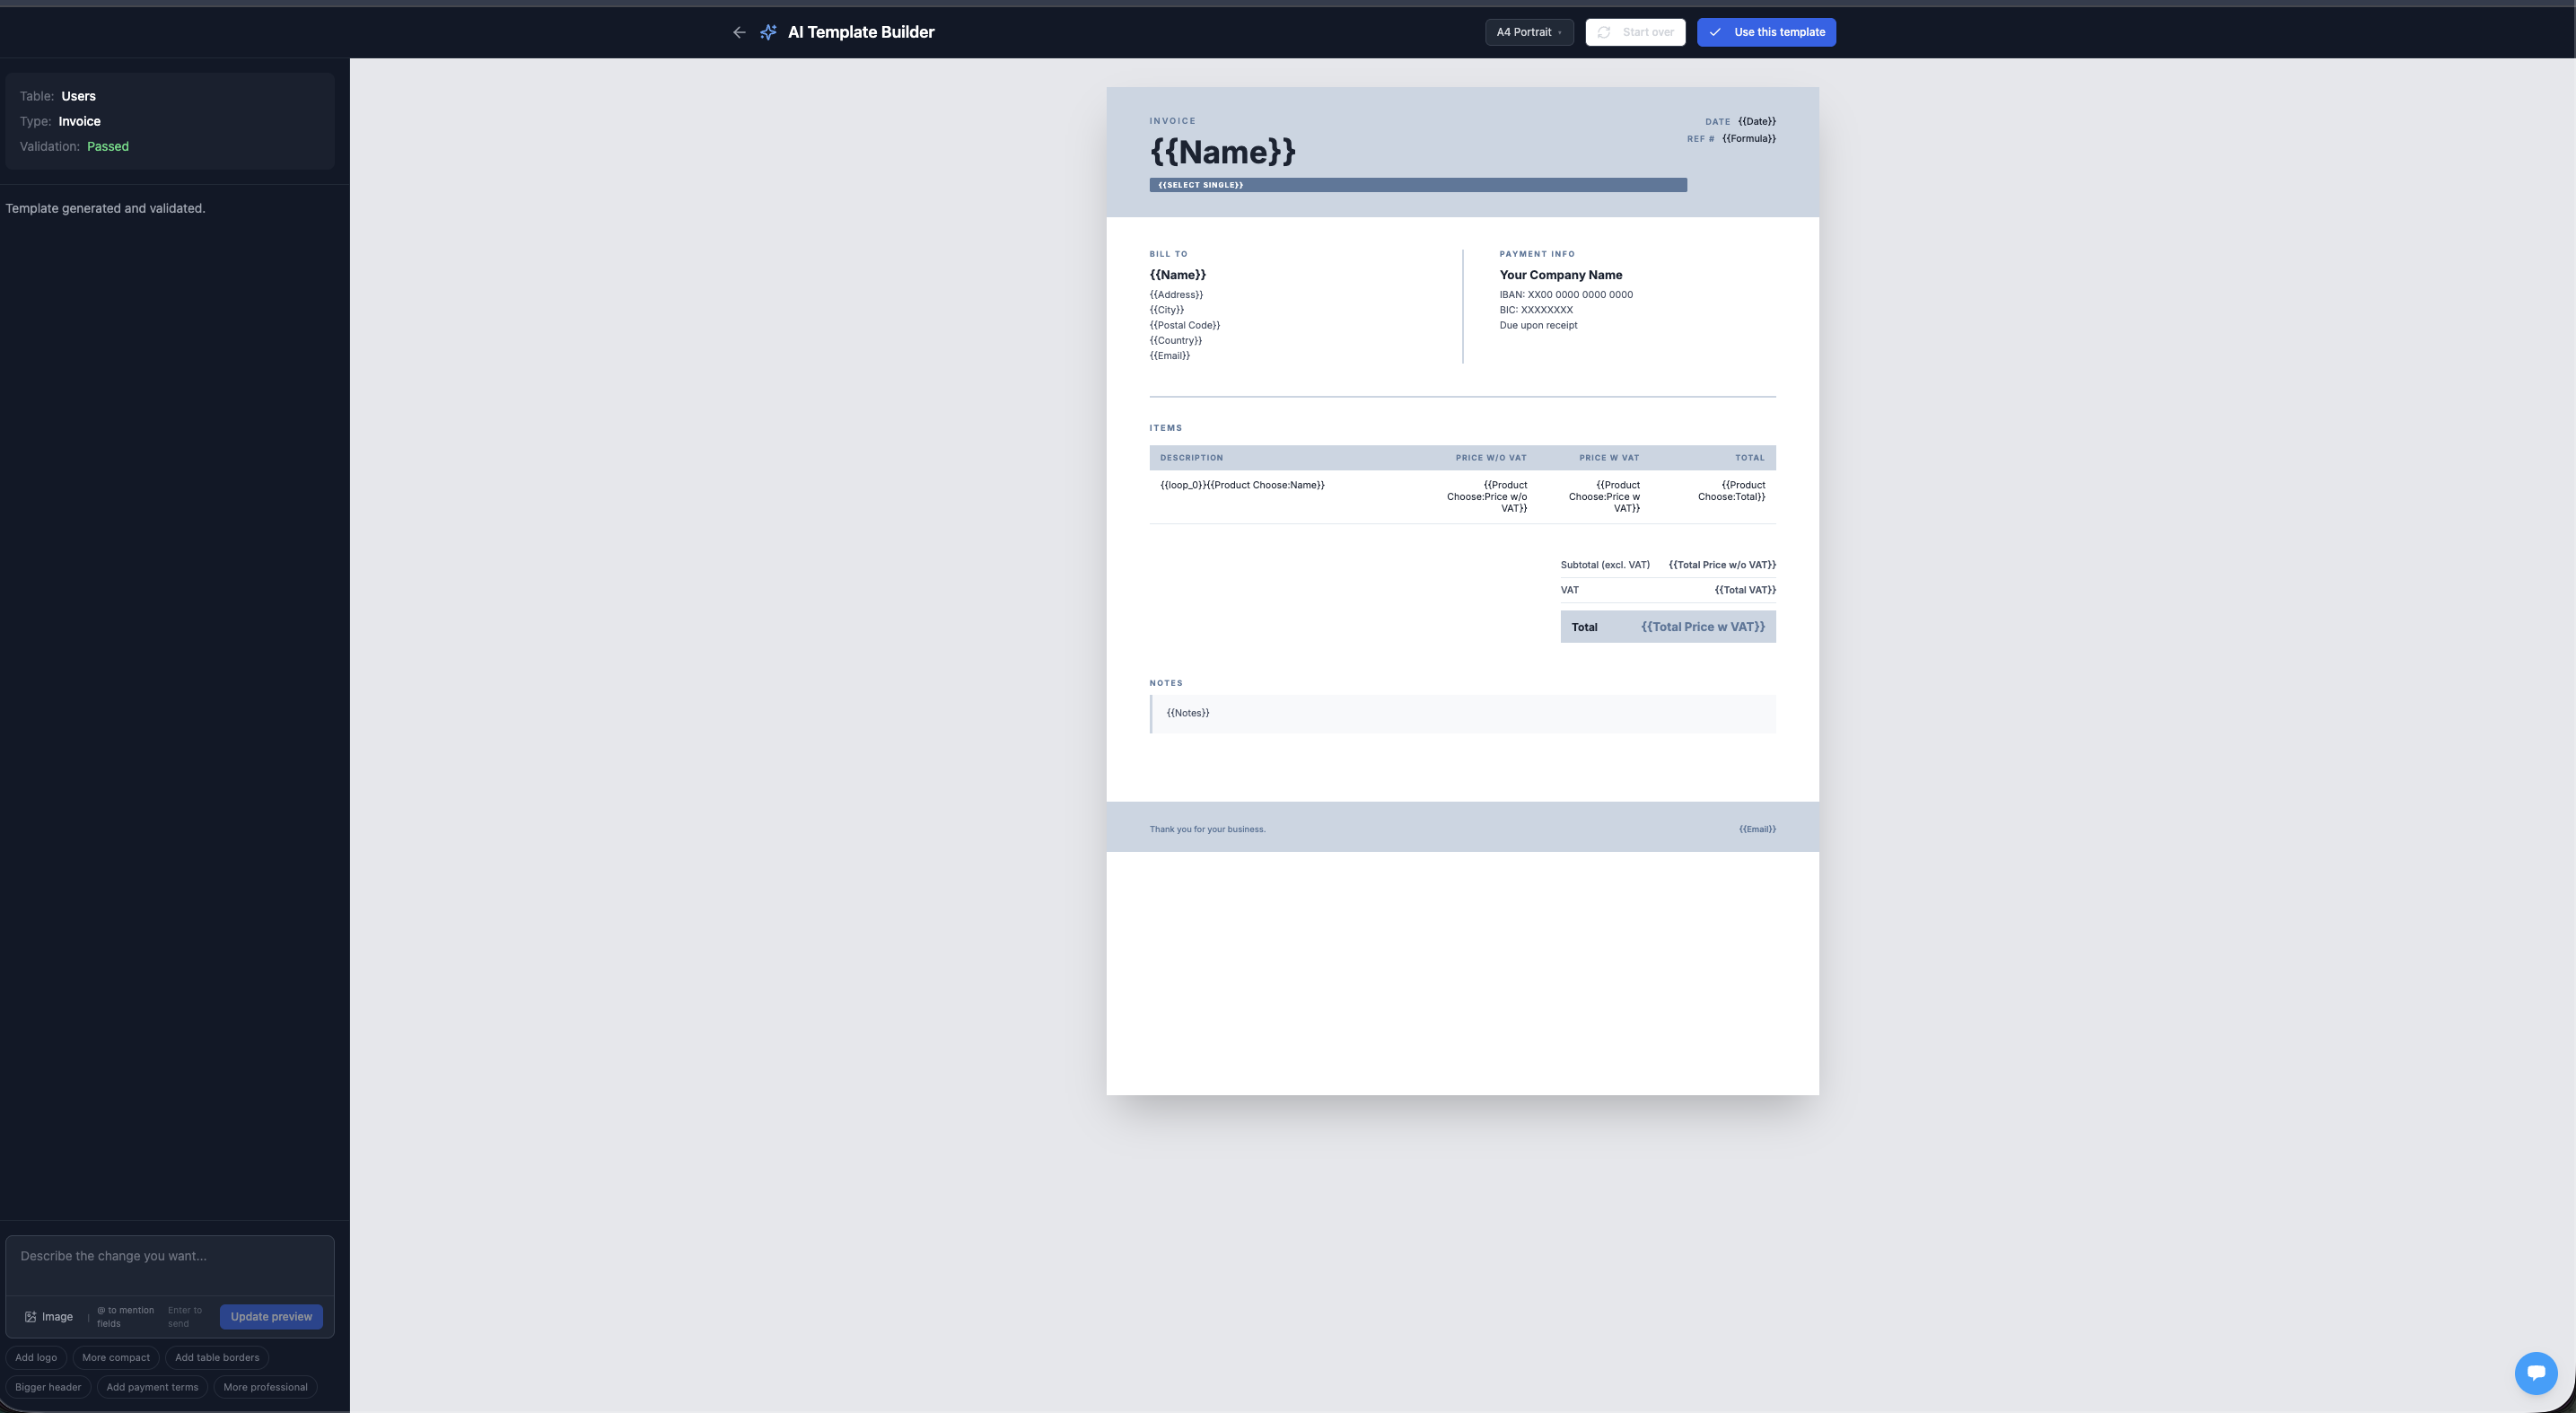
Type any change you want in plain language:
- "Make the header blue"
- "Add the phone number below the email"
- "Move the totals to the right"
- "Add a payment terms section at the bottom"
- "Make it more compact"
You can also use the quick action chips below the input for common changes.
Click-to-Select
Click any element directly in the preview to select it. The element gets highlighted with a blue outline, and the composer shows which element you selected.
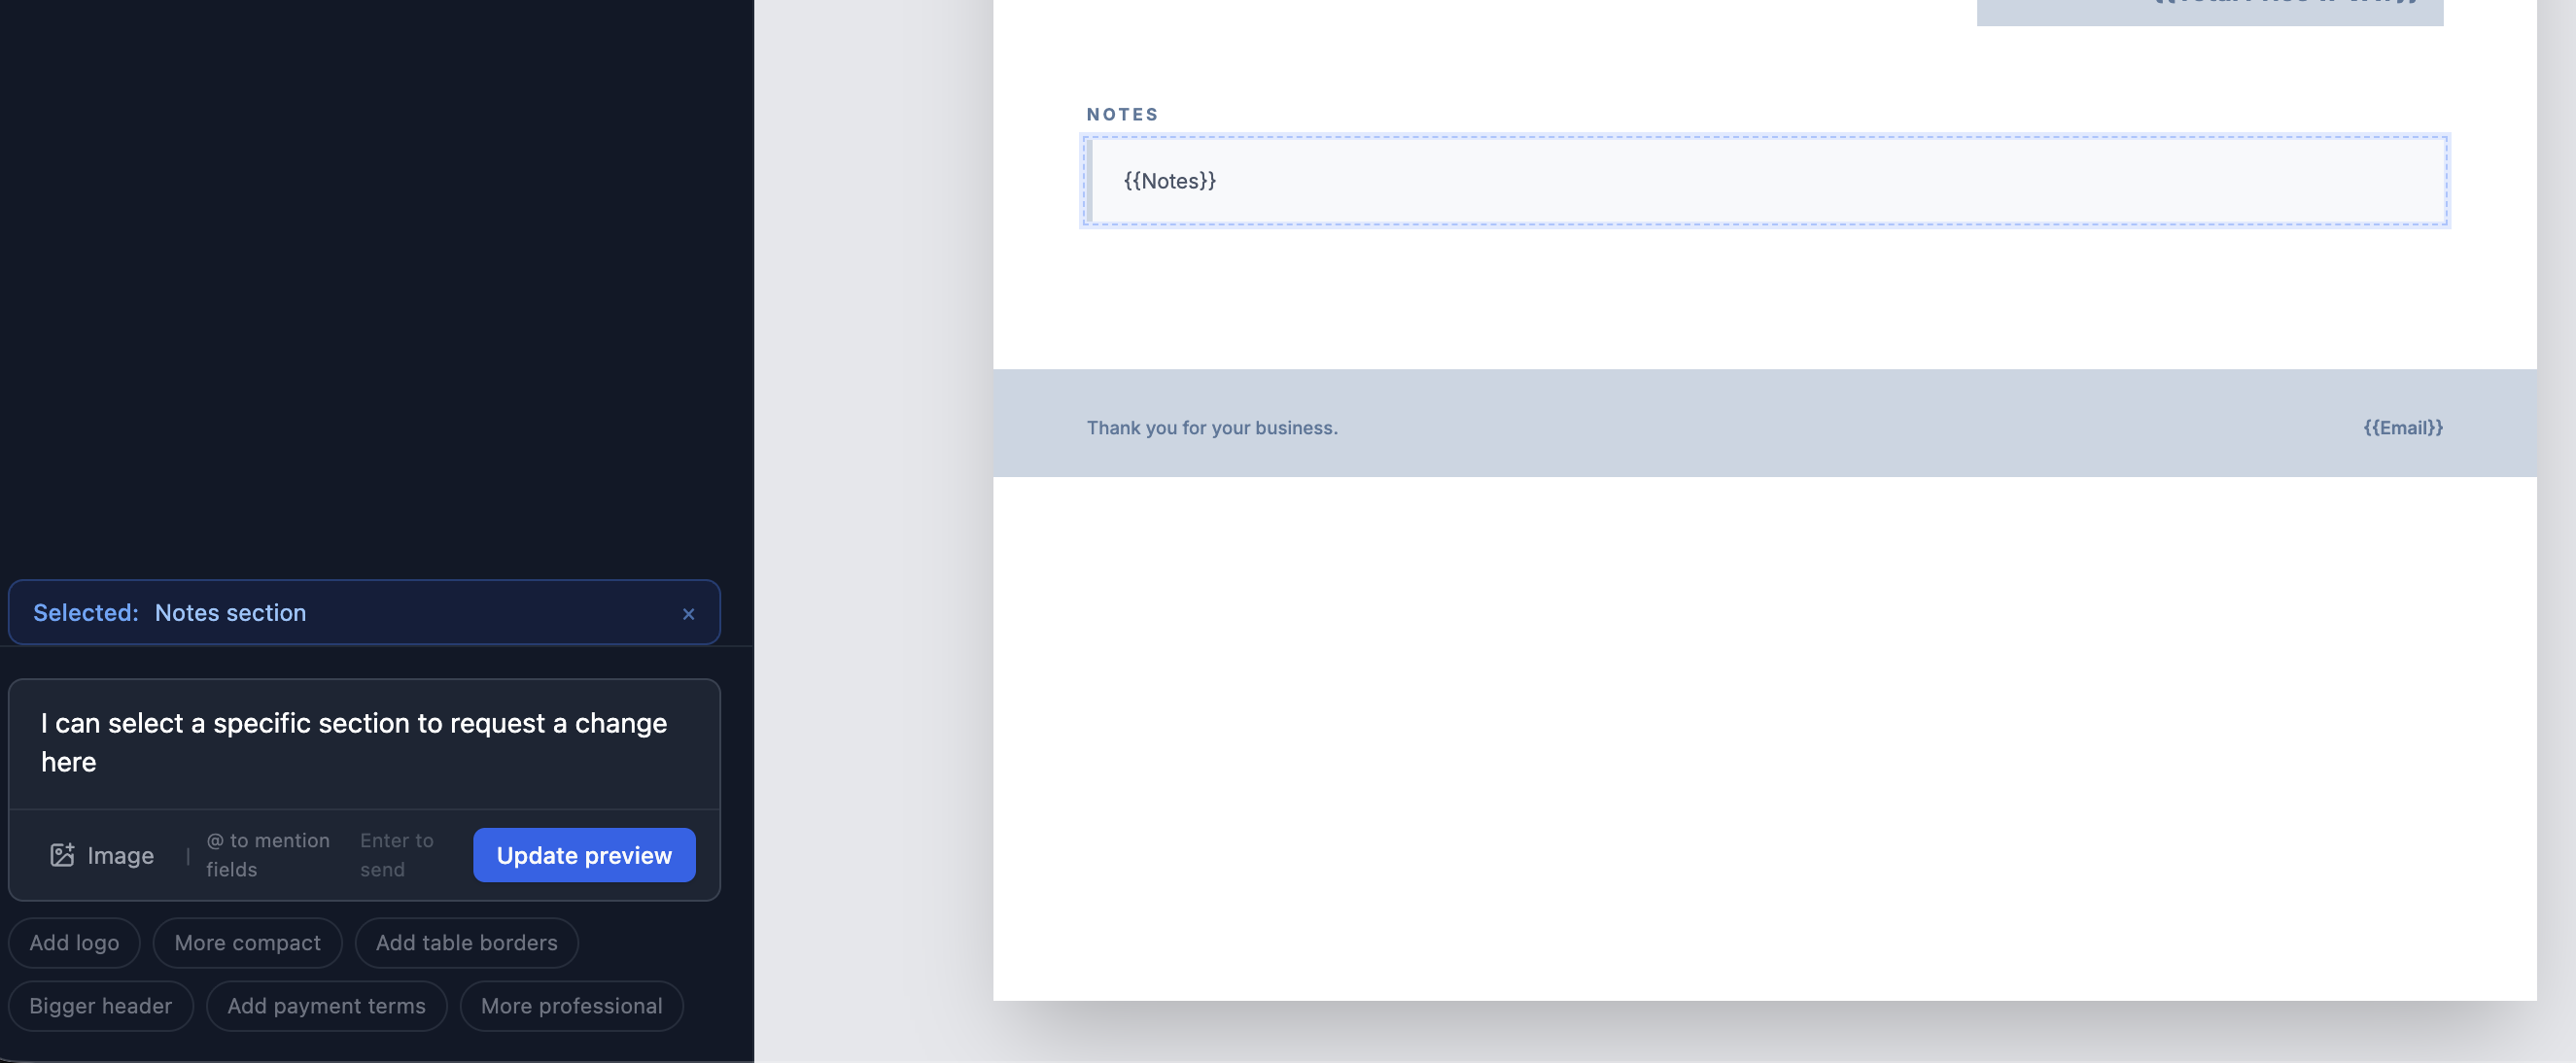
Then describe the change for that specific element:
- "Make this blue"
- "Bigger font"
- "Add a border"
- "Remove this section"
The AI will modify only the selected element.
Uploading Images
Click the image icon next to the text input to upload a logo, header image, or any other image.
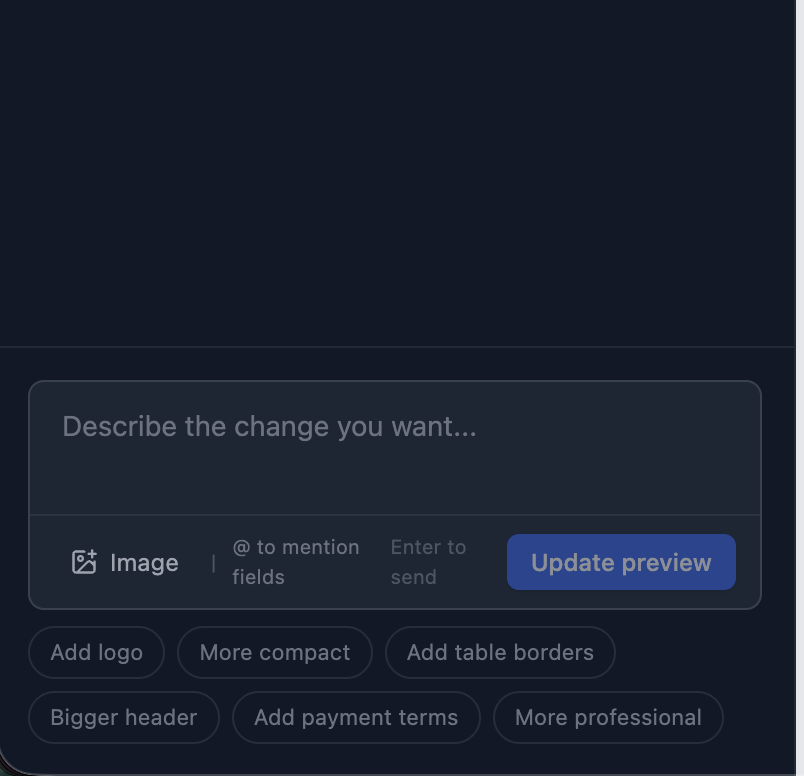
After uploading, the image URL is pre-filled in the composer. Complete the sentence to tell the AI where to place it:
"Use this image as the logo in the top left corner"
The image is stored in your TypeFlow account and inserted directly into the template.
Page Format
The AI infers the page format from your description:
- "Invoice" or "contract" defaults to A4 Portrait
- "Landscape proposal" defaults to A4 Landscape
- "Shipping label" defaults to a label format
- Mention "Letter" for US Letter format
You can change the format anytime using the format selector in the preview header. Click the format pill (e.g., "A4 Portrait") to see all options:
Standard: A4, A4 Landscape, Letter, Letter Landscape, A5, A3
Labels: 100x150 mm, 100x60 mm, 4x6 in
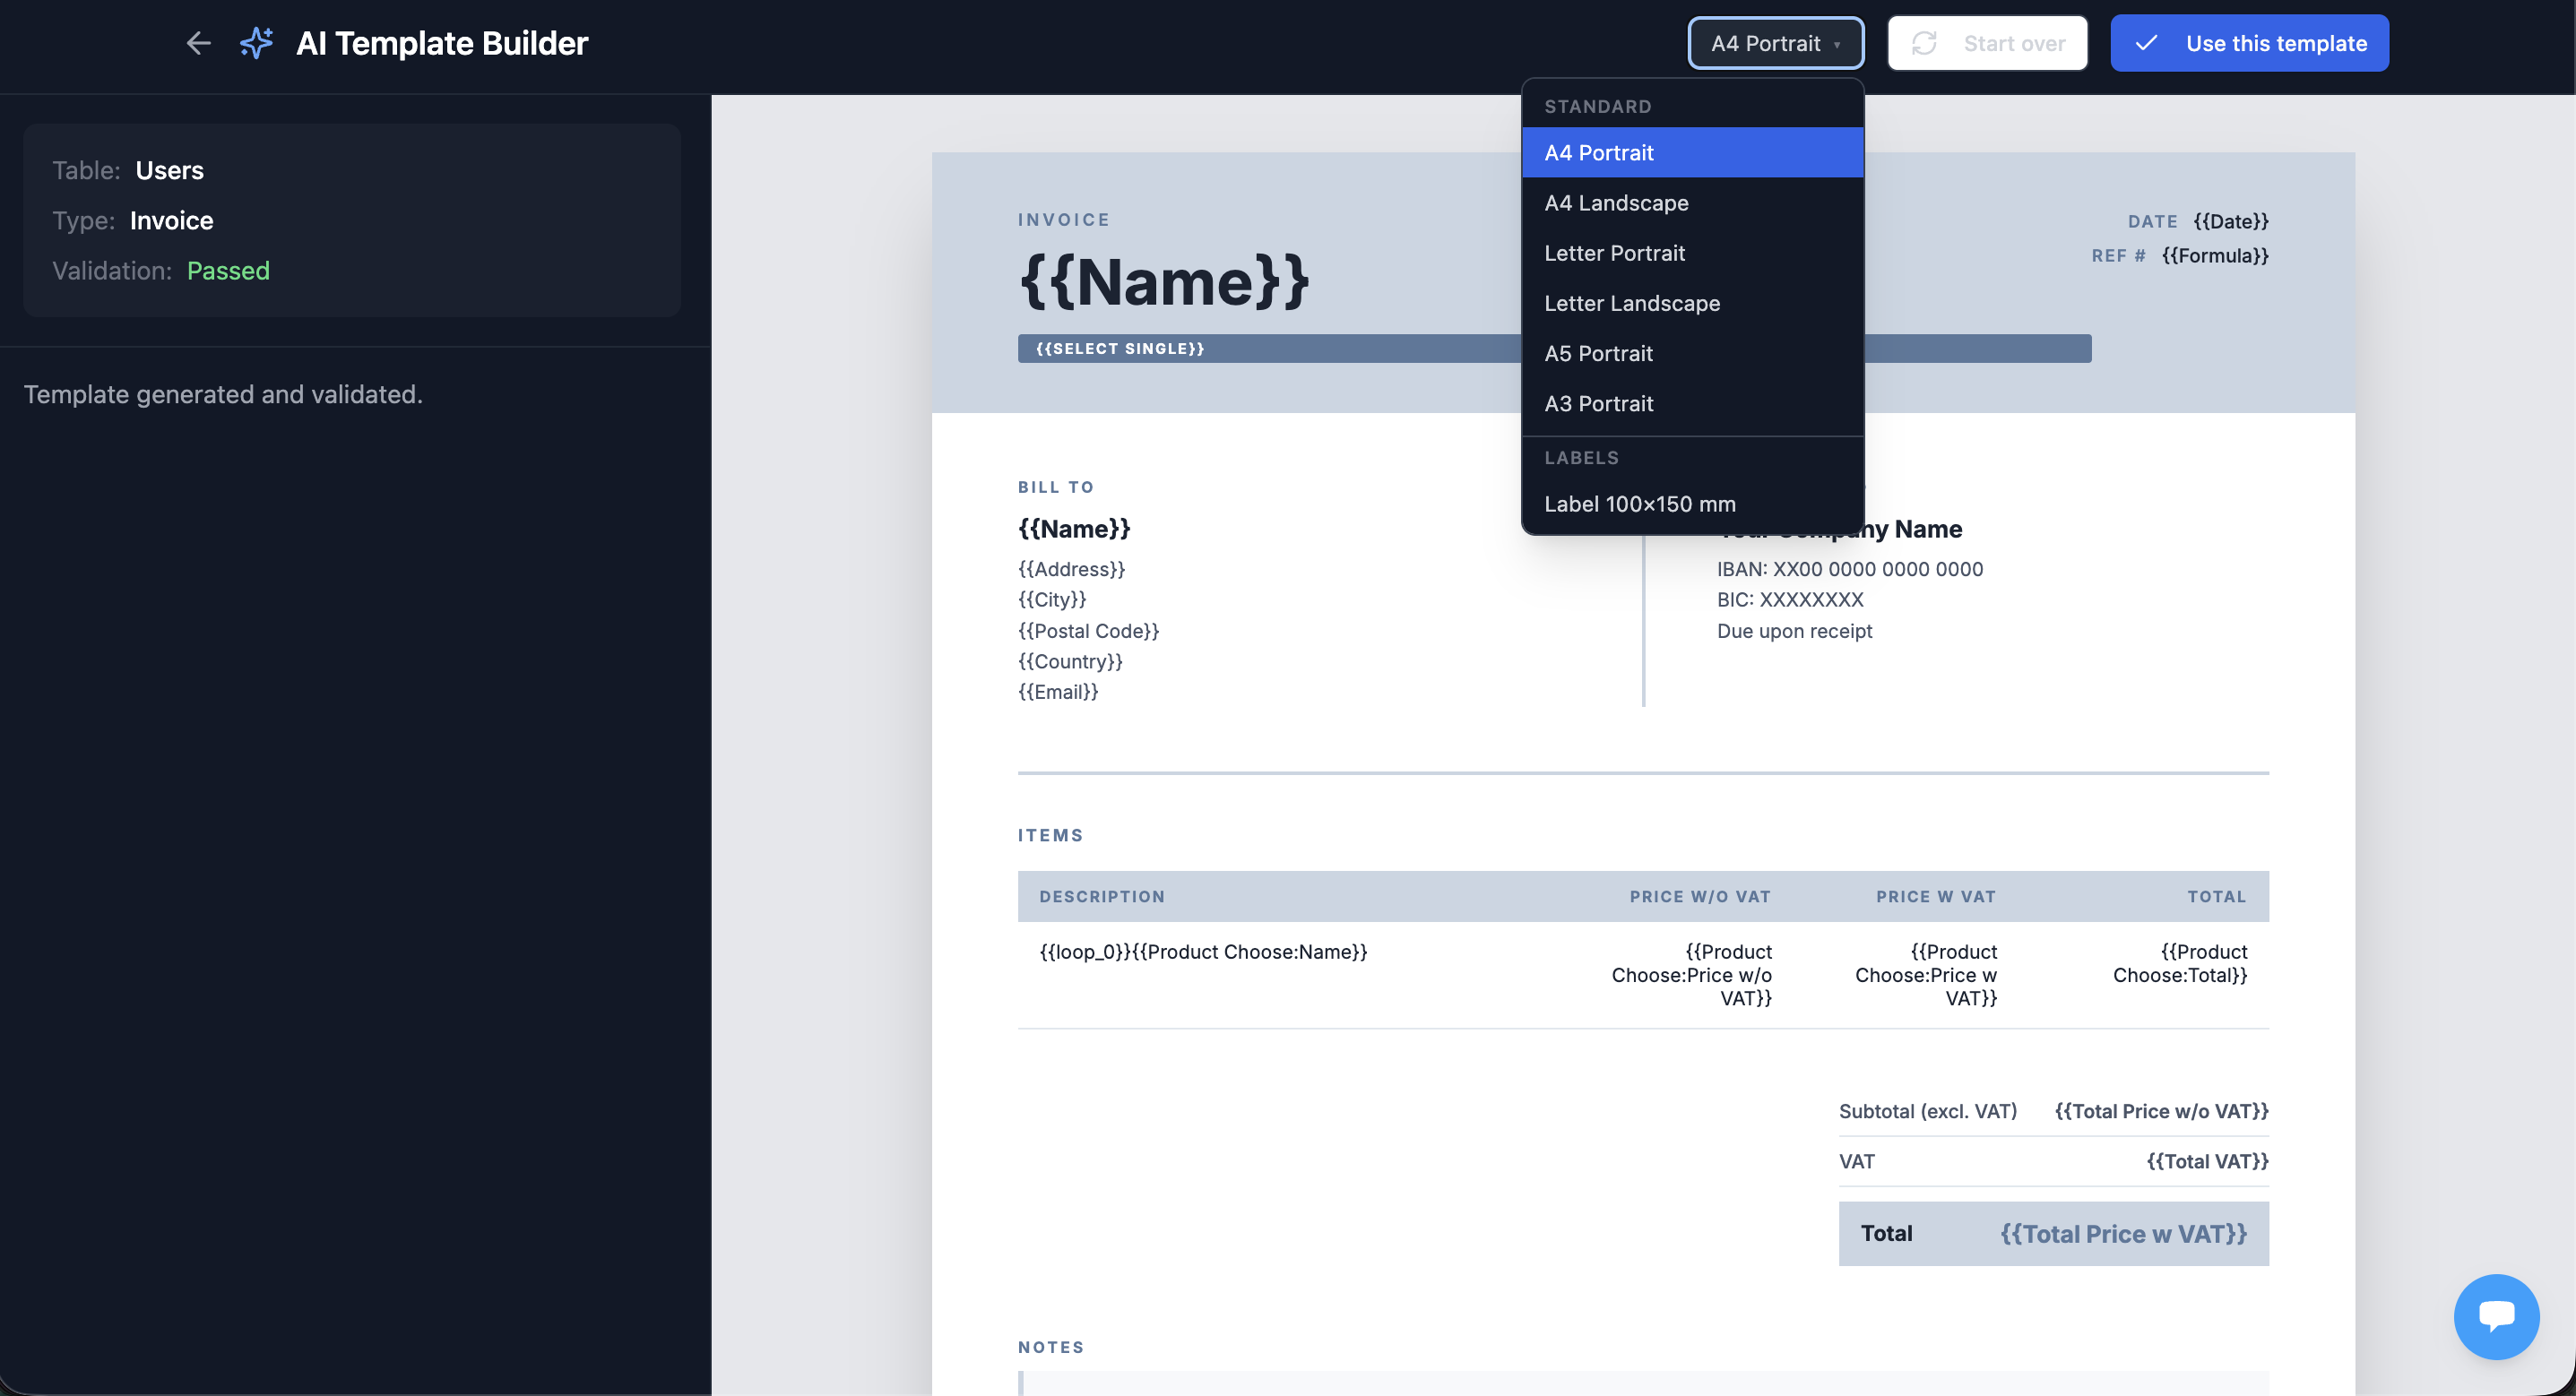
The preview updates immediately to show the correct page dimensions.
Saving Your Template
Your template is auto-saved as a draft after every change. If you close the page and come back later, your draft will be restored.
When you are satisfied with the template:
- Click Use this template
- The template is saved and activated
- You are redirected to the flow editor where you can map variables and test
From there, you can generate your first document.