How to Print Labels from Airtable (Product, Shipping, Inventory)
You can print product labels, shipping labels, inventory tags, and warehouse pick labels directly from your Airtable data - with barcodes, custom sizes, and bulk generation. Connect TypeFlow, use an HTML/CSS template for pixel-perfect label layouts, and generate labels on demand or in batch from any Airtable view. Explore our label printing solution for the full feature set.
Labels are part of the broader fulfillment workflow - see our complete guide to shipping and fulfillment document automation in Airtable. If you're comparing options, see Airtable Page Designer vs TypeFlow for label printing.
Key Takeaways
- Choose the right mode: Use "Linked Records" for one label per linked record. Use "Repeat X Times" for multiple copies based on a quantity field.
- Built-in barcodes: Generate EAN-13, Code 128, or QR codes directly from Airtable fields - no external barcode tools needed.
- Label sizes: Use Avery templates for sheet labels or custom dimensions for thermal printers (Zebra, DYMO, Brother).
- Cart/picking labels: List multiple items using a loop with conditional page breaks.
Types of Labels You Can Print from Airtable
Product Labels
Retail labels with product details and a scannable barcode. For a step-by-step product label guide with barcode setup, see How to Create Airtable Product Labels with Barcodes.
- Common fields: Name, SKU, price, barcode
- Examples: Plant nursery tags, parts bin labels
Shipping Labels
Address labels for packages with recipient details and a tracking barcode. Often used alongside packing lists and other shipping documents. For thermal printer setup, see our shipping label thermal printer guide. For return workflows, see our dedicated return label guide.
- Common fields: Name, address, order ID, tracking code
Inventory and Asset Tags
Labels for tracking equipment, locations, and bins using QR codes or Code 128 barcodes. For a detailed setup guide, see inventory labels with barcodes.
- Common fields: Asset ID, location, condition, QR code
Cart Labels (Picking/Packing Labels)
One label per cart or order that includes customer details and a list of all items to pick. Used in fulfillment operations where pickers work with carts.
- Best for: Warehouse and fulfillment workflows
Understanding Your Data Structure
Your Airtable data structure determines which label mode to use. Get this right first, and the rest becomes straightforward.
Linked Records Structure
You have linked records when your data is split across multiple tables connected by links.
Example - E-commerce orders:
- Orders table: Order ID, Customer, Shipping Address
- Line Items table: Product, Quantity, Price (linked to Orders)
Each order links to multiple line items. When you want one label per linked record, use Linked Records mode. If an order has 3 line items, you get 3 labels.
Single Table with Quantity Field
Your data is in a single table when products and quantities live in the same row.
Example - Parts inventory:
| Part Name | Part Number | Quantity in Stock |
|---|---|---|
| Oil Filter | OF-2024 | 12 |
| Brake Pad | BP-3055 | 8 |
When you want to print the SAME label multiple times based on a quantity field, use Repeat X Times mode. Oil Filter with Quantity=12 produces 12 identical labels.
Which Structure Do You Have?
| Your Data | Mode to Use | Result |
|---|---|---|
| Orders → Line Items (linked tables) | Linked Records | 1 label per line item |
| Products table with Quantity field | Repeat X Times | Same label repeated X times |
Two Label Generation Modes in TypeFlow
TypeFlow offers two modes based on how your Airtable data is structured.
- Linked Records: One label per record in a linked table
- Repeat X Times: Repeat the same label using a quantity field
Mode 1: Linked Records
Use when: You have separate tables connected by linked records and want one label per linked record.
How it works: Select a linked record field. TypeFlow generates one label for each record in that linked table.

Examples:
- Order fulfillment: Orders → Line Items. Each line item = 1 label.
- Project materials: Projects → Materials. Each material = 1 label.
- Event badges: Events → Attendees. Each attendee = 1 badge.
Mode 2: Repeat X Times
Use when: Your data is in a single table with a quantity field and you want multiple copies of the same label.
How it works: Select a number field. TypeFlow repeats the same label that many times.

Examples:
- Product restocking: Products table with "Qty to Label" field. 10 units = 10 identical labels.
- Parts warehouse: Components table with "Stock Count" field.
- Bulk shipping: Same label repeated for multiple identical packages.
Barcode Types Supported
Generate barcodes directly in your labels without external tools. TypeFlow supports the most common GS1 barcode standards.
| Barcode Type | Use Case | Requirements |
|---|---|---|
| EAN-13 | Retail products, point of sale | 13-digit number |
| Code 128 | Logistics, shipping, SKUs | Any text or number |
| QR Code | Inventory, asset tracking | Any text, URL, or data |

In your template, add a barcode placeholder like {{barcode:EAN13}}. In the mapping interface, select the Airtable field containing your barcode number and choose the barcode type.
For a deep dive on all barcode types including GS1-128 for food traceability, see our complete barcode generation guide.
Label Sizes and Templates
Avery Templates for Sheet Labels
TypeFlow includes pre-built templates for common Avery label sheets:
| Avery Template | Labels per Sheet | Label Size |
|---|---|---|
| Avery 5160 | 30 | 2.63" × 1" |
| Avery 5163 | 10 | 4" × 2" |
| Avery 6870 | 60 | 2.5" × 0.5" |
Custom Sizes for Thermal Printers
For thermal label printers (Zebra, DYMO, Brother), set custom page dimensions:

Common thermal label sizes:
- 100mm × 60mm (product labels)
- 4" × 6" (shipping labels)
- 50mm × 25mm (small asset tags)
How to Create a Label Template
TypeFlow uses an HTML/CSS template builder for labels because labels require precise sizing and positioning.
Step 1: Choose Your Label Size
Select an Avery preset from the dropdown or enter custom dimensions for your thermal printer.
Step 2: Design Your Label Layout
Add elements to your label:
- Text fields with placeholders (
{{product_name}},{{price}}) - Barcode element (
{{barcode:EAN13}}) - Images for logos
Step 3: Add the Print Label Marker
The {{print_label_0}} marker at the top of your template defines the repeating label block.
How to Configure Print Label Mapping
After creating your template, configure how Airtable data maps to your label.
Step 1: Select Your Mode
Choose between:
- Linked Records (1 label per linked record): For order items, project materials, event attendees
- Repeat X Times (same label repeated based on quantity): For inventory restocking, bulk labels
Step 2: Choose Your Data Source
- For Linked Records: Select which linked record field to use
- For Repeat X Times: Select the quantity field
Step 3: Map Variables to Airtable Fields
Match each template variable to the corresponding Airtable field.
For barcodes, you'll see additional options:
- Select the Airtable field containing the barcode number
- Choose barcode type (EAN-13, Code 128, QR Code)
- Optionally set a country prefix for EAN-13
Display Conditions: Filter Which Records Get Labels
Not every linked record needs a label. Use Display Conditions to filter which records are included.
Options:
- All selected variables have values (AND): Only include records where ALL required fields are filled
- At least one selected variable has a value (OR): Include if ANY required field is filled
Use cases:
- Only print labels for items with a valid barcode number
- Skip line items where quantity is 0
- Only include products marked as "Ready"
Cart Labels with Multiple Items (Advanced)
Scenario: A warehouse picks orders using carts. Each cart goes to one customer. The picker needs a label showing customer info and a list of ALL items in that cart - not separate labels for each item.
Solution: Use a loop ({{loop_0}}) inside the label template combined with conditional page breaks.

How It Works
- The label template contains fixed header info (customer, transport) and a
{{loop_0}}section that lists all items - Configure "Page break when field changes" on a grouping field (Customer or Cart ID)
- All items for the same customer appear on one label
- When the customer changes, a new label starts
Critical: Sort Your Airtable View First
The "Page break when field changes" feature requires your data to be sorted by the grouping field in Airtable.
Create a view sorted by Customer (or Cart ID) so records appear grouped together:
Customer A, Customer A, Customer B, Customer B, Customer B, Customer C...
If your data is unsorted (A, B, A, C, B, A...), you'll get a new label every time the value changes - potentially one label per item instead of one per customer.
Template Structure
Kar {{page}} Van {{total}}
Klant: {{klant}}
Transport: {{transport}}
Referentie(s): {{Referentie}}

{{loop_0}}{{Aantal}} {{Description}}
Configure the Page Break
In the loop mapping, select "Page break when field changes" and choose your grouping field.

Fixed Header on Every Page
If a cart has many items spanning multiple pages, enable "Repeat on each page" so the customer info appears at the top of every page.

Pro Tip: Page Counter for Multi-Page Labels
Use {{page}} and {{total}} to show "Page 1 of 3" on cart labels with many items. This helps pickers know when they have all pages for a cart.
How to Generate Labels from Airtable
Once your template and mapping are set, you can generate labels in three ways. Choose the one that matches your workflow (manual, automated, or batch).
Option 1: Button Field (On-Demand)
Add a button field to your Airtable table that triggers label generation with a single click.
Step 1: In TypeFlow, go to your flow settings and copy the Button URL from the left sidebar.
Step 2: In Airtable, add a Button field to your table. Set the action to "Open URL" and paste the TypeFlow URL with the record ID variable.
Step 3: Click the button on any record. TypeFlow generates the labels and saves the PDF to an attachment field on that record.
Best for: Generating labels for specific orders or products as needed - warehouse staff can print labels for individual orders during picking.
Option 2: Airtable Automation (Automatic)
Set up an Airtable Automation that triggers label generation automatically when conditions are met.
Step 1: In Airtable, go to Automations and create a new automation.
Step 2: Set your trigger condition. Common triggers for labels:
- When Status changes to "Ready to Ship"
- When a record is created
- When a "Print Labels" checkbox is checked
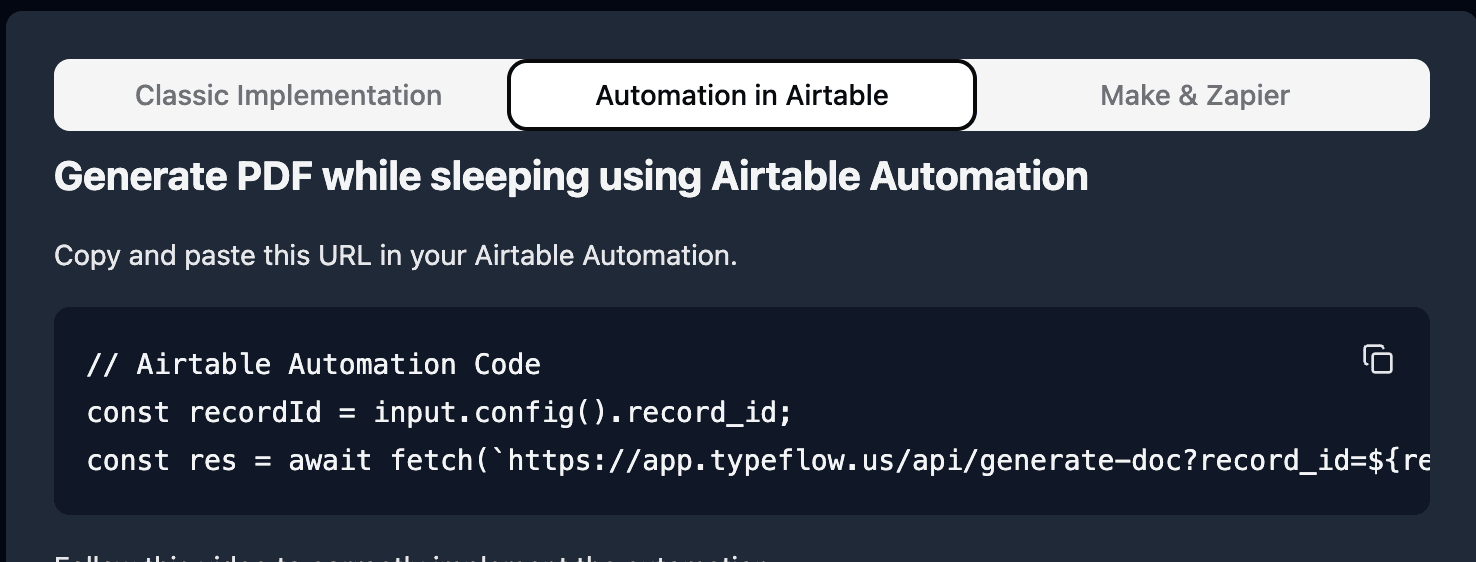
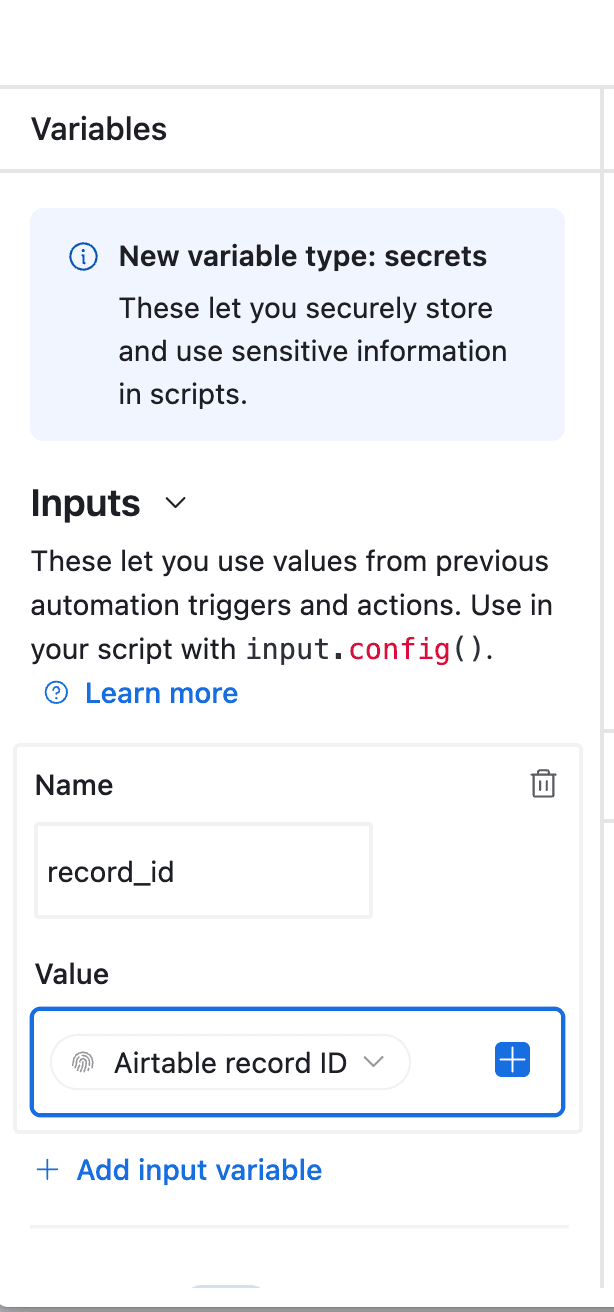
Step 3: Add a "Run script" action. Copy the TypeFlow automation script from your flow settings and paste it into the script editor.
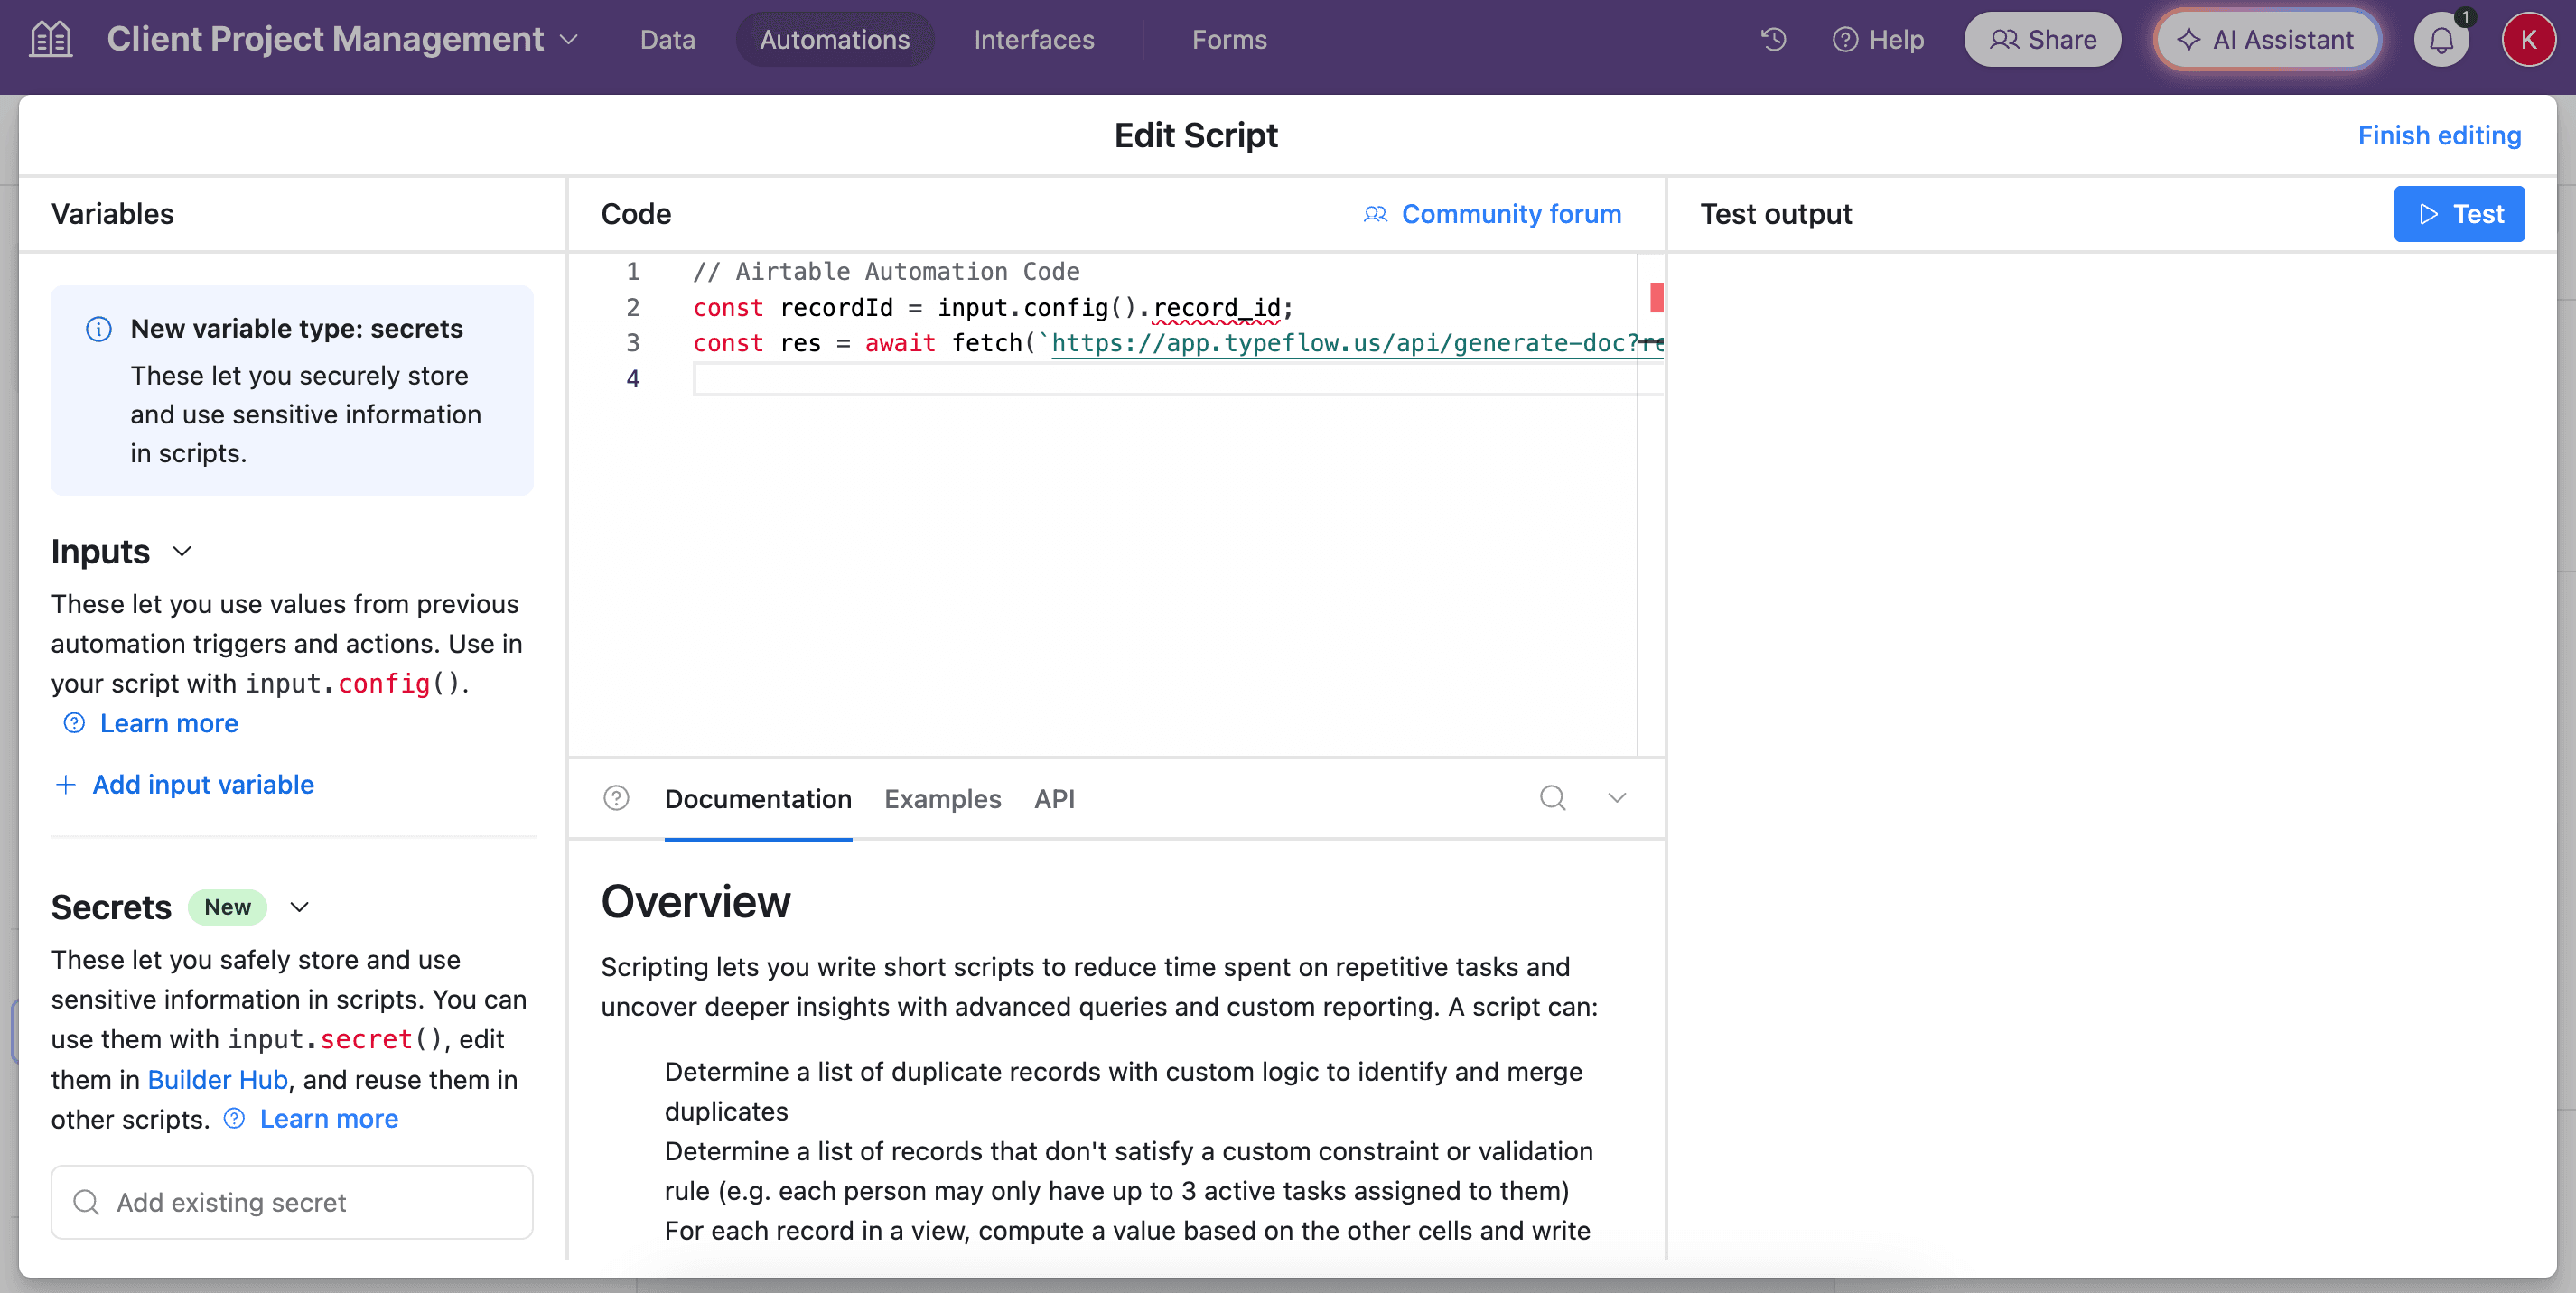
Step 4: Configure the script input variables to pass the record ID.
Step 5: Turn on the automation. Labels now generate automatically when records match your trigger conditions.
Best for: High-volume operations where labels should generate without manual action - e-commerce stores can auto-generate packing labels when orders are marked ready.
Option 3: Bulk Generation (Batch Processing)
Generate labels for multiple records at once using the TypeFlow Airtable extension.
Step 1: Install the TypeFlow extension in your Airtable base.
Step 2: Open the extension and select your label flow.
Step 3: In your Airtable view, select the records you want to generate labels for (use checkboxes or filter your view).
Step 4: Click "Generate" in the extension. TypeFlow creates labels for all selected records and saves PDFs to each record's attachment field.
Best for: Batch printing for inventory counts, restocking, or preparing all orders for a shift.
| Trigger Method | Best For | Manual Steps |
|---|---|---|
| Button | Individual records on-demand | Click per record |
| Automation | High-volume automatic generation | Zero after setup |
| Bulk | Batch processing multiple records | Select records, click once |
Automate your document generation
Start with 20 free documents. Built for businesses using Airtable.
Real-World Examples
Plant Nursery Product Labels
Business: Nursery selling plants with variety names, pot sizes, and EAN-13 barcodes.
Data structure: Single Products table
| Variety | Size | EAN13 | Qty to Label |
|---|---|---|---|
| Hidcote Lavender | 30-35cm | 6095955014015 | 24 |
Setup:
- Use Repeat X Times mode
- Select "Qty to Label" as repeat count field
- Map variety, size, and EAN13 to template
- Result: 24 identical labels for Hidcote Lavender
Warehouse Cart/Picking Labels
Business: Fulfillment center with cart-based picking.
Data structure: Orders linked to Line Items
Challenge: Need one label per cart showing ALL items, not one label per item.
Setup:
- Use a template with
{{loop_0}}to list items - Configure "Page break when field changes" on Customer field
- All items for same customer appear on one label
- Header repeats on each page for multi-page carts
E-commerce Packing Labels
Business: Online store shipping individual items.
Data structure: Orders linked to Line Items
Setup:
- Use Linked Records mode
- Each line item = one label
- Include product name, quantity, order number
- Code 128 barcode for scanning during packing
Common Issues and Solutions
Barcode Not Generating
Problem: {{barcode:Field}} shows as text instead of a barcode image.
Solution:
- Verify the field name matches exactly (case-sensitive)
- Check the field has valid data (EAN-13 needs exactly 13 digits)
- Ensure you selected the correct barcode type in mapping
Wrong Number of Labels Generated
Problem: Expected 50 labels but got a different amount.
Solution:
- Repeat mode: Verify the quantity field has correct numeric values (not text)
- Linked Records mode: Check records are actually linked in Airtable
- Check Display Conditions aren't filtering out records
All Items on Separate Labels Instead of One
Problem: Wanted all order items on ONE cart label, but got separate labels for each item.
Solution: Use {{loop_0}} inside your label template to list items, combined with "Page break when field changes" to group by order or customer.
Labels Misaligned on Avery Sheets
Problem: Labels don't align with the Avery sheet grid.
Solution:
- Select the correct Avery template in the dropdown
- Set printer margins to 0 or "fit to page"
- Print a test page on plain paper first
Start Printing Labels from Airtable
TypeFlow makes Airtable label printing straightforward - no CSV exports, no external barcode generators, no middleware. Design your label, map your fields, and print. Rated by Airtable users on G2.
Related Shipping & Fulfillment Documents
- Generate Packing Lists from Airtable - Automated packing list PDFs for warehouse workflows
- Generate Shipping Documents from Airtable - Bills of lading, packing slips, and commercial invoices
- Generate Proof of Delivery from Airtable - POD documents with recipient signatures
Automate your document generation
Start with 20 free documents. Built for businesses using Airtable.
Frequently Asked Questions
Find answers to the most common questions about this feature.
Popular Questions
All Questions
Need more help?
Our team is here to help you solve all your problems and answer your questions.
Contact Us
Kevin from TypeFlow
•AuthorKevin Rabesaotra is a growth engineer and automation specialist with 8+ years of experience building no-code solutions. As Founder & CEO of TypeFlow, he has helped hundreds of businesses automate document generation and streamline workflows with Airtable integrations. Previously, Kevin was a Product Lead specializing in growth engineering, running experiments to drive revenue, retention, and lead generation.
More articles
How to Print Labels from Airtable with Quantity Control (Step by Step)
Print multiple labels per Airtable record based on a quantity field. Step-by-step guide for linked records mode and quantity repeat mode with barcodes and Avery sheets.
Read articleHow to Print Avery Mailing Labels from Airtable
Print Avery mailing labels (5160, 5161, 5162) from Airtable without Word mail merge. Step-by-step guide with print label mode, automation, and bulk generation.
Read articleHow to Create Inventory Labels with Barcodes in Airtable
Create inventory labels with Code 128, EAN-13, or QR barcodes from Airtable. Step-by-step guide for warehouse, retail, and asset tracking with thermal and Avery printers.
Read article