How to Generate Shipping Documents from Airtable Automatically
You can generate packing slips, bills of lading, and commercial invoices directly from your Airtable order data using Google Docs or HTML/CSS templates. Connect TypeFlow to your base, map your fields, and produce shipping documents on demand, in bulk, or automatically through Airtable Automations. According to McKinsey, warehouse errors from manual documentation cost companies 1-3% of total revenue.
This guide shows you how to generate shipping documents from Airtable using Google Docs templates and TypeFlow. For a complete overview of all fulfillment documents you can automate, see our guide to shipping and fulfillment document automation in Airtable.
By the end, you'll have a workflow that:
- Creates PDFs from your Airtable order data
- Supports single and multi-item orders
- Generates documents on demand, in bulk, or automatically
Key Takeaways
To generate shipping documents from Airtable automatically, connect your Orders table to a Google Docs template with TypeFlow, map your fields, and generate PDFs via a button, bulk action, or Airtable Automation.
- Documents: Create packing slips, bills of lading, delivery receipts, shipping labels, and commercial invoices
- Templates: Use Google Docs placeholders so your PDFs stay consistent and branded
- Automation options: Choose button-based, bulk, or status-triggered generation depending on your workflow
- International shipping: Add customs fields to generate commercial invoices when needed
Types of Shipping Documents You Can Generate from Airtable
Different shipping scenarios require different documents:
| Document Type | Purpose | When Used |
|---|---|---|
| Packing Slip | Lists items included in a shipment | Placed inside package for recipient verification |
| Bill of Lading | Legal contract for freight transport | Required for LTL and truckload shipments |
| Commercial Invoice | Declares shipment contents and value | Required for international customs clearance |
| Delivery Receipt | Proof of delivery document | Signed by recipient upon delivery |
| Shipping Label | Address and tracking information | Attached to outside of package |
All of these can be generated automatically from your Airtable order data.
Why Automate Shipping Documents in Airtable
Automation turns your Airtable order records into ready-to-print PDFs in seconds.
- Save time: Generate documents without manual copy-paste
- Reduce errors: Pull data directly from Airtable fields to avoid typos
- Scale smoothly: Handle more orders without adding admin work
- Stay consistent: Every document follows the same format
- Create an audit trail: Save PDFs back to the order record automatically
Airtable's Page Designer is useful for basic single-page layouts, but it isn't built for automated, multi-page, or bulk document generation. For shipping workflows, you'll typically need a dedicated document generator.
What You Need Before Starting
Make sure you have these in place before you build your workflow:
| Requirement | Why it matters |
|---|---|
| Airtable Orders table | The source of truth for order and shipping data |
| Google Docs | Where your templates live (supports multi-page layouts) |
| TypeFlow account | Connects Airtable data to templates and generates PDFs |
| (Optional) Line Items table | Needed for orders with multiple products |
How to Set Up Your Airtable Base for Shipping Documents
Your base only needs a few essentials to generate reliable shipping PDFs.
- One record per order: Store shipment-level info (address, dates, tracking) on the order
- Line items for products: Use a linked table when an order contains multiple products
- A PDF attachment field: Save generated documents back to the order for easy printing and auditing
Required Fields for Shipping Documents
| Field Name | Field Type | Purpose |
|---|---|---|
| Order ID | Auto-number or Formula | Unique identifier for tracking |
| Ship To Name | Single line text | Recipient name |
| Ship To Address | Long text | Full delivery address |
| Ship To City | Single line text | City for address formatting |
| Ship To Postal Code | Single line text | ZIP/postal code |
| Ship To Country | Single select | Country for international shipping |
| Shipping Method | Single select | Carrier and service level |
| Order Date | Date | When order was placed |
| Ship Date | Date | When order ships |
| Tracking Number | Single line text | Carrier tracking ID |
| Products | Linked record | Connection to line items |
| Shipping Document PDF | Attachment | Where generated docs are saved |
Organizing Orders and Line Items
For orders with multiple products, create a separate Line Items table linked to your Orders table.
Line Items Table:
| Field Name | Field Type | Purpose |
|---|---|---|
| Product Name | Single line text | Item description |
| SKU | Single line text | Stock keeping unit |
| Quantity | Number | Units being shipped |
| Unit Weight | Number | Weight per unit |
| Unit Price | Currency | Price per unit (for commercial invoices) |
| Order | Linked record | Link back to Orders table |
Pro Tip: Add Rollup Fields for Totals
Create rollup fields in your Orders table to calculate totals from linked line items. For example, a "Total Weight" rollup that sums all unit weights, or "Total Value" for commercial invoices.
How to Create a Shipping Document Template in Google Docs
Design your template with placeholders that TypeFlow will replace with actual data.
Step 1: Set Up Your Document Structure
Create a new Google Doc with your company header:
[Company Logo]
[Company Name]
[Company Address]
[Phone | Email]

---

PACKING SLIP

Order #: {{Order ID}}
Ship Date: {{Ship Date}}
Tracking: {{Tracking Number}}
Step 2: Add Shipping Address Block
SHIP TO:
{{Ship To Name}}
{{Ship To Address}}
{{Ship To City}}, {{Ship To Postal Code}}
{{Ship To Country}}

SHIPPING METHOD: {{Shipping Method}}
Step 3: Create the Line Items Table
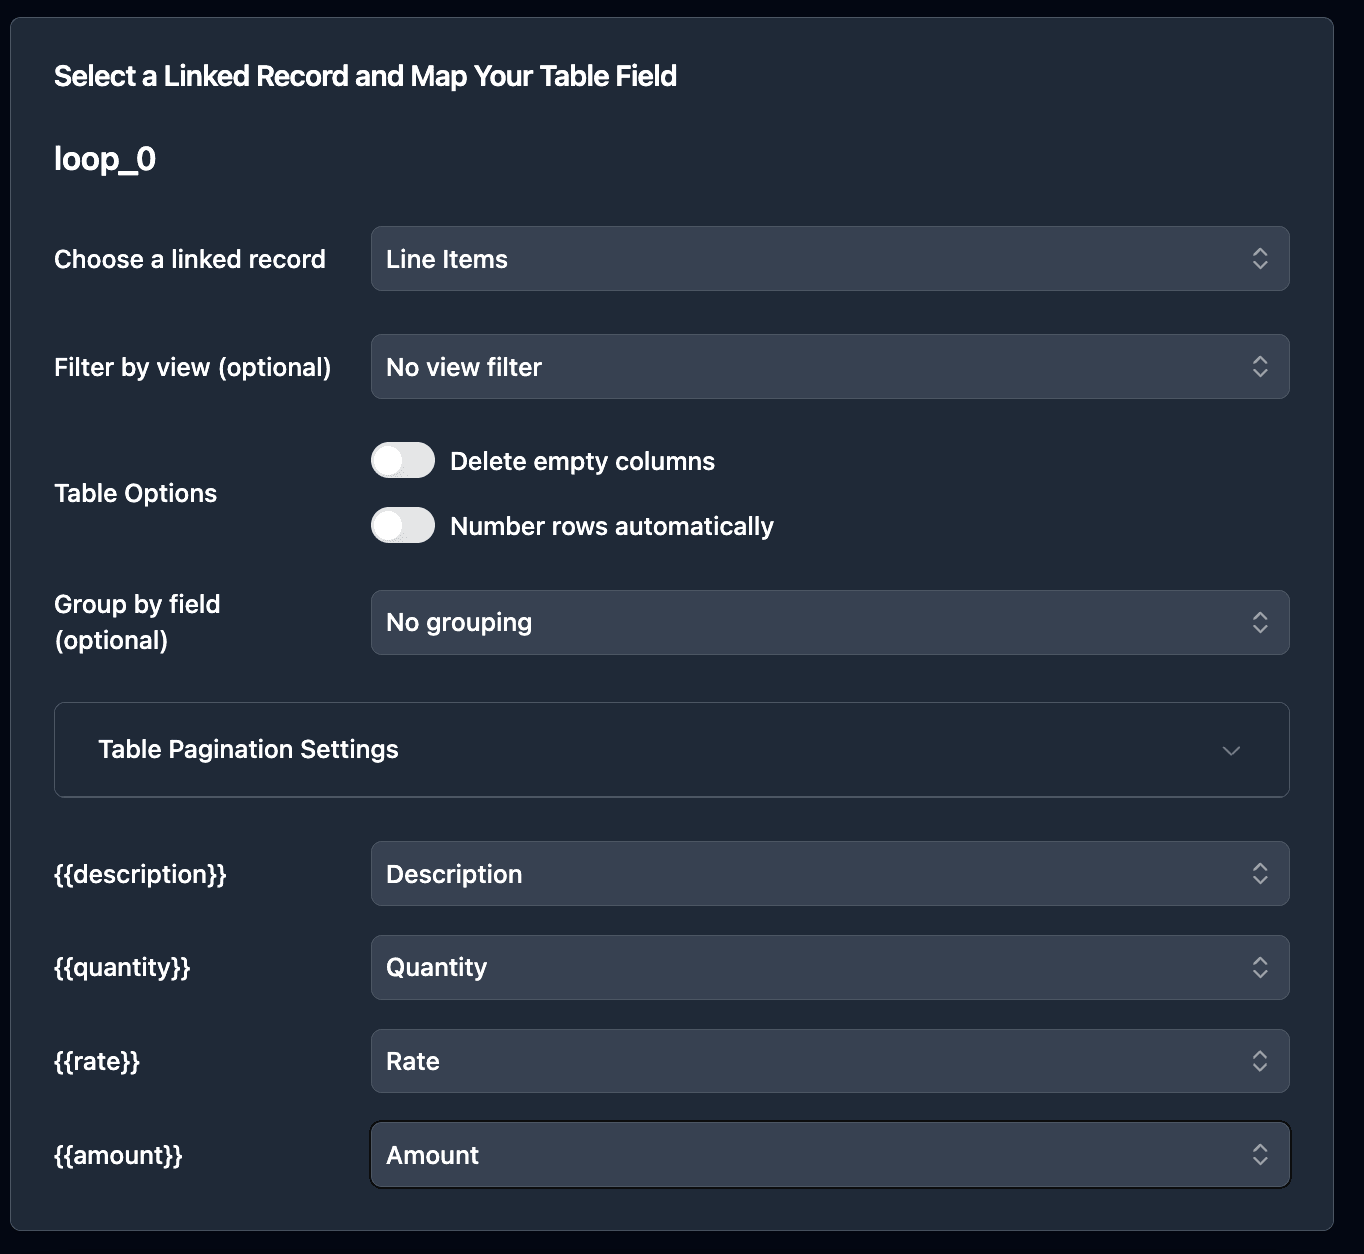
Use loop syntax to include all products from linked records:
ITEMS:

| SKU | Description | Qty |
|-----|-------------|-----|
{{loop_0}}
| {{SKU}} | {{Product Name}} | {{Quantity}} |
Step 4: Add Footer Elements
---

Total Items: {{Total Items}}
Total Weight: {{Total Weight}} kg

Special Instructions: {{Special Instructions}}

Packed by: ________________  Date: ________________
Pro Tip: Create Multiple Templates
Create separate templates for different document types (packing slip, commercial invoice, bill of lading). Each can pull from the same Airtable data but display it differently based on the document's purpose.
How to Connect TypeFlow to Your Airtable Base
Install TypeFlow and link it to your shipping data.
Step 1: Create Your TypeFlow Account
Go to app.typeflow.us and connect your Google account. This gives TypeFlow access to your Google Docs templates.
Step 2: Link Your Airtable Base
Authorize TypeFlow to access your Airtable account, then select the base containing your shipping data.
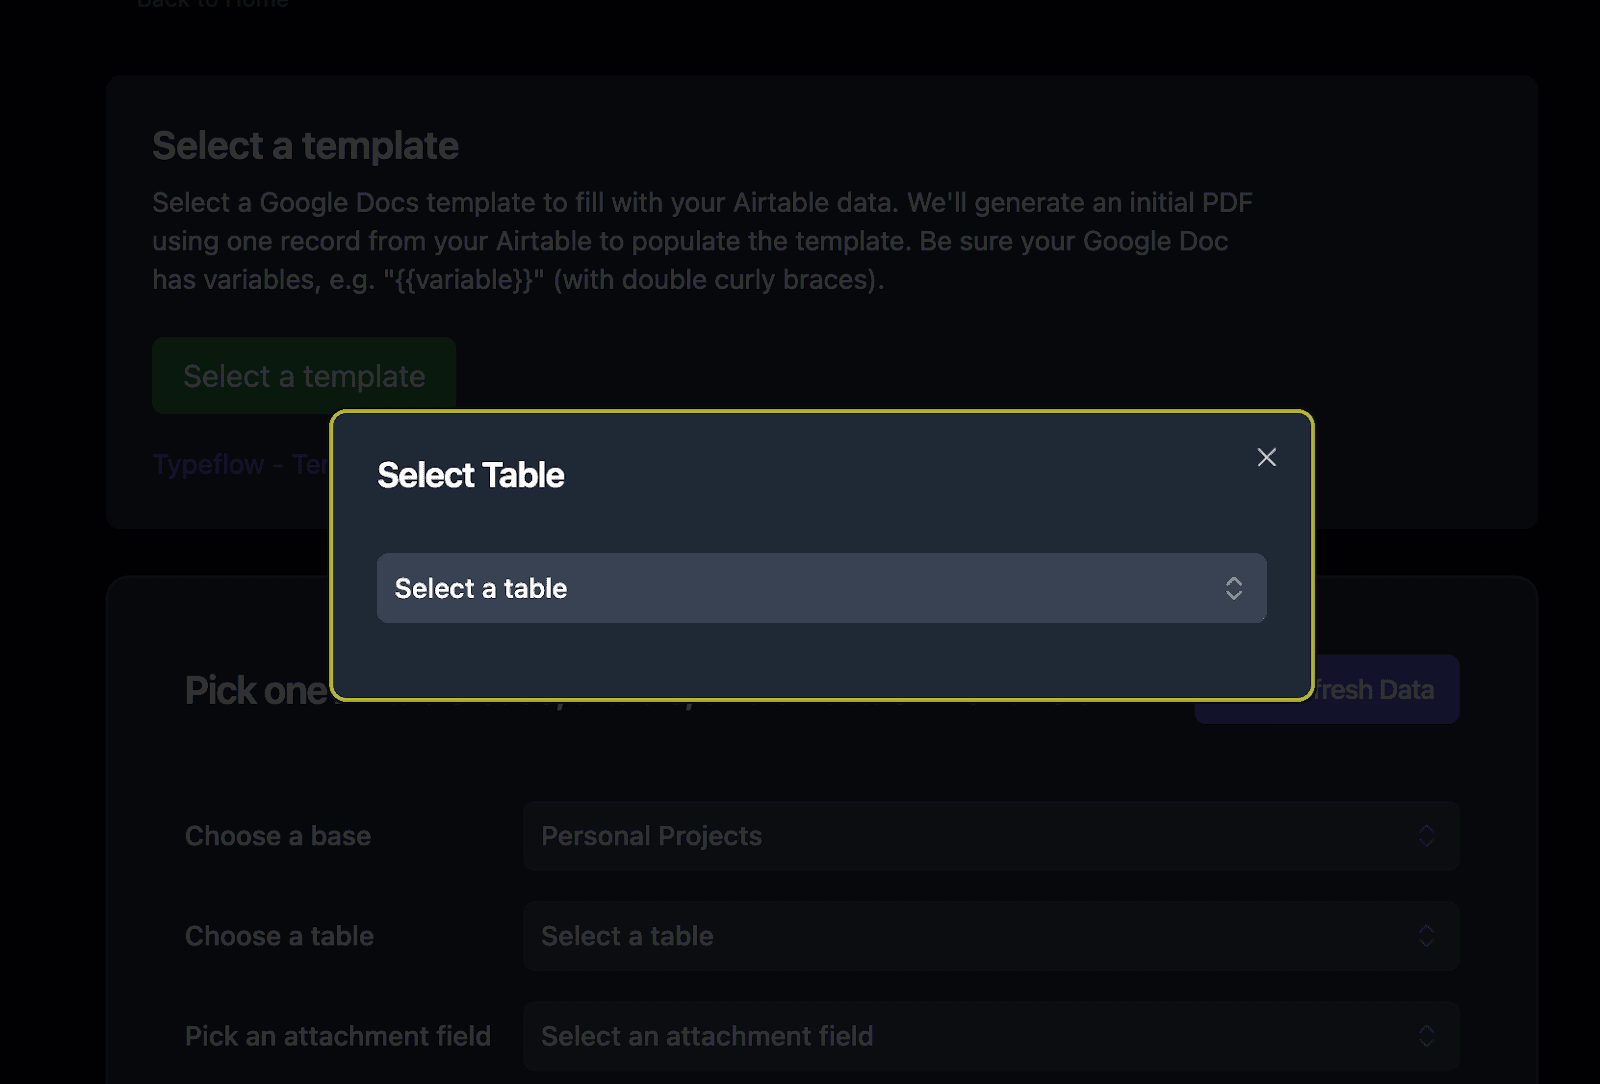
Step 3: Select Your Shipping Table
Choose the table containing your orders. This is where TypeFlow will pull data from when generating documents.
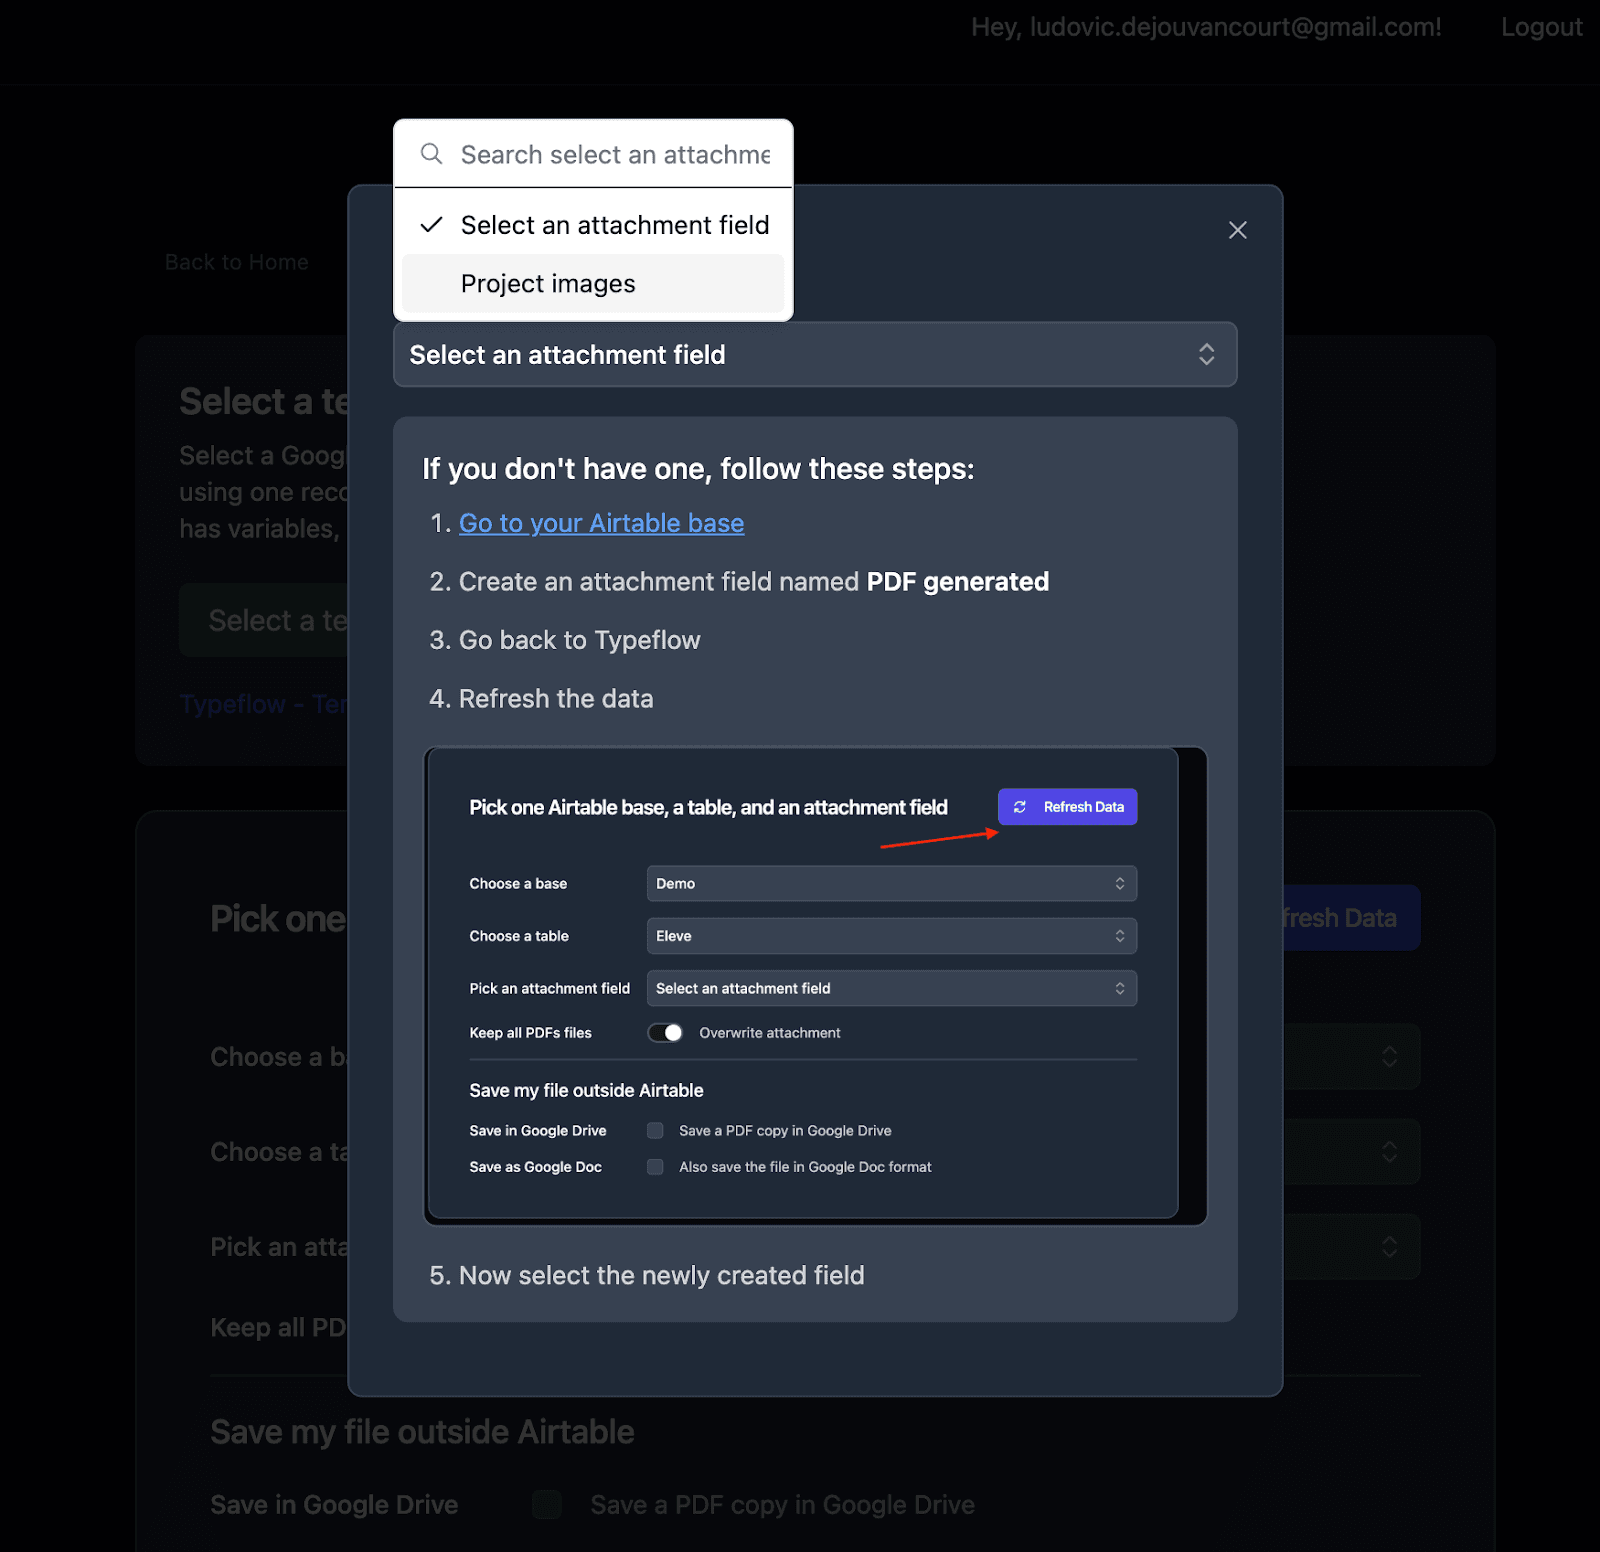
Step 4: Configure Output Settings
Select the attachment field where generated shipping documents should be saved.
How to Map Airtable Fields to Your Shipping Template
Connect each placeholder in your template to the corresponding Airtable field.
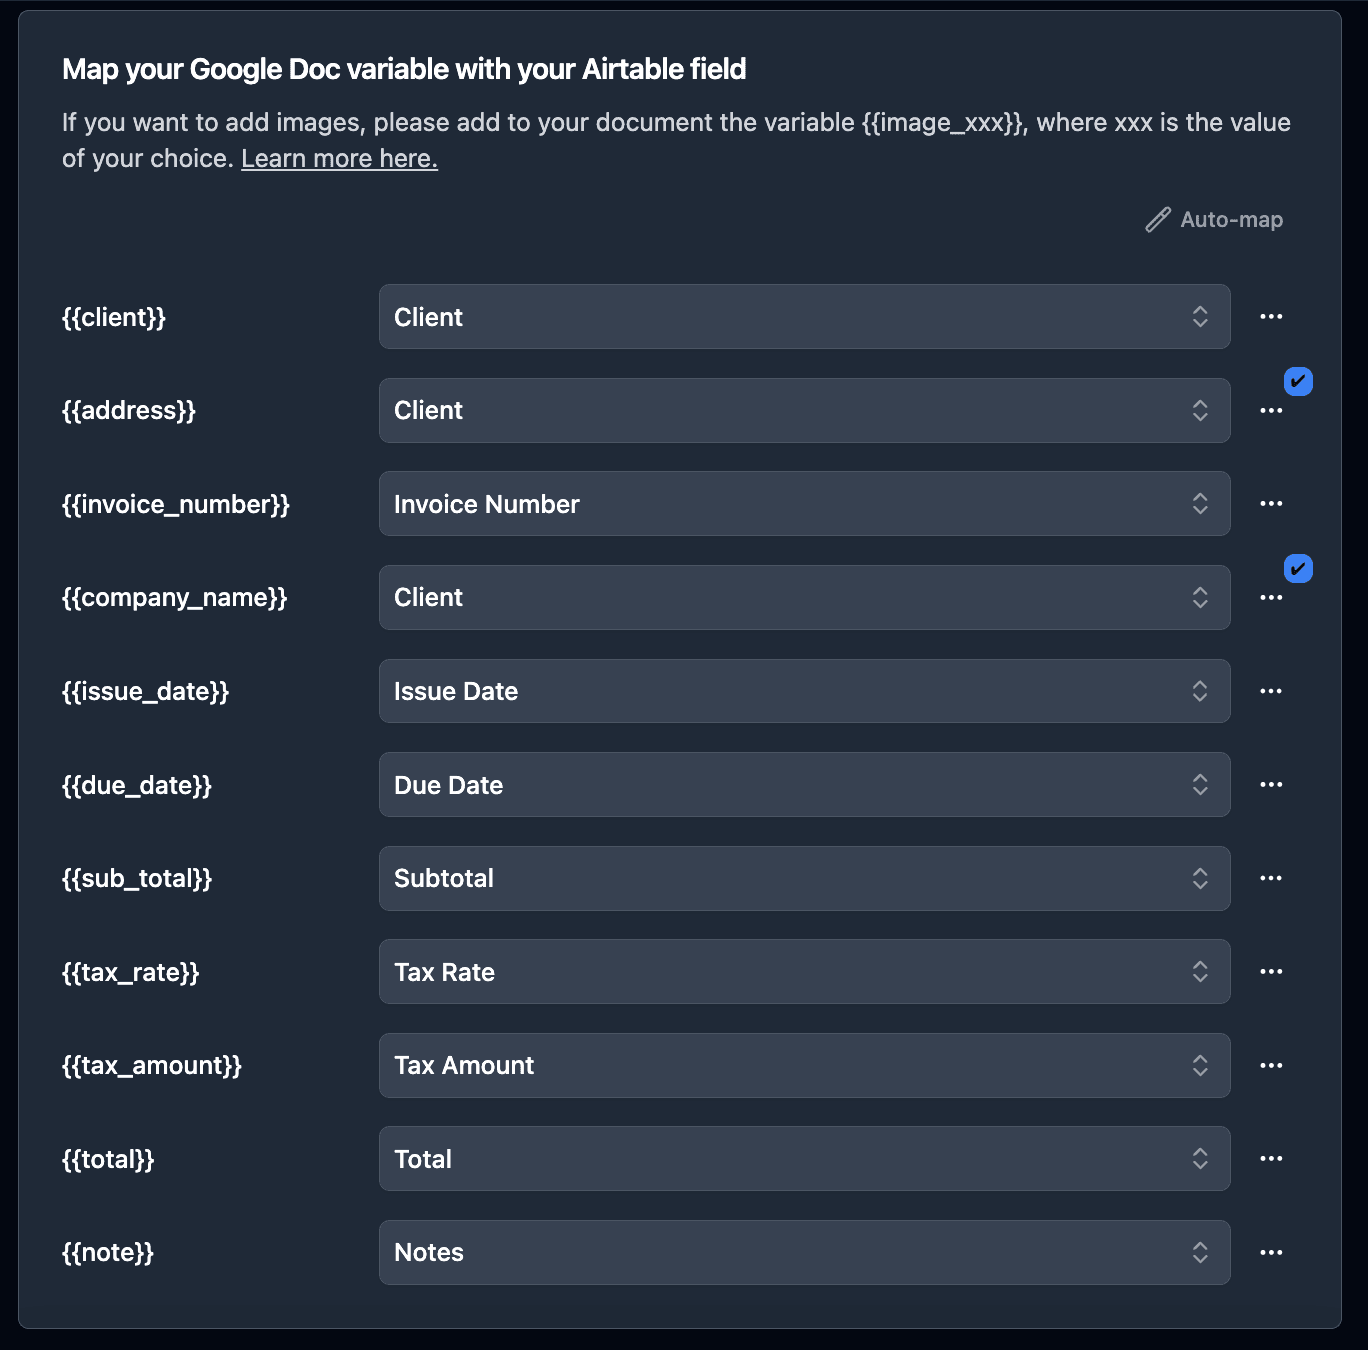
Mapping Basic Shipping Fields
Direct one-to-one mapping for order details:
{{Order ID}}→ Order ID field{{Ship Date}}→ Ship Date field{{Tracking Number}}→ Tracking Number field{{Shipping Method}}→ Shipping Method field
Mapping Address Fields
Map each address component separately for proper formatting:
{{Ship To Name}}→ Ship To Name field{{Ship To Address}}→ Ship To Address field{{Ship To City}}→ Ship To City field{{Ship To Postal Code}}→ Ship To Postal Code field{{Ship To Country}}→ Ship To Country field
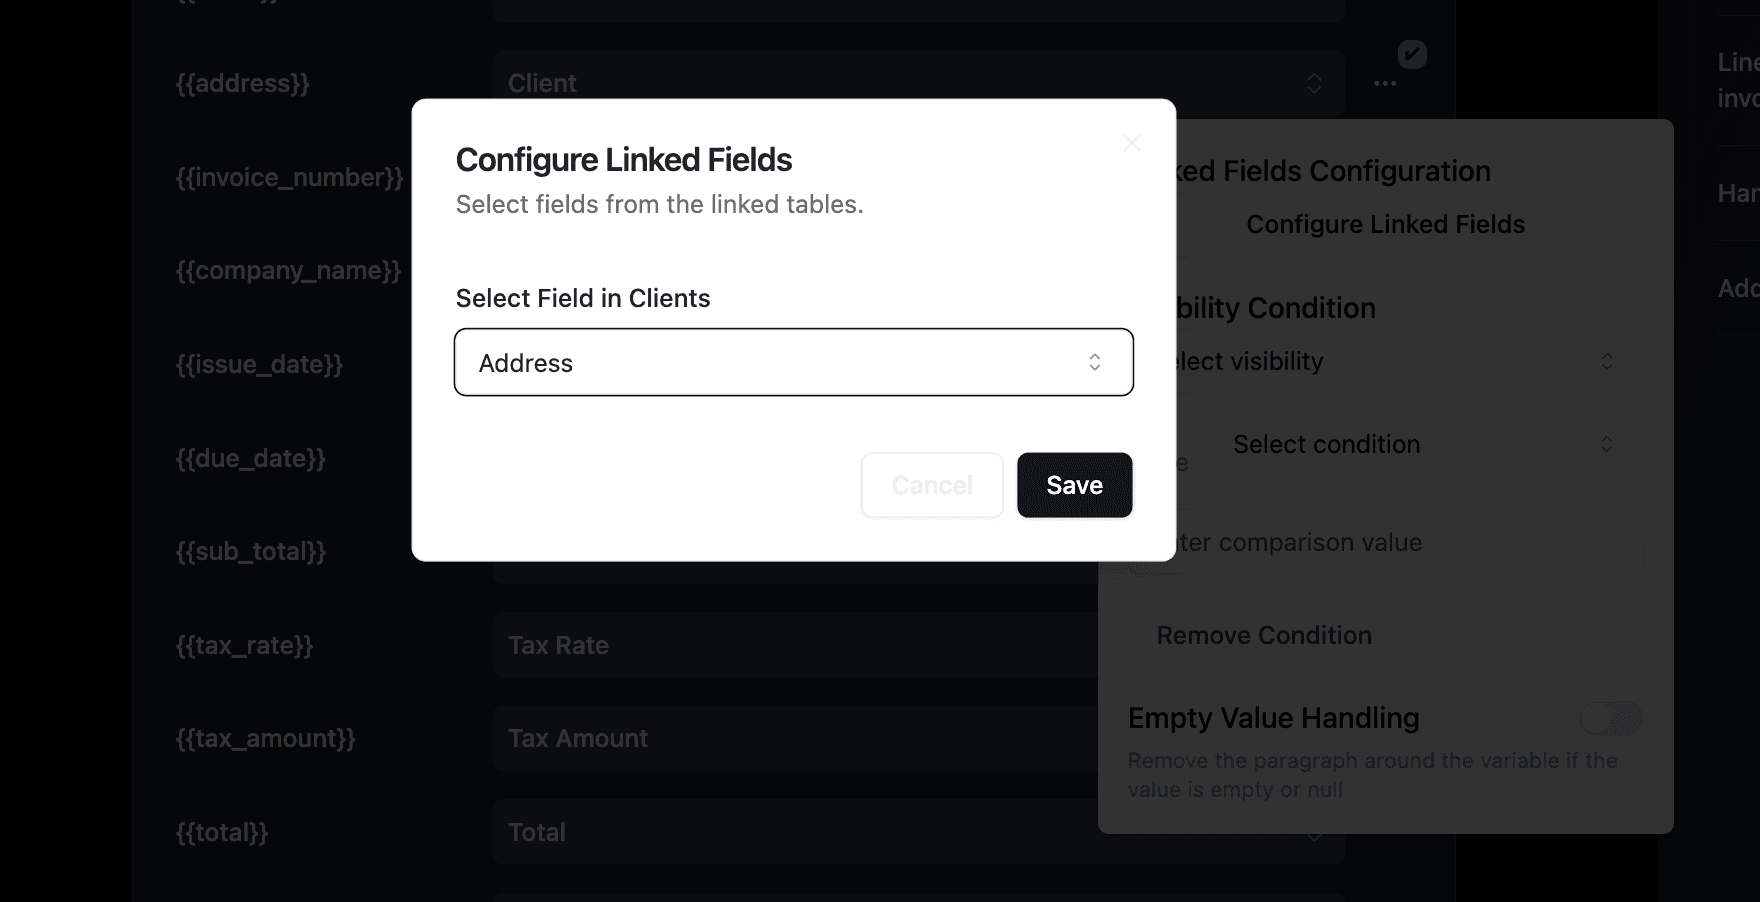
Mapping Line Items for Multiple Products
Configure the linked record field to pull data from each connected line item.
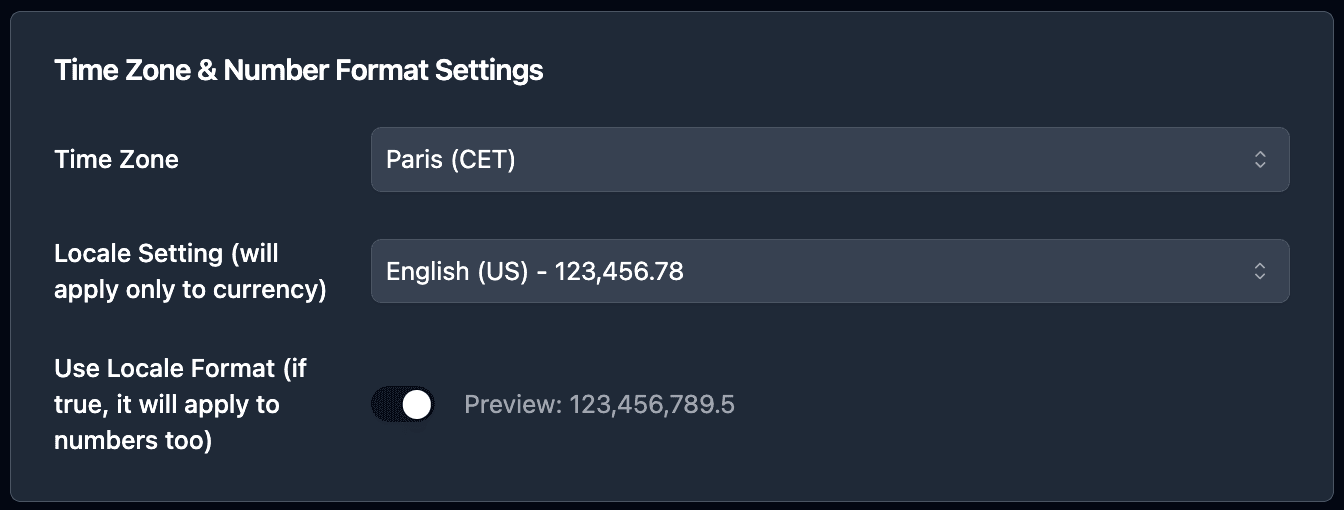
Apply Data Formatting
Use formatting options for dates, numbers, and currency values.
How to Automate Shipping Document Generation in Airtable
After your template and mapping are set up, choose how you want PDFs to generate.
| Method | Best for | How it works |
|---|---|---|
| Button | Manual processing | Staff clicks once per order to generate the PDF |
| Bulk generation | Batch shipping | Select multiple records and generate PDFs in parallel |
| Airtable Automations | Hands-off workflows | Generate PDFs automatically when a record meets conditions |
Option 1: Button Field (On-Demand Generation)
Add a button field to your Orders table for one-click generation.
Workflow:
- Open an order record
- Click "Generate Shipping Doc"
- PDF appears in the attachment field
- Print and include with shipment
Best for: Operations where staff manually processes each order.
Option 2: Bulk Generation (Batch Processing)
Generate shipping documents for multiple orders at once.
Workflow:
- Filter view to show orders ready to ship
- Select all records
- Click "Generate PDFs"
- All documents generate in parallel
Best for: End-of-day batch processing or preparing multiple shipments at once.
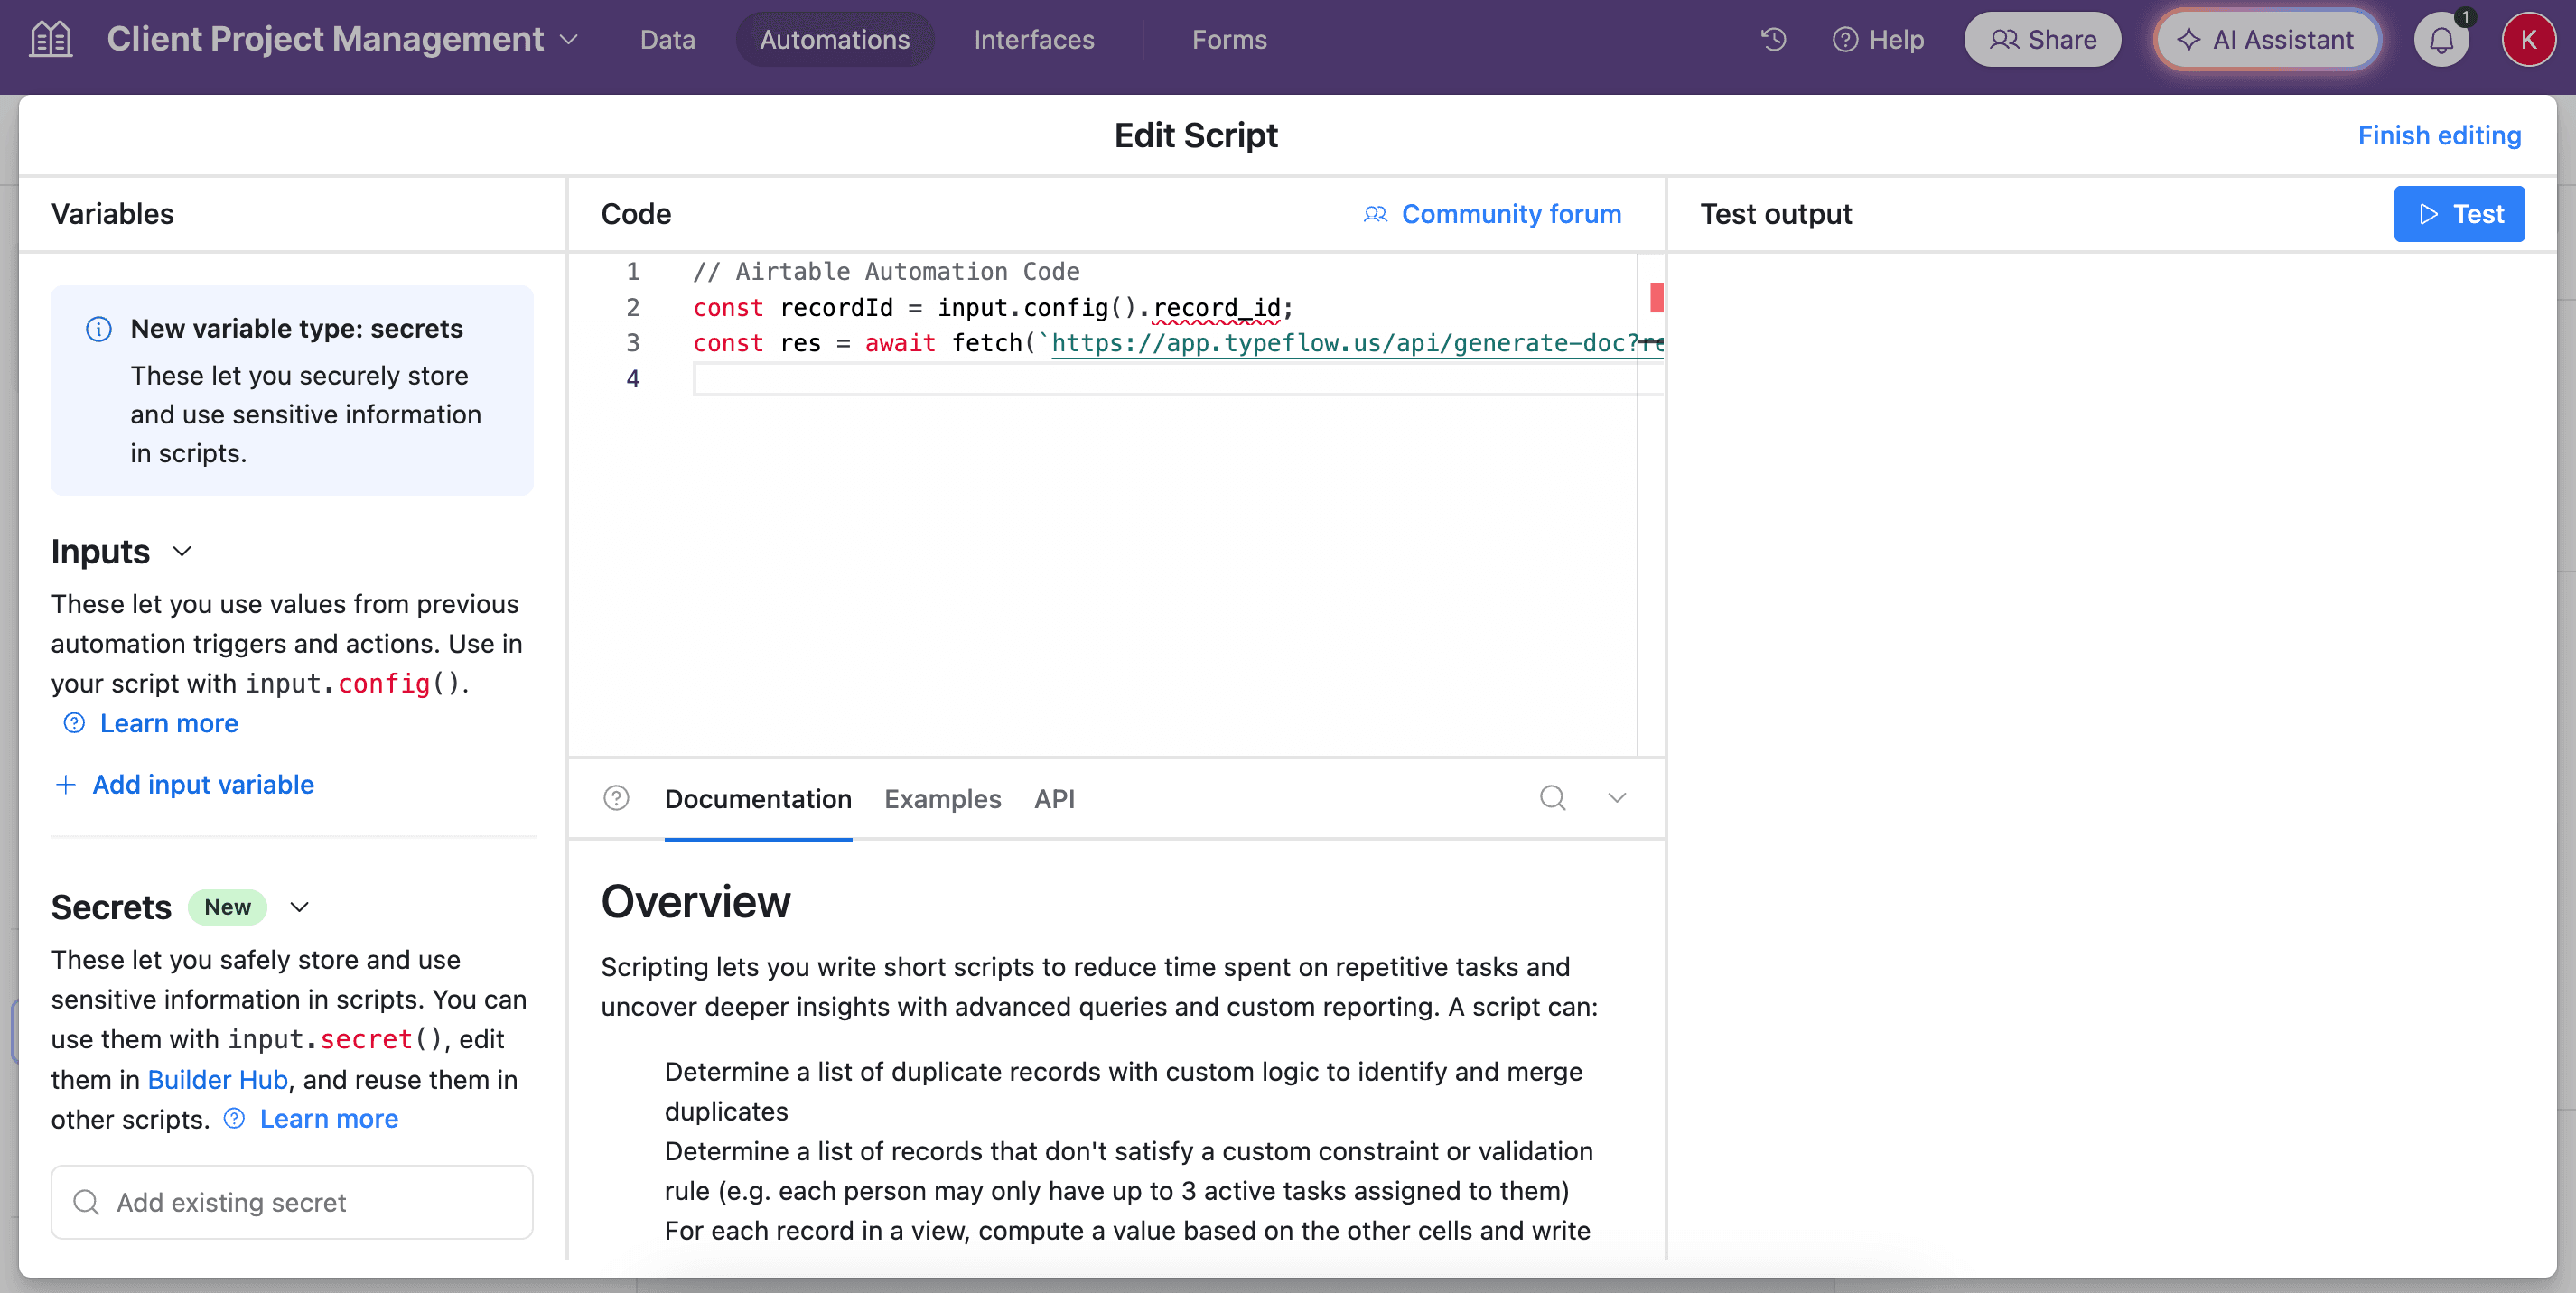
Option 3: Airtable Automations (Automatic Generation)
Set up automations to generate documents when orders reach a specific status.
Setup steps:
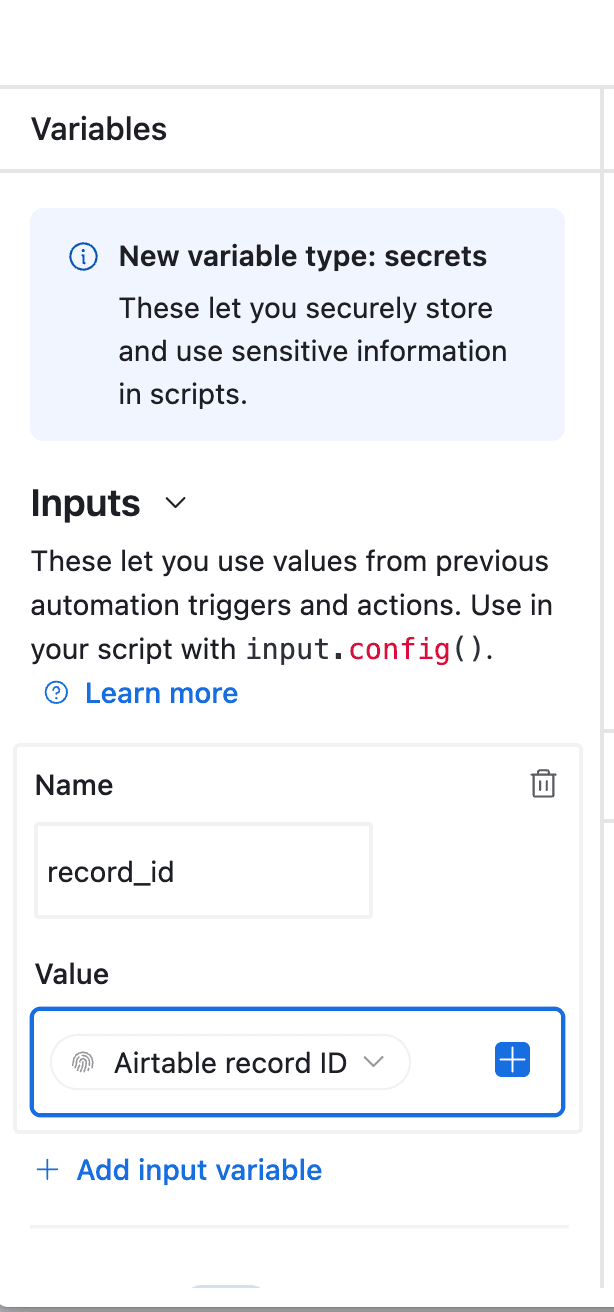
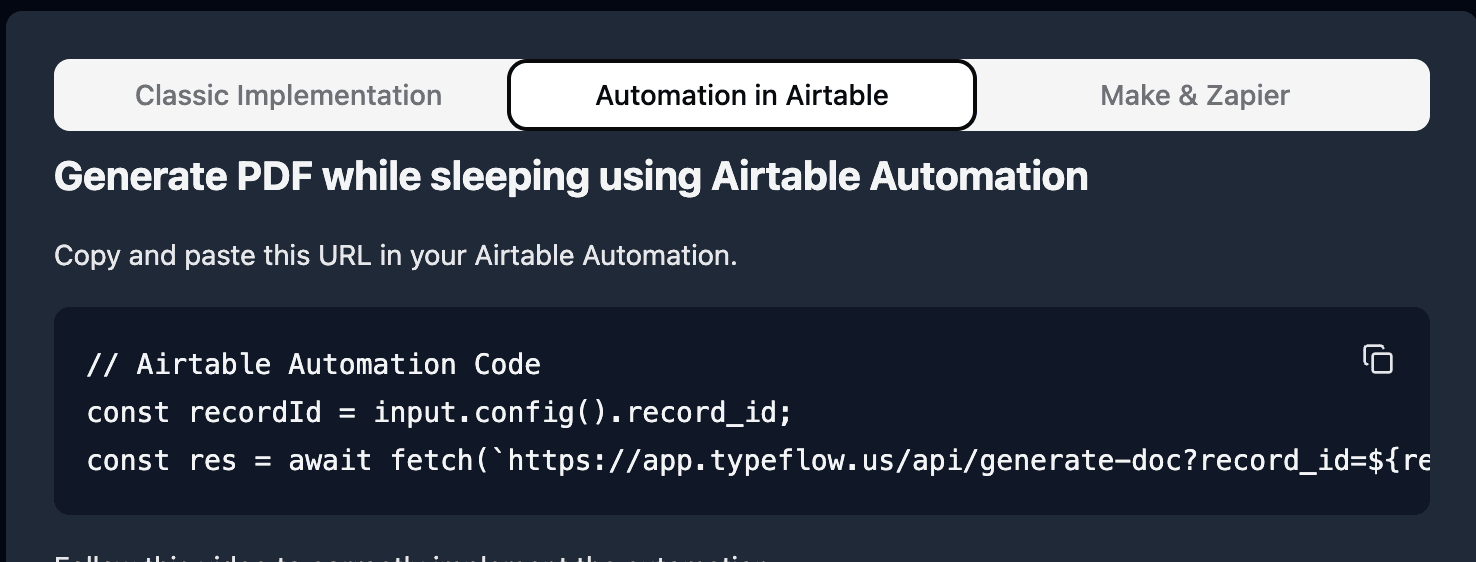
- Create a new Automation in Airtable
- Set trigger: "When record matches conditions" (Status = "Ready to Ship")
- Add action: "Run script"
- Paste the TypeFlow script
Pro Tip: Generate Multiple Documents at Once
If you need both a packing slip and commercial invoice for international orders, set up two automations with the same trigger but different templates. Both documents generate simultaneously when an order is ready to ship.
Automate your document generation
Start with 20 free documents. Built for businesses using Airtable.
Commercial Invoices for International Shipping
If you ship internationally, you'll typically need a commercial invoice that declares what's in the shipment and its value for customs.
- Product classification: HS code per item
- Origin details: Country of origin per item
- Value and terms: Currency, totals, and Incoterms
Additional Fields for Commercial Invoices
| Field Name | Field Type | Purpose |
|---|---|---|
| HS Code | Single line text | Harmonized System tariff code |
| Country of Origin | Single select | Where goods were manufactured |
| Invoice Number | Auto-number | Unique invoice identifier |
| Terms of Sale | Single select | Incoterms (FOB, CIF, etc.) |
| Currency | Single select | Transaction currency |
Commercial Invoice Template Structure
COMMERCIAL INVOICE

Invoice #: {{Invoice Number}}
Date: {{Ship Date}}
Currency: {{Currency}}

EXPORTER:
[Your Company Details]

IMPORTER:
{{Ship To Name}}
{{Ship To Address}}
{{Ship To City}}, {{Ship To Postal Code}}
{{Ship To Country}}

| Description | HS Code | Origin | Qty | Unit Value | Total |
|-------------|---------|--------|-----|------------|-------|
{{loop_0}}
| {{Product Name}} | {{HS Code}} | {{Country of Origin}} | {{Quantity}} | {{Unit Price}} | {{Line Total}} |

TOTAL VALUE: {{Total Value}}
TERMS: {{Terms of Sale}}

I declare that the information on this invoice is true and correct.

Signature: ________________  Date: ________________
Real-World Use Cases
E-commerce Fulfillment
An online store generates packing slips automatically when orders are marked "Ready to Ship." At the end of each day, the team bulk-generates any remaining documents for batch shipping.
Wholesale Distribution
A B2B distributor generates commercial invoices for international orders with HS codes and country of origin for customs. Separate templates handle domestic packing slips vs international invoices.
3PL / Warehouse Operations
A third-party logistics provider triggers document generation from WMS status updates. Each shipment gets both a packing slip and bill of lading generated simultaneously using two automations with the same trigger.
Best Practices for Shipping Document Generation
Test Before Going Live
Generate sample documents with test data before using in production. Verify all fields populate correctly and formatting looks professional.
Use Consistent Field Naming
Airtable field names must match template placeholders exactly. Avoid spaces or special characters when possible. Use underscores instead (e.g., Ship_To_Name).
Handle Missing Data Gracefully
Some orders may have empty fields. Design your template so missing data doesn't create awkward blank spaces or broken formatting.
Keep Templates Simple
Complex formatting can cause PDF generation issues. Use standard fonts, simple tables, and minimal styling for reliable results.
Common Issues and How to Fix Them
Variables Not Populating
Problem: Template shows {{Field_Name}} instead of actual data.
Solution: Check that Airtable field names match template placeholders exactly, including capitalization and underscores.
Line Items Not Displaying
Problem: Products don't appear in the generated document.
Solution:
- Verify linked records are properly connected in Airtable
- Check loop syntax is correct in template
- Ensure line items mapping is configured in TypeFlow
Formatting Problems in PDFs
Problem: Generated PDFs look different from Google Docs template.
Solution: Simplify template formatting. Use standard fonts (Arial, Times New Roman), avoid complex table borders, and remove unnecessary styling.
Start Generating Shipping Documents from Airtable Today
Automating shipping paperwork saves time and keeps every order accurate. With TypeFlow + Google Docs templates, you can generate PDFs directly from Airtable in a few clicks. See what users say about TypeFlow on G2.
- Faster fulfillment: Less manual admin work per order
- Cleaner data: Fewer copy-paste mistakes
- More consistency: Every document follows the same format
Related Shipping & Fulfillment Documents
- Generate Packing Lists from Airtable - Automated packing list PDFs for warehouse workflows
- Print Labels from Airtable - Product, shipping, and inventory labels with barcodes
- Generate Proof of Delivery from Airtable - POD documents with recipient signatures
Automate your document generation
Start with 20 free documents. Built for businesses using Airtable.
Frequently Asked Questions
Find answers to the most common questions about this feature.
Popular Questions
All Questions
Need more help?
Our team is here to help you solve all your problems and answer your questions.
Contact Us
Kevin from TypeFlow
•AuthorKevin Rabesaotra is a growth engineer and automation specialist with 8+ years of experience building no-code solutions. As Founder & CEO of TypeFlow, he has helped hundreds of businesses automate document generation and streamline workflows with Airtable integrations. Previously, Kevin was a Product Lead specializing in growth engineering, running experiments to drive revenue, retention, and lead generation.
More articles
How to Print Labels from Airtable with Quantity Control (Step by Step)
Print multiple labels per Airtable record based on a quantity field. Step-by-step guide for linked records mode and quantity repeat mode with barcodes and Avery sheets.
Read articleHow to Print Avery Mailing Labels from Airtable
Print Avery mailing labels (5160, 5161, 5162) from Airtable without Word mail merge. Step-by-step guide with print label mode, automation, and bulk generation.
Read articleHow to Create Inventory Labels with Barcodes in Airtable
Create inventory labels with Code 128, EAN-13, or QR barcodes from Airtable. Step-by-step guide for warehouse, retail, and asset tracking with thermal and Avery printers.
Read article