How to Create Certificates of Conformity in Airtable Automatically
You can generate Certificates of Conformity (CoC) directly from your Airtable quality data - batch numbers, product specs, test results, and supplier details pulled from linked tables into a single document. Connect TypeFlow, use a Google Docs or HTML/CSS template, and add authorized e-signatures automatically when batches are approved.
Certificates of conformity are one of several manufacturing documents you can automate - see our complete guide to manufacturing document automation in Airtable.
By the end, you'll have a system that:
- Creates CoCs with product specs, batch numbers, and test results from Airtable
- Pulls data from linked tables for suppliers, inspections, and compliance standards
- Generates certificates on-demand or automatically when batches are approved
- Includes authorized signatures with legally binding e-signature
Key Takeaways
- Page Designer limitations: Airtable's built-in tool can't bulk export, has limited formatting, and doesn't support linked record data or automation
- Three generation methods: Manual export, Zapier/Make workflows, or native document automation with TypeFlow
- Template-first approach: Create a Google Docs template with
{{variables}}that map directly to your Airtable fields - Linked records support: Pull test results, supplier data, and inspection records from related tables automatically
- Full automation: Trigger CoC generation when batch status changes to "Approved" or "Ready to Ship"
What Is a Certificate of Conformity
A Certificate of Conformity (CoC) is a document from a manufacturer or supplier confirming a product meets specific standards, regulations, or customer requirements. It's commonly used in manufacturing, import/export, and regulated supply chains.
Common use cases:
- Manufacturing: Confirms finished goods meet quality specifications before shipment
- Import/Export: Required by customs authorities for regulatory compliance
- Supply Chain: Provides traceability and accountability between vendors and buyers
- Medical Devices: Mandatory for regulatory approval and lot release
- Aerospace: Required for AS9100 and FAA compliance - often paired with spec sheets and production orders
A CoC typically includes product identification, batch/lot numbers, applicable specifications, test results, compliance declarations, and an authorized signature. It is often issued alongside a QC report and traceability documentation.
Why Airtable Page Designer Falls Short for Certificates of Conformity
While Airtable's Page Designer works for simple one-page documents, it has critical limitations for professional CoC generation.
No Bulk PDF Export
Page Designer exports one record at a time. When you need to issue CoCs for 50+ batches before a shipment, clicking through each record isn't sustainable.
Limited Linked Record Support
CoCs often need to pull test results from a separate Inspections table, supplier data from a Suppliers table, and compliance standards from a Standards table. Page Designer struggles with nested linked record data.
No Automation or E-Signature
Quality workflows require automated generation when batches are approved, plus authorized signatures for compliance. Page Designer offers neither.
No Built-In Verification
Page Designer creates static PDFs with no way to verify authenticity. When customers or auditors need to confirm a CoC is genuine, you're stuck doing manual lookups. A proper CoC system includes verification URLs or QR codes that link back to the source data.
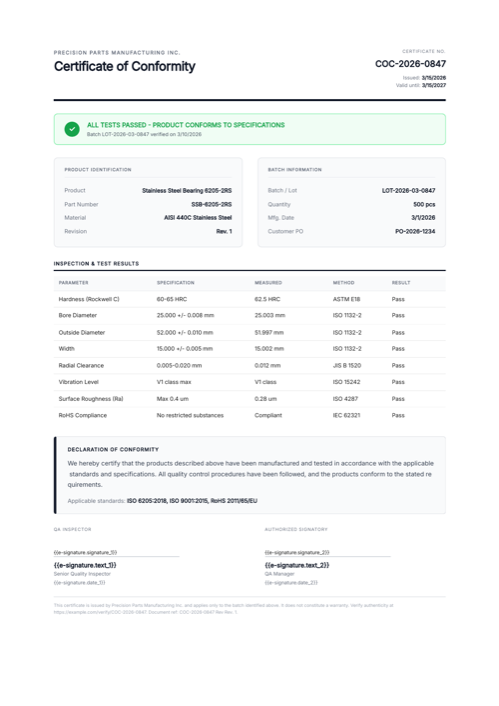
Here's an example CoC generated from Airtable data with TypeFlow, including test results table and e-signature blocks. Click to open the full PDF, or duplicate the demo base:
Ready-to-use template
Certificate of Conformity
Duplicate the Airtable base, paste the template in Typeflow, then generate your first PDF in minutes.
Free tier available • No credit card required
Three Methods to Generate Certificate of Conformity PDFs
| Method | Best For | Limitations |
|---|---|---|
| Manual Export with Page Designer | One-off CoCs, simple layouts | No bulk export, limited linked records |
| Zapier/Make with PDF Tool | Teams already using automation platforms | Multiple subscriptions, complex setup |
| Native Document Automation | High-volume, recurring CoC generation | Requires initial template setup |
Method 1: Manual Export with Page Designer
Only suitable for occasional, simple certificates for individual batches. You design a layout in Page Designer, then manually export PDFs one record at a time. Not recommended for serious quality management operations.
Method 2: Zapier or Make with a PDF Tool
Connect Airtable to an external PDF generation service through Zapier or Make. This works but requires managing multiple subscriptions, troubleshooting across platforms, and dealing with webhook complexity.
Method 3: Native Document Automation with TypeFlow
Use a dedicated document automation tool that integrates directly with Airtable. Create templates in Google Docs with {{variables}}, map them to your Airtable fields, and generate CoCs in bulk or on autopilot.
This guide focuses on Method 3 - the most efficient approach for quality management workflows.
How to Set Up Your Airtable Base for Certificate of Conformity Data
The schema below matches the demo base you can duplicate. It uses two tables: Batches (main, one record per batch per CoC) and Test Results (linked via loop). Each record in Batches generates one CoC PDF.
Batches Table (main)
| Field Name | Field Type | Purpose |
|---|---|---|
| Batch Title | Single line text | Primary field (e.g. "LOT-2026-03-0847 - SSB-6205") |
| Product Name | Single line text | Product being certified |
| Part Number | Single line text | Part / model number |
| Material | Single line text | e.g. "AISI 440C Stainless Steel" |
| Batch Number | Single line text | Lot identifier |
| Quantity | Number | Number of units in the batch |
| Unit | Single line text | e.g. "pcs", "kg" |
| Manufacturing Date | Date | |
| Customer PO | Single line text | Customer purchase order reference |
| Certificate Number | Single line text | Unique CoC identifier (e.g. "COC-2026-0847") |
| Revision | Single line text | Document revision |
| Issue Date | Date | Date the CoC is issued |
| Expiration Date | Date | Certificate validity end date |
| Test Date | Date | Date inspection was completed |
| Applicable Standards | Single line text | e.g. "ISO 6205:2018, ISO 9001:2015, RoHS 2011/65/EU" |
| Compliance Statement | Long text (rich text ON) | Declaration of conformity text |
| Inspector Name | Single line text | QA inspector who performed the tests |
| Inspector Title | Single line text | e.g. "Senior Quality Inspector" |
| Signatory Name | Single line text | Authorized person who signs the CoC |
| Signatory Title | Single line text | e.g. "QA Manager" |
| Company Name | Single line text | Issuing company |
| Verification URL | URL | URL to verify the certificate |
Test Results Table (linked, feeds the test results section)
| Field Name | Field Type | Purpose |
|---|---|---|
| Test Parameter | Single line text | What was tested (e.g. "Hardness") |
| Specification | Single line text | Required range (e.g. "60-65 HRC") |
| Measured Value | Single line text | Actual measurement (e.g. "62.5 HRC") |
| Test Method | Single line text | Standard used (e.g. "ASTM E18") |
| Result | Single line text | "Pass" or "Fail" |
| Batch | Link to Batches | Links to the batch being tested |
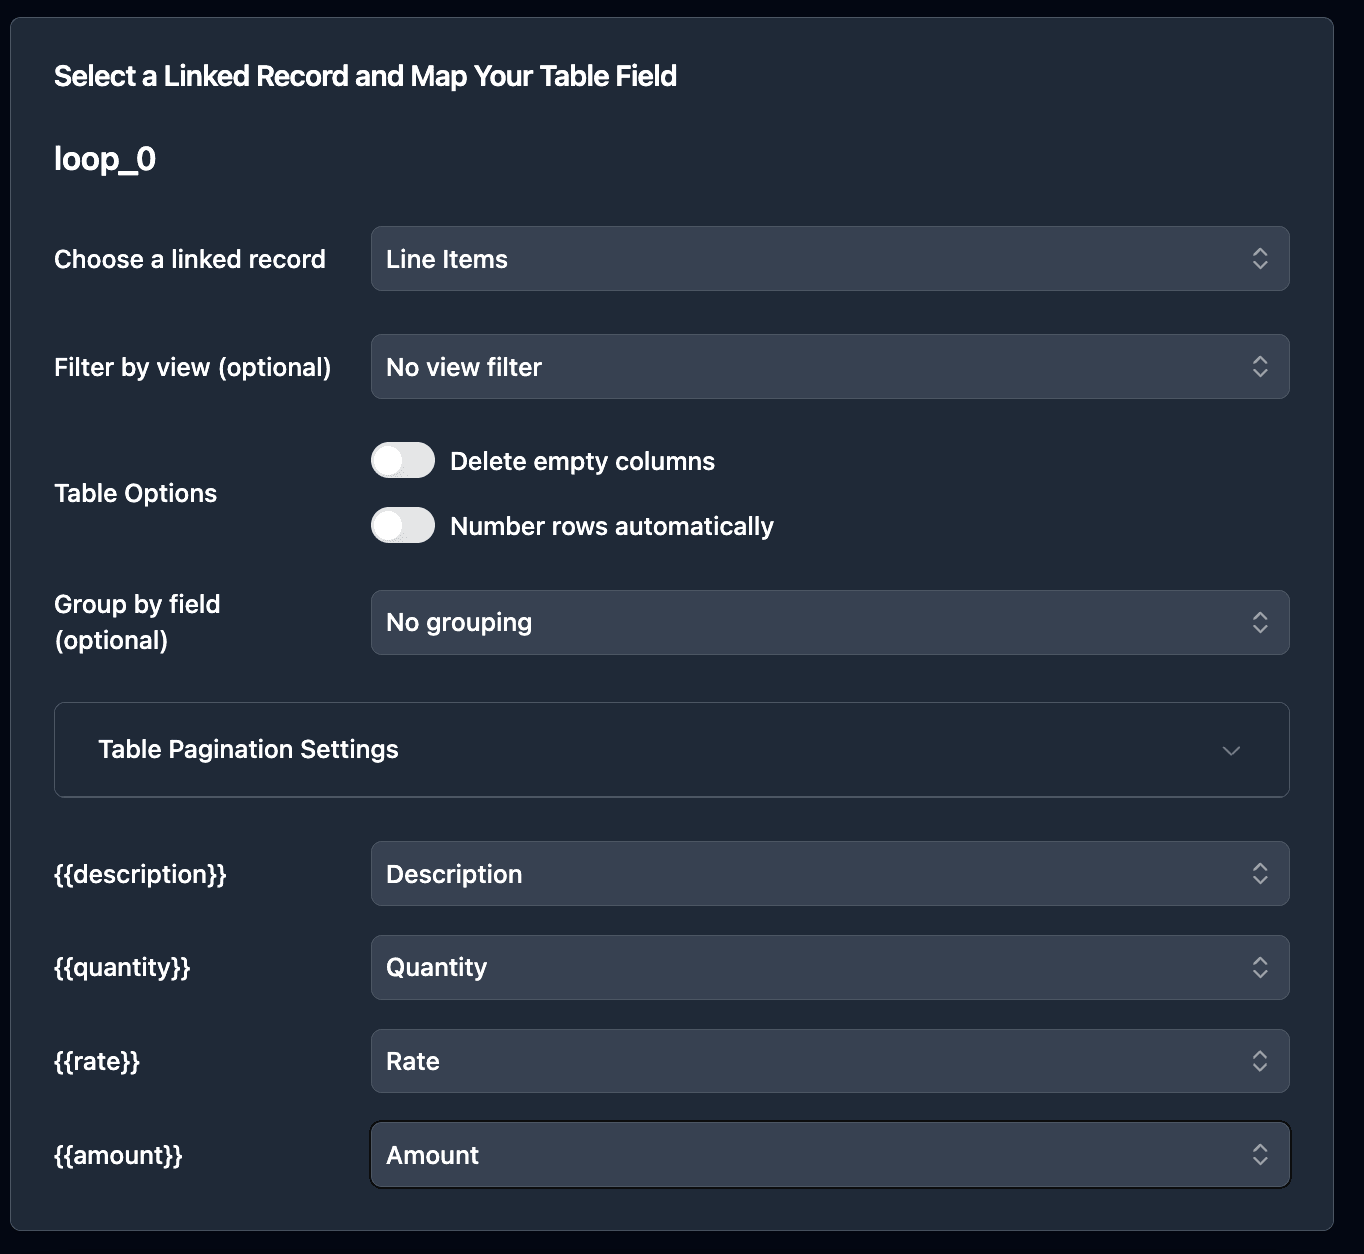
The test results table is rendered dynamically via a linked-record loop. Add as many test rows as needed per batch - the CoC expands automatically. In the template, you reference fields by name: {{Product Name}}, {{Batch Number}}, {{Test Parameter}}, etc. No dot notation needed - TypeFlow resolves linked fields automatically via the mapping UI.
How to Design Your Certificate of Conformity Template
TypeFlow supports both Google Docs templates and Template Builder. For CoCs with test result tables and complex formatting, Google Docs often provides more control.
Standard CoC Layout and Required Sections
A professional Certificate of Conformity typically includes:
- Header - Company logo, document title, certificate number
- Product Identification - Product name, part number, batch/lot number, quantity
- Specification Block - Applicable standards, test methods, acceptance criteria
- Test Results - Measured values, pass/fail status (often in a table)
- Compliance Declaration - Statement confirming conformity to requirements
- Signature Block - Authorized signatory name, title, date, signature
Adding Airtable Field Variables
Use placeholders that match your Airtable field names:
CERTIFICATE OF CONFORMITY

Certificate No: {{Certificate_Number}}
Issue Date: {{Issue_Date}}

PRODUCT IDENTIFICATION
Product Name: {{Product_Name}}
Part Number: {{Part_Number}}
Batch/Lot Number: {{Batch_Number}}
Quantity: {{Quantity}} {{Unit_of_Measure}}
Manufacturing Date: {{Manufacturing_Date}}

APPLICABLE STANDARDS
{{Applicable_Standards}}

DECLARATION OF CONFORMITY
We hereby certify that the above-referenced product has been
manufactured and tested in accordance with the applicable
standards and conforms to all specified requirements.

This certificate is valid until {{Expiration_Date}}.

AUTHORIZED BY
_______________________
{{Authorized_Signatory}}
{{Signatory_Title}}
Date: {{Issue_Date}}
Including Test Results in a Table
For products with multiple test parameters, use a table with {{loop_0}} to repeat rows for each linked test record:
TEST RESULTS

| Parameter | Specification | Measured | Result |
| {{loop_0}}{{Test_Parameter}} | {{Specification}} | {{Measured_Value}} | {{Test_Result}} |
The row with {{loop_0}} repeats for each linked record in your Tests field.
Template Builder (Visual Editor)
Template Builder is TypeFlow's visual HTML editor - an alternative to Google Docs when you want precise control over your certificate layout.
Why use Template Builder for CoCs:
- Drag-and-drop layout control
- Consistent formatting across all certificates
- No Google account required
- Pre-built compliance document blocks
- Easy logo and certification mark placement
To use Template Builder:
- Start a new flow in TypeFlow
- Choose "Template Builder" instead of Google Docs
- Add text blocks with your CoC sections
- Insert variables from the Fields panel
- Add a table for test results
- Include signature block at the bottom
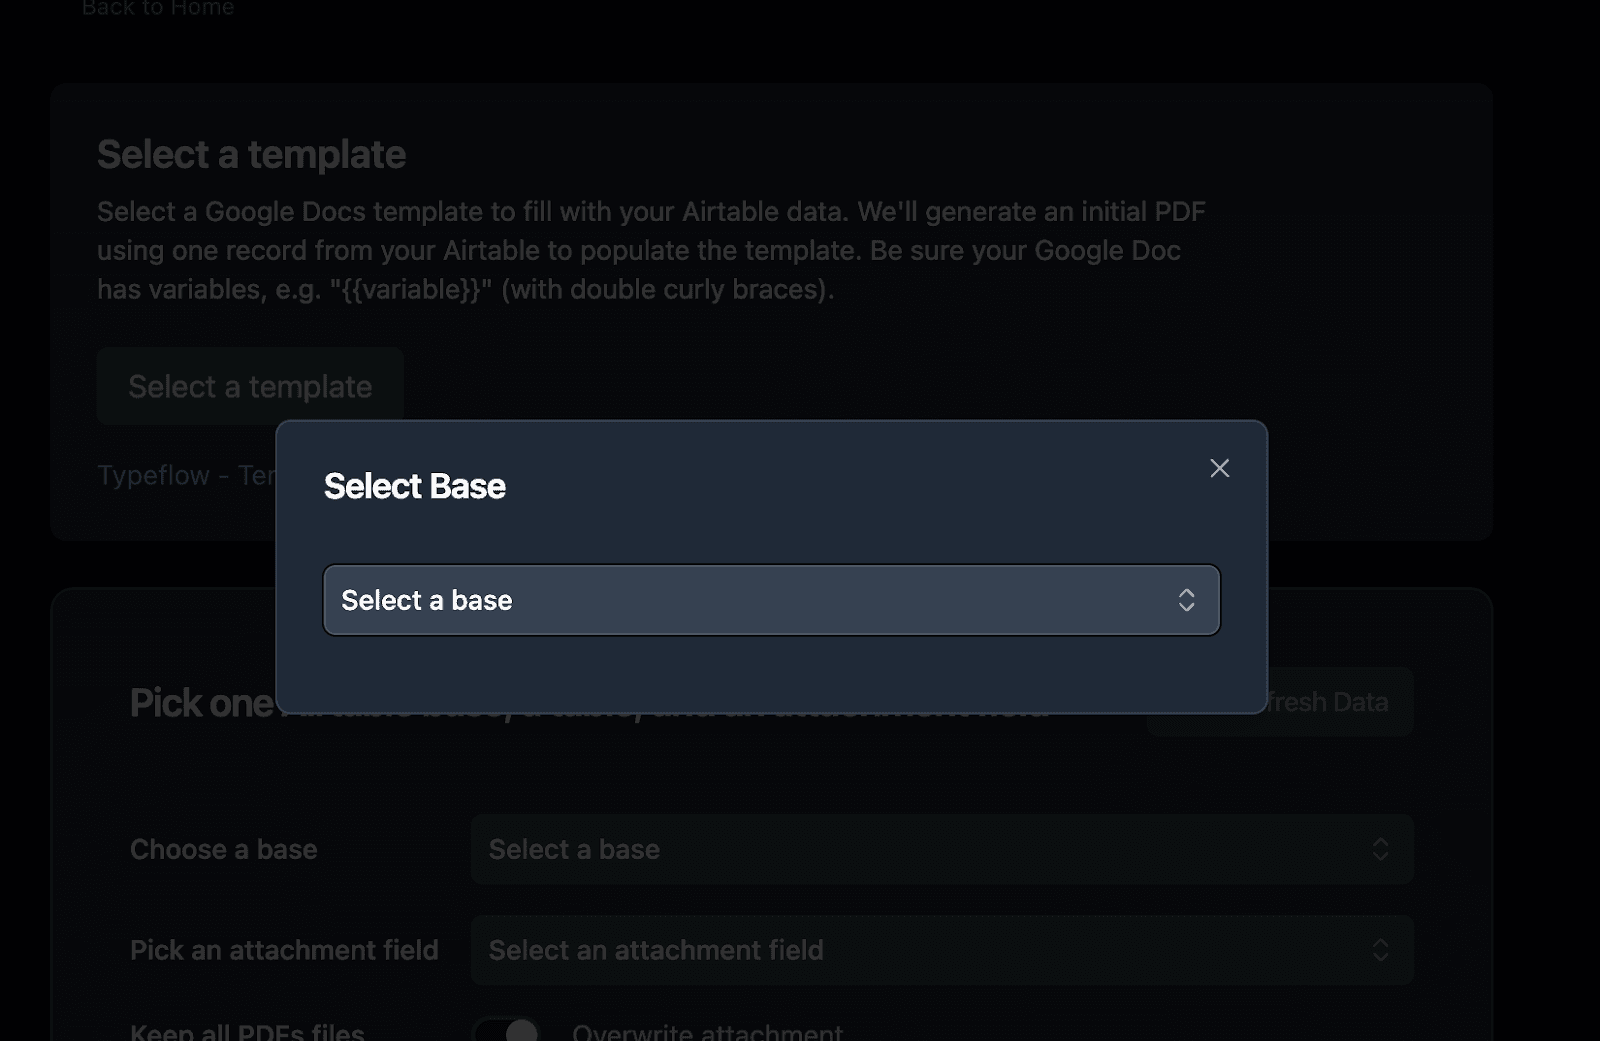
Connect TypeFlow to Your Airtable Base
If not already done, connect TypeFlow to your Airtable base:
-
Sign in to your TypeFlow account
-
Visit this link to integrate Airtable with TypeFlow: Integrate Airtable with TypeFlow
-
Select "Connect to Airtable"
-
Authorize TypeFlow to access your Airtable account
-
Select the base and table you want to use (in this case, your Batches or Products table)
Configure Your Certificate of Conformity Workflow
Once connected, configure your flow in TypeFlow:
-
Sign in to your TypeFlow account
-
Click "Start a new automation workflow"
-
Select "Google Docs"
-
Pick your CoC template
Now connect TypeFlow to your Airtable base:
- Select your Airtable base from the dropdown menu
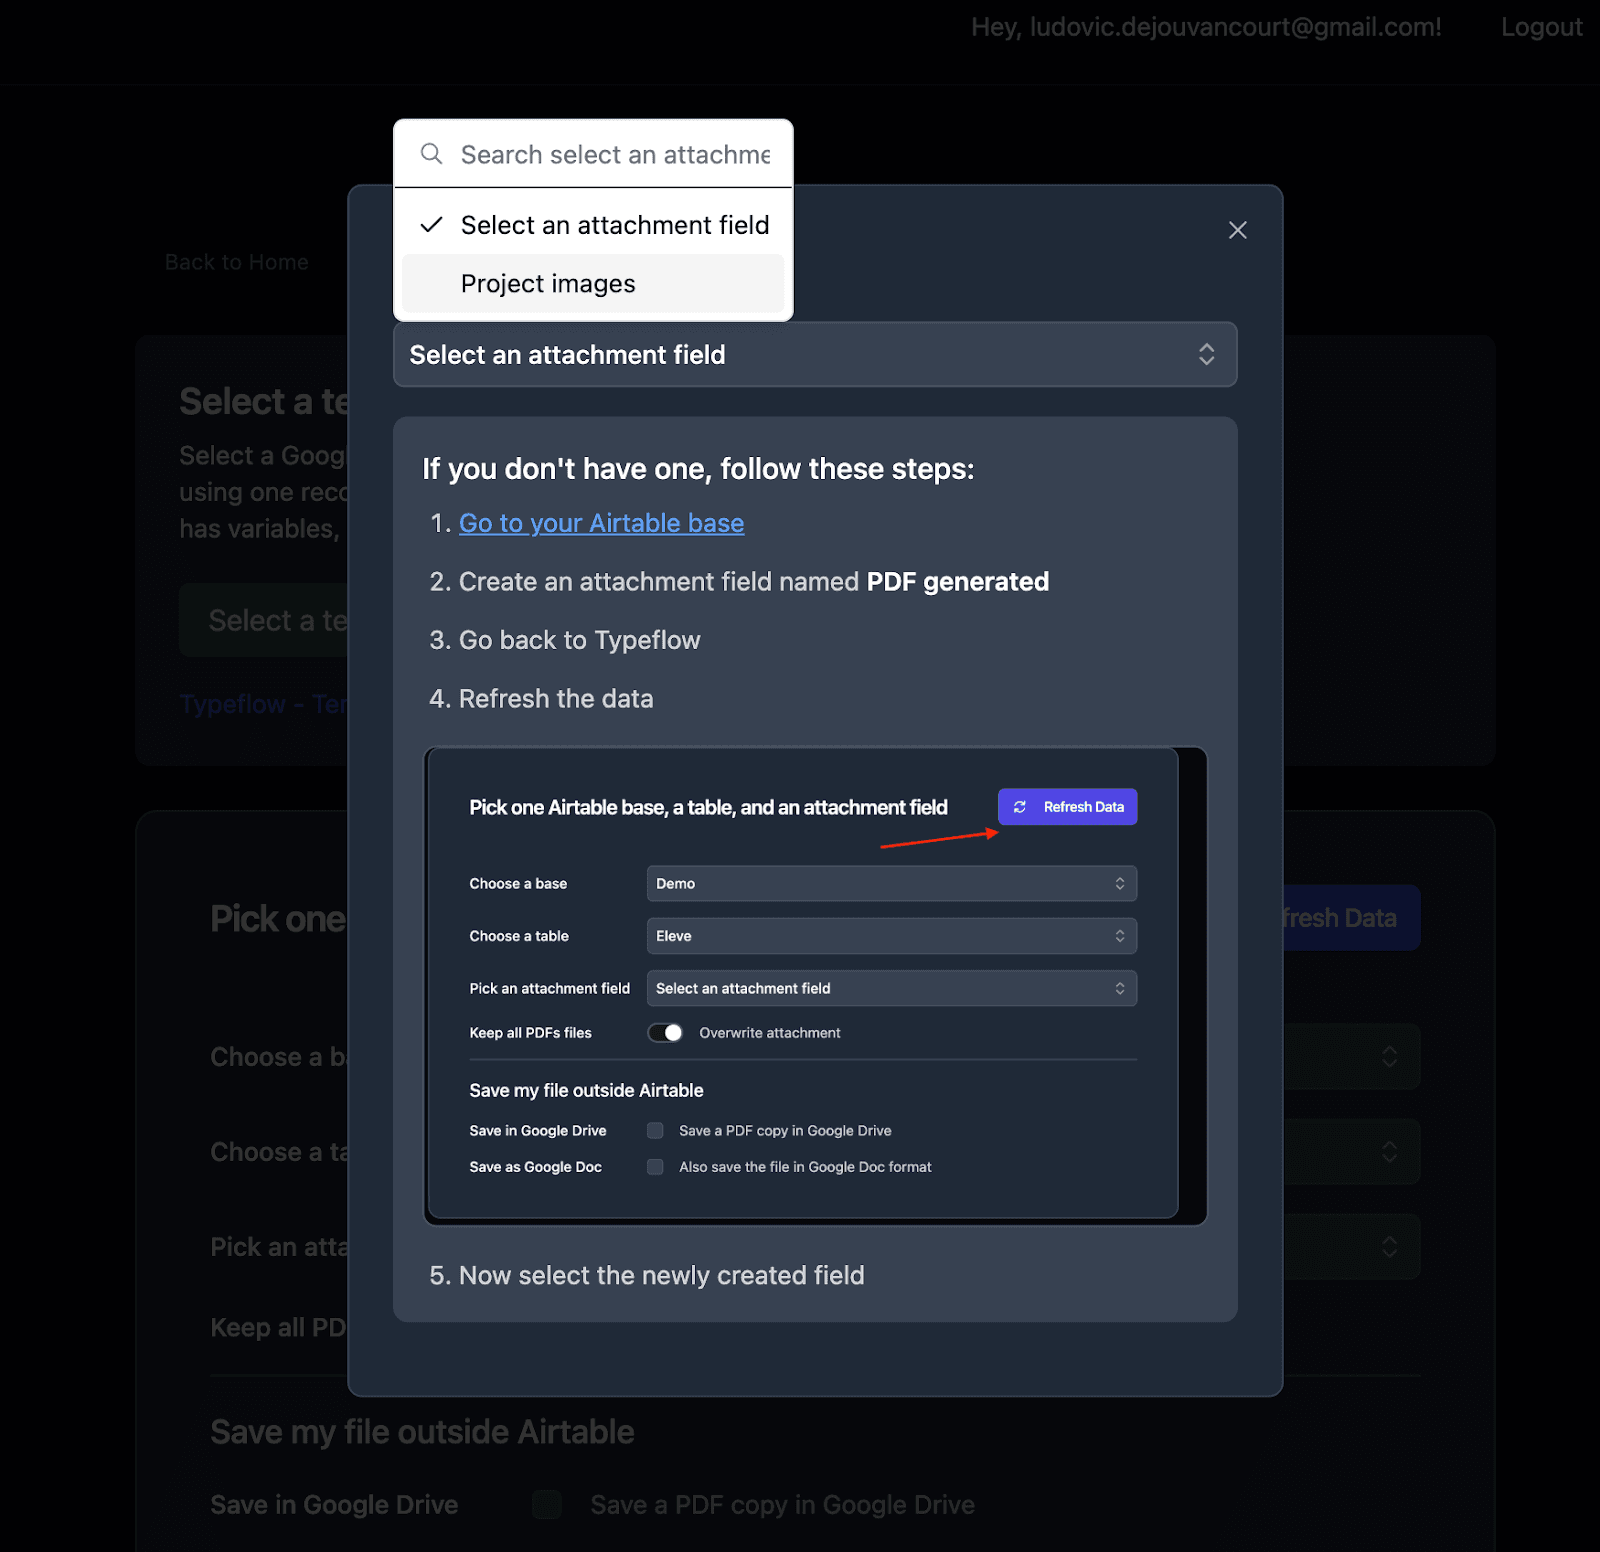
- Choose the specific table where you want to generate your PDF (in your case the Batches or Products table)
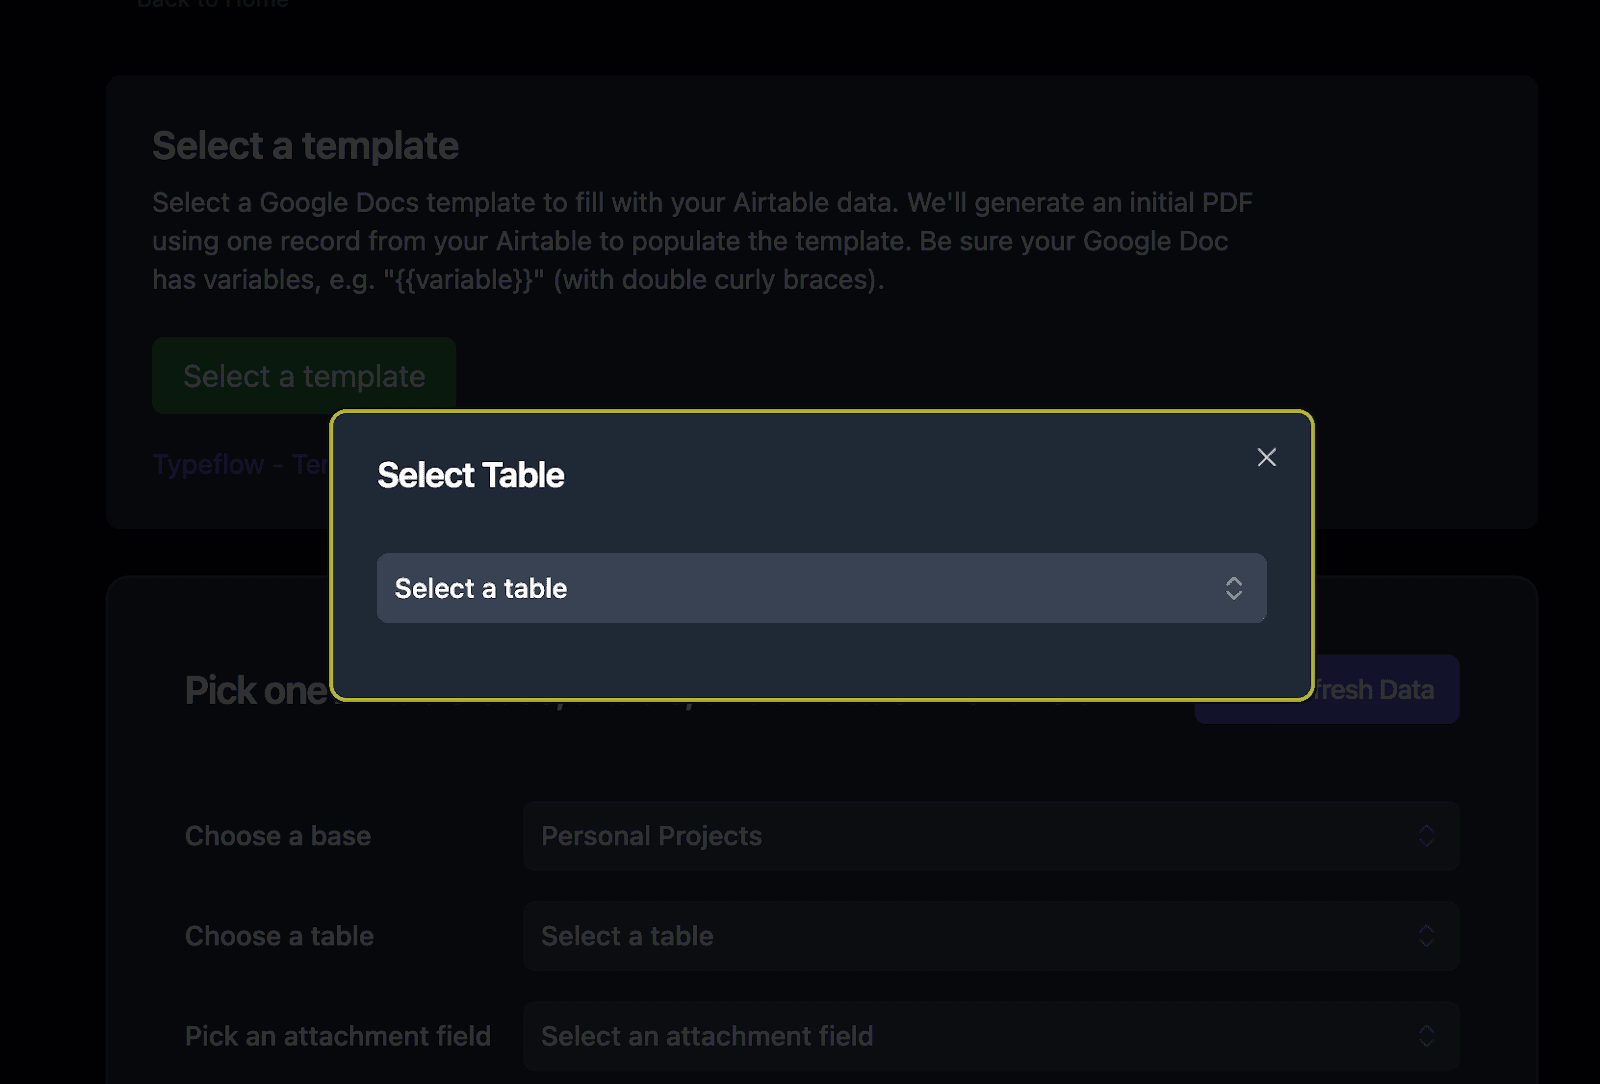
- Set up the attachment field where generated CoC PDFs will be saved
Pro Tip: Number Formatting
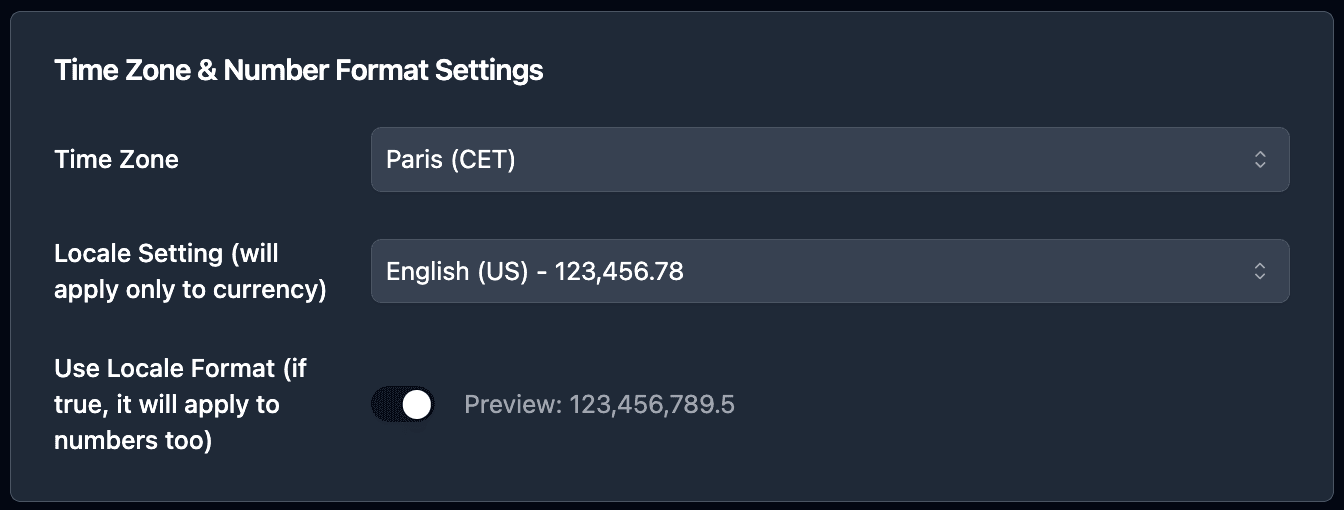
If you need to adjust the number formatting for measurements or specifications on your CoC, you can adjust your locale settings. It will format values according to your regional standards (decimal separators, etc.).
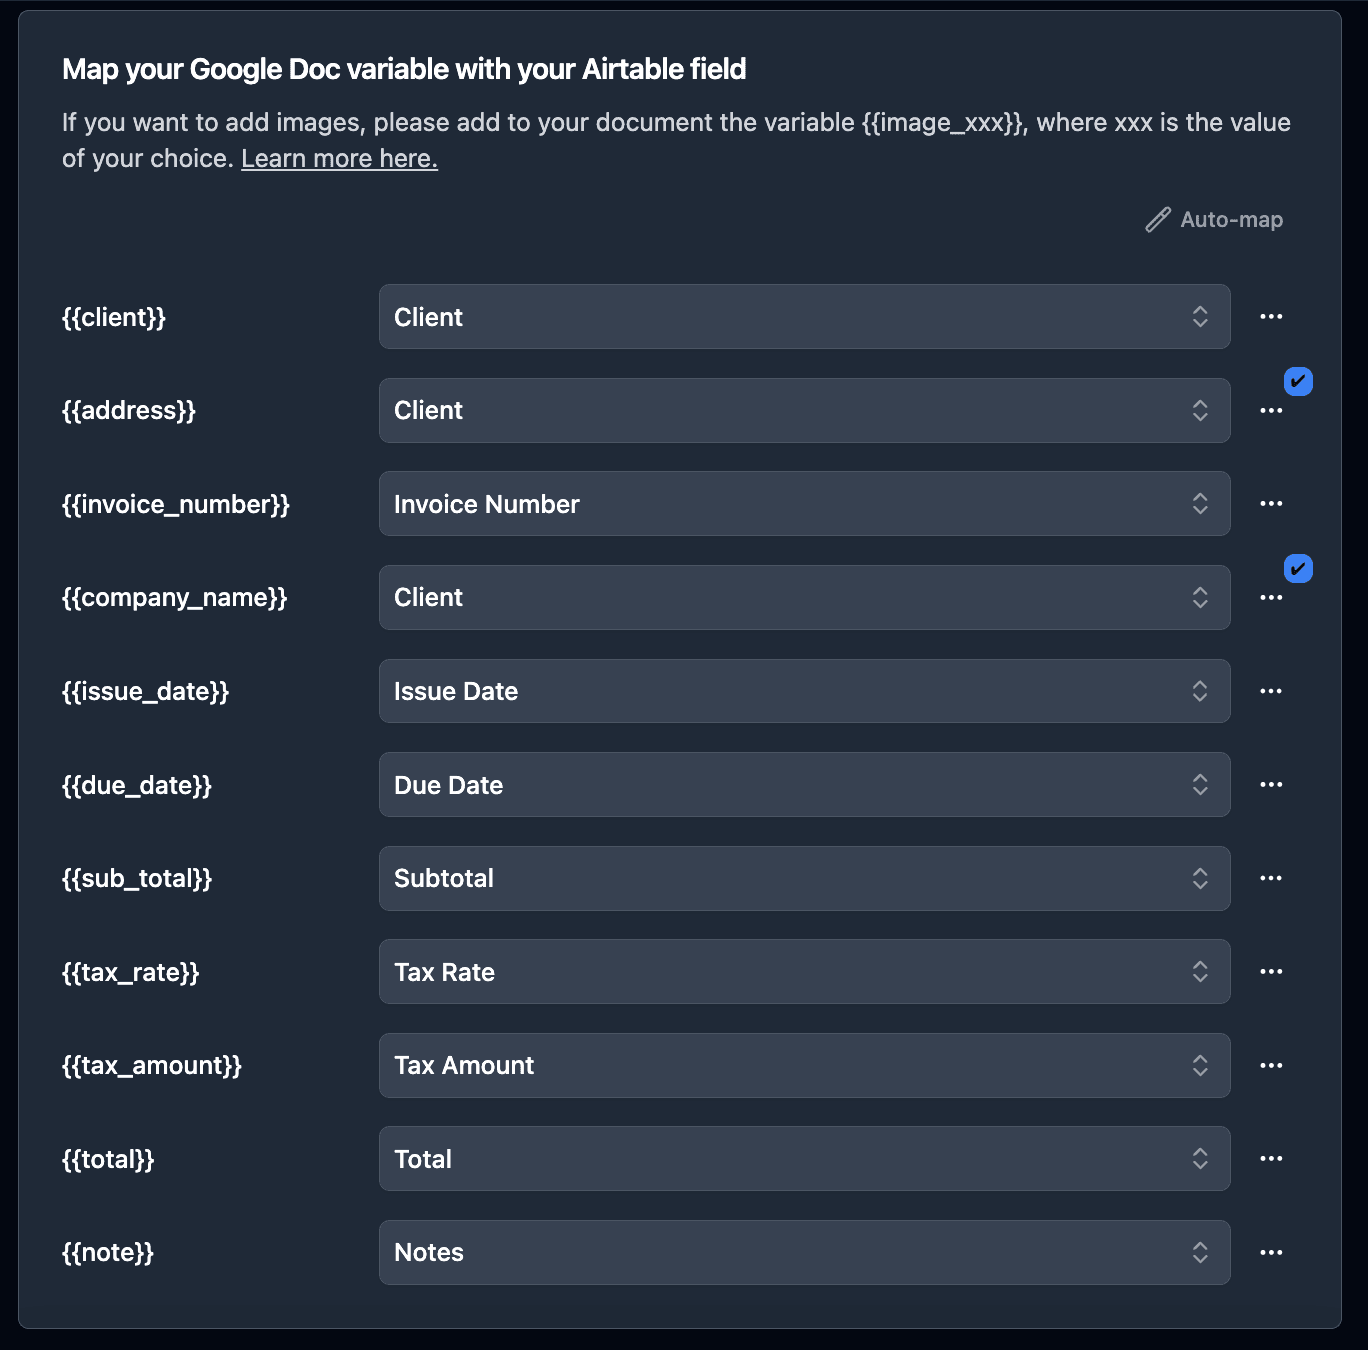
- Map Airtable fields to your template variables
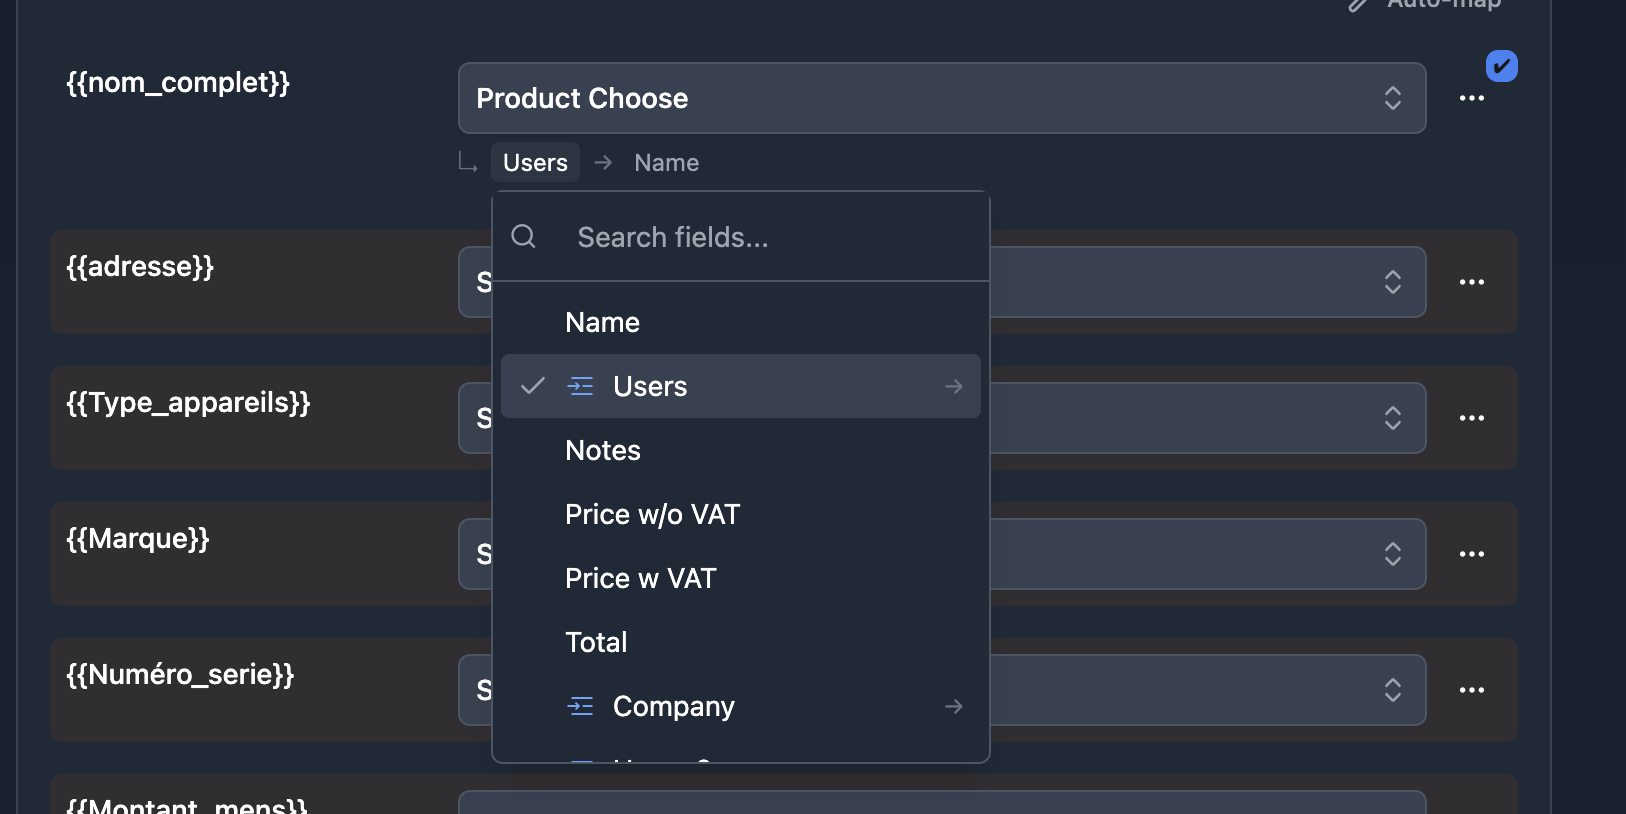
Pro Tip: Accessing Linked Records
No need to add rollup fields to access test results or supplier data from linked tables! TypeFlow supports navigation through up to 3 levels of nested linked records. Just 2 clicks to access any field from a linked table.
- Select the linked record field from the dropdown (e.g., Tests, Supplier)
- Click the breadcrumb that appears below the field
- Select the field you want to access (e.g., Measured Value, Supplier Name)
For deeper navigation like Batch → Product → Supplier → Certification, just keep clicking through the breadcrumbs!
- For test results stored in a linked table, select your linked Tests field to populate the
{{loop_0}}rows
- Optionally set a custom filename format like
COC-{{Batch_Number}}-{{Issue_Date}}
Pro Tip: Test First
Test your template with a few batch records to ensure proper mapping before generating CoCs for all batches. Check that test results populate correctly in the table rows.
How to Generate Certificates of Conformity
Once your flow is configured, you have three ways to generate CoCs depending on your workflow needs.
Option 1: Manual Generation with Button Field
Add a button field to your Batches table for quick one-click generation:
- In Airtable, create a new Button field called "Generate CoC"
- Set the action to "Open URL"
- In TypeFlow, copy the generation URL from your flow settings
- Paste the URL in the button configuration
Click the button on any batch record to generate its Certificate of Conformity instantly. The PDF saves to your attachment field within seconds.
Best for: QA inspectors generating CoCs after completing inspections, one-off generation for urgent shipments, or testing your flow before setting up automation.
Option 2: Bulk Generation with TypeFlow Extension
When you have dozens or hundreds of batches ready to ship, generating CoCs one by one isn't practical. The TypeFlow extension supports bulk generation.
- Install the TypeFlow extension from Airtable's extension marketplace
- Enter your API key (found in your flow settings)
- Filter your view to "Ready for CoC" batches
- Select the records you want to generate PDFs for
- Click Generate
The extension creates PDFs for all selected records and saves them to your configured attachment field. Generate hundreds of CoCs in one action.
Best for: End-of-shift processing, shipment preparation, or generating CoCs for an entire production run.
Option 3: Automated Generation with Airtable Automations
Full automation removes manual steps entirely. Use Airtable Automations to trigger CoC generation when a batch is approved - no clicks required.
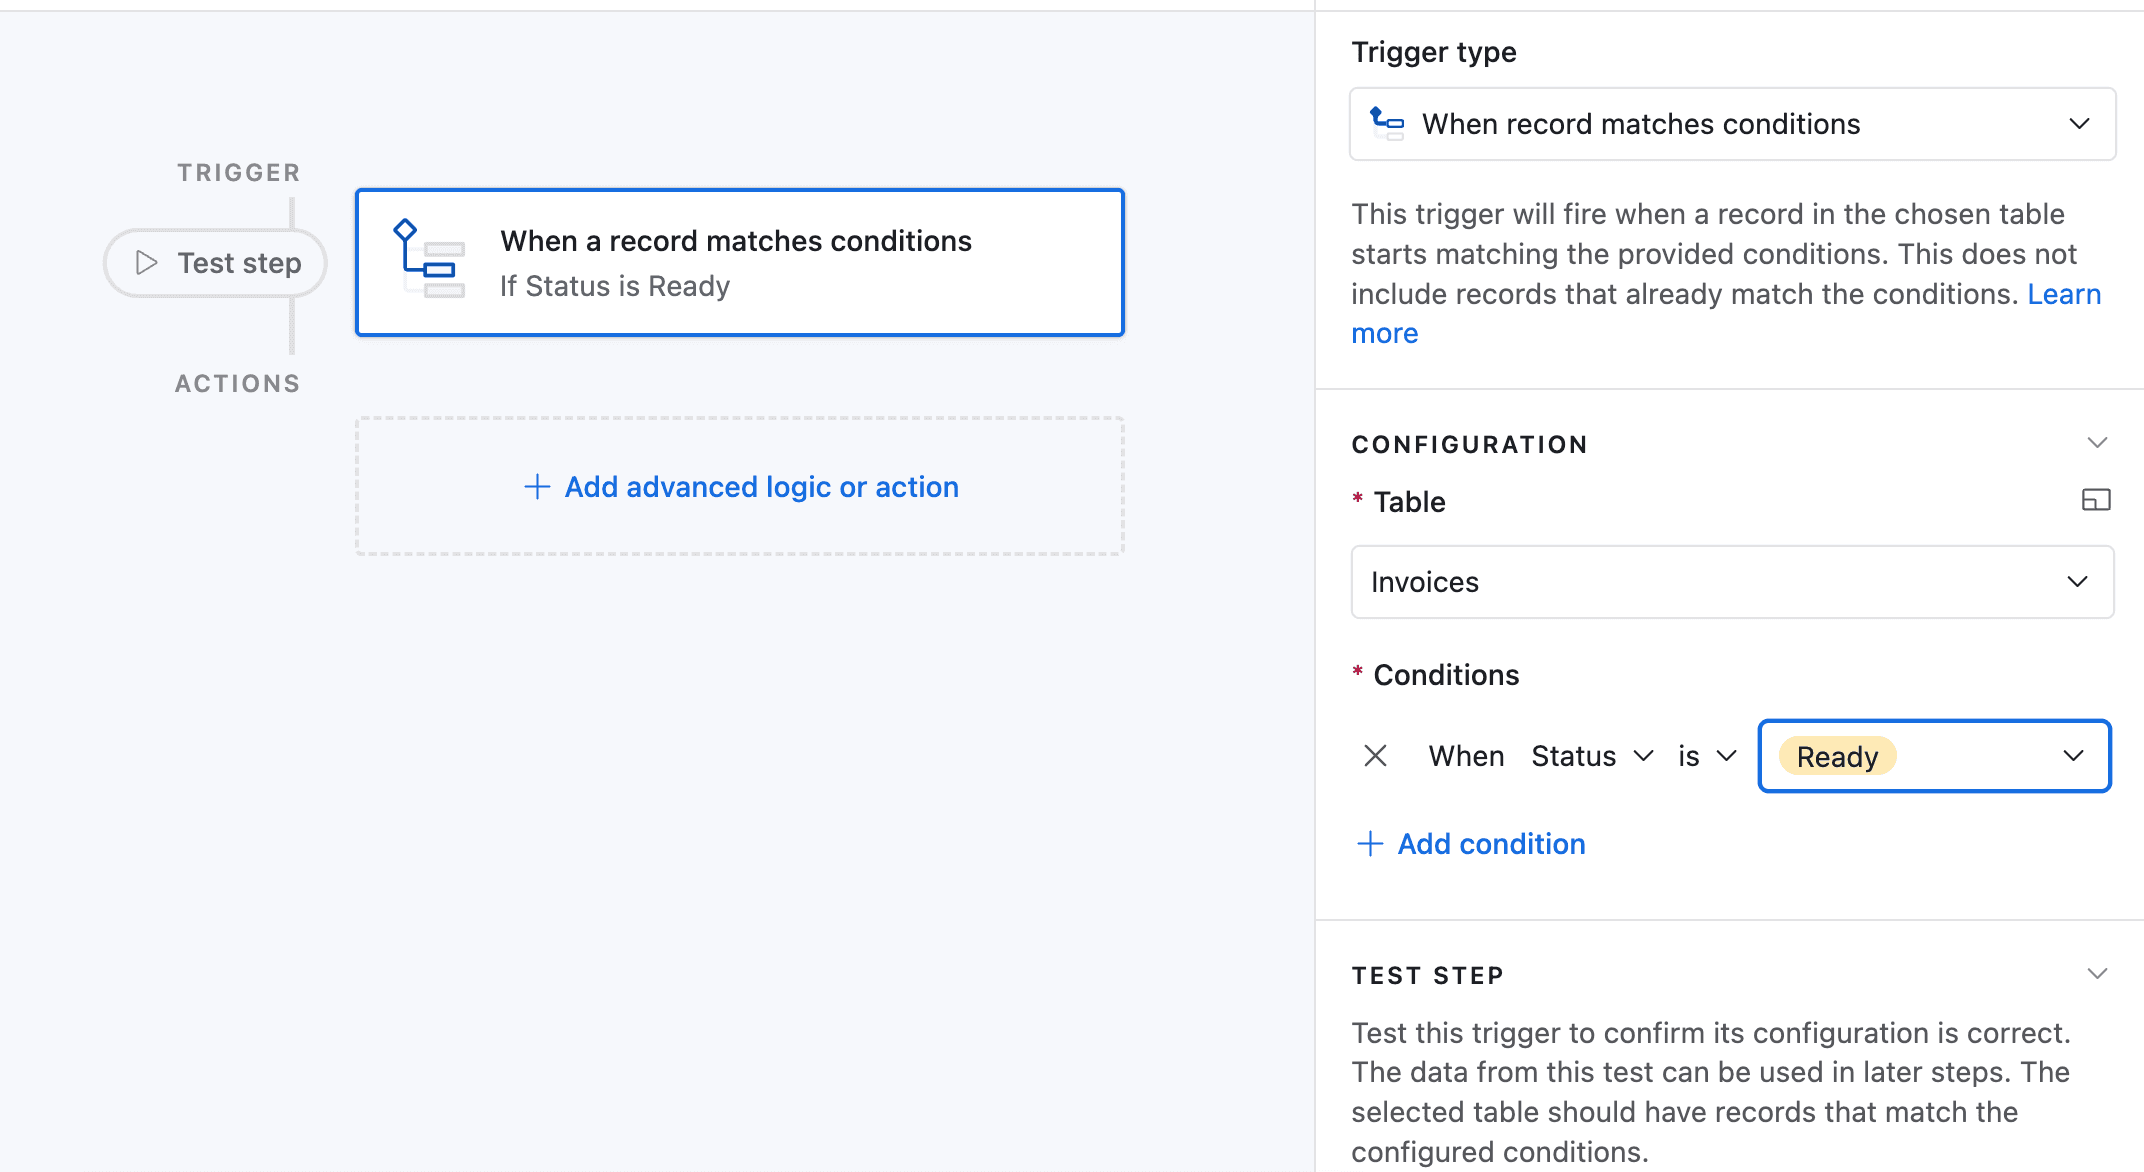
In this example, we'll trigger the automation when a batch status changes to "Approved."
-
Go to Automation in Airtable
-
Click on "Add a trigger" and choose When a Record matches a condition
-
Select the table you want to trigger the automation on (in this case the Batches table)
-
Select the field you want to trigger the automation on (in this case the Status field)
-
Select the condition you want to trigger the automation on (in this case "is")
-
Select the value you want to trigger the automation on (in this case "Approved")
-
Now choose a record that matches the condition
-
Click on Add an advanced logic or action
-
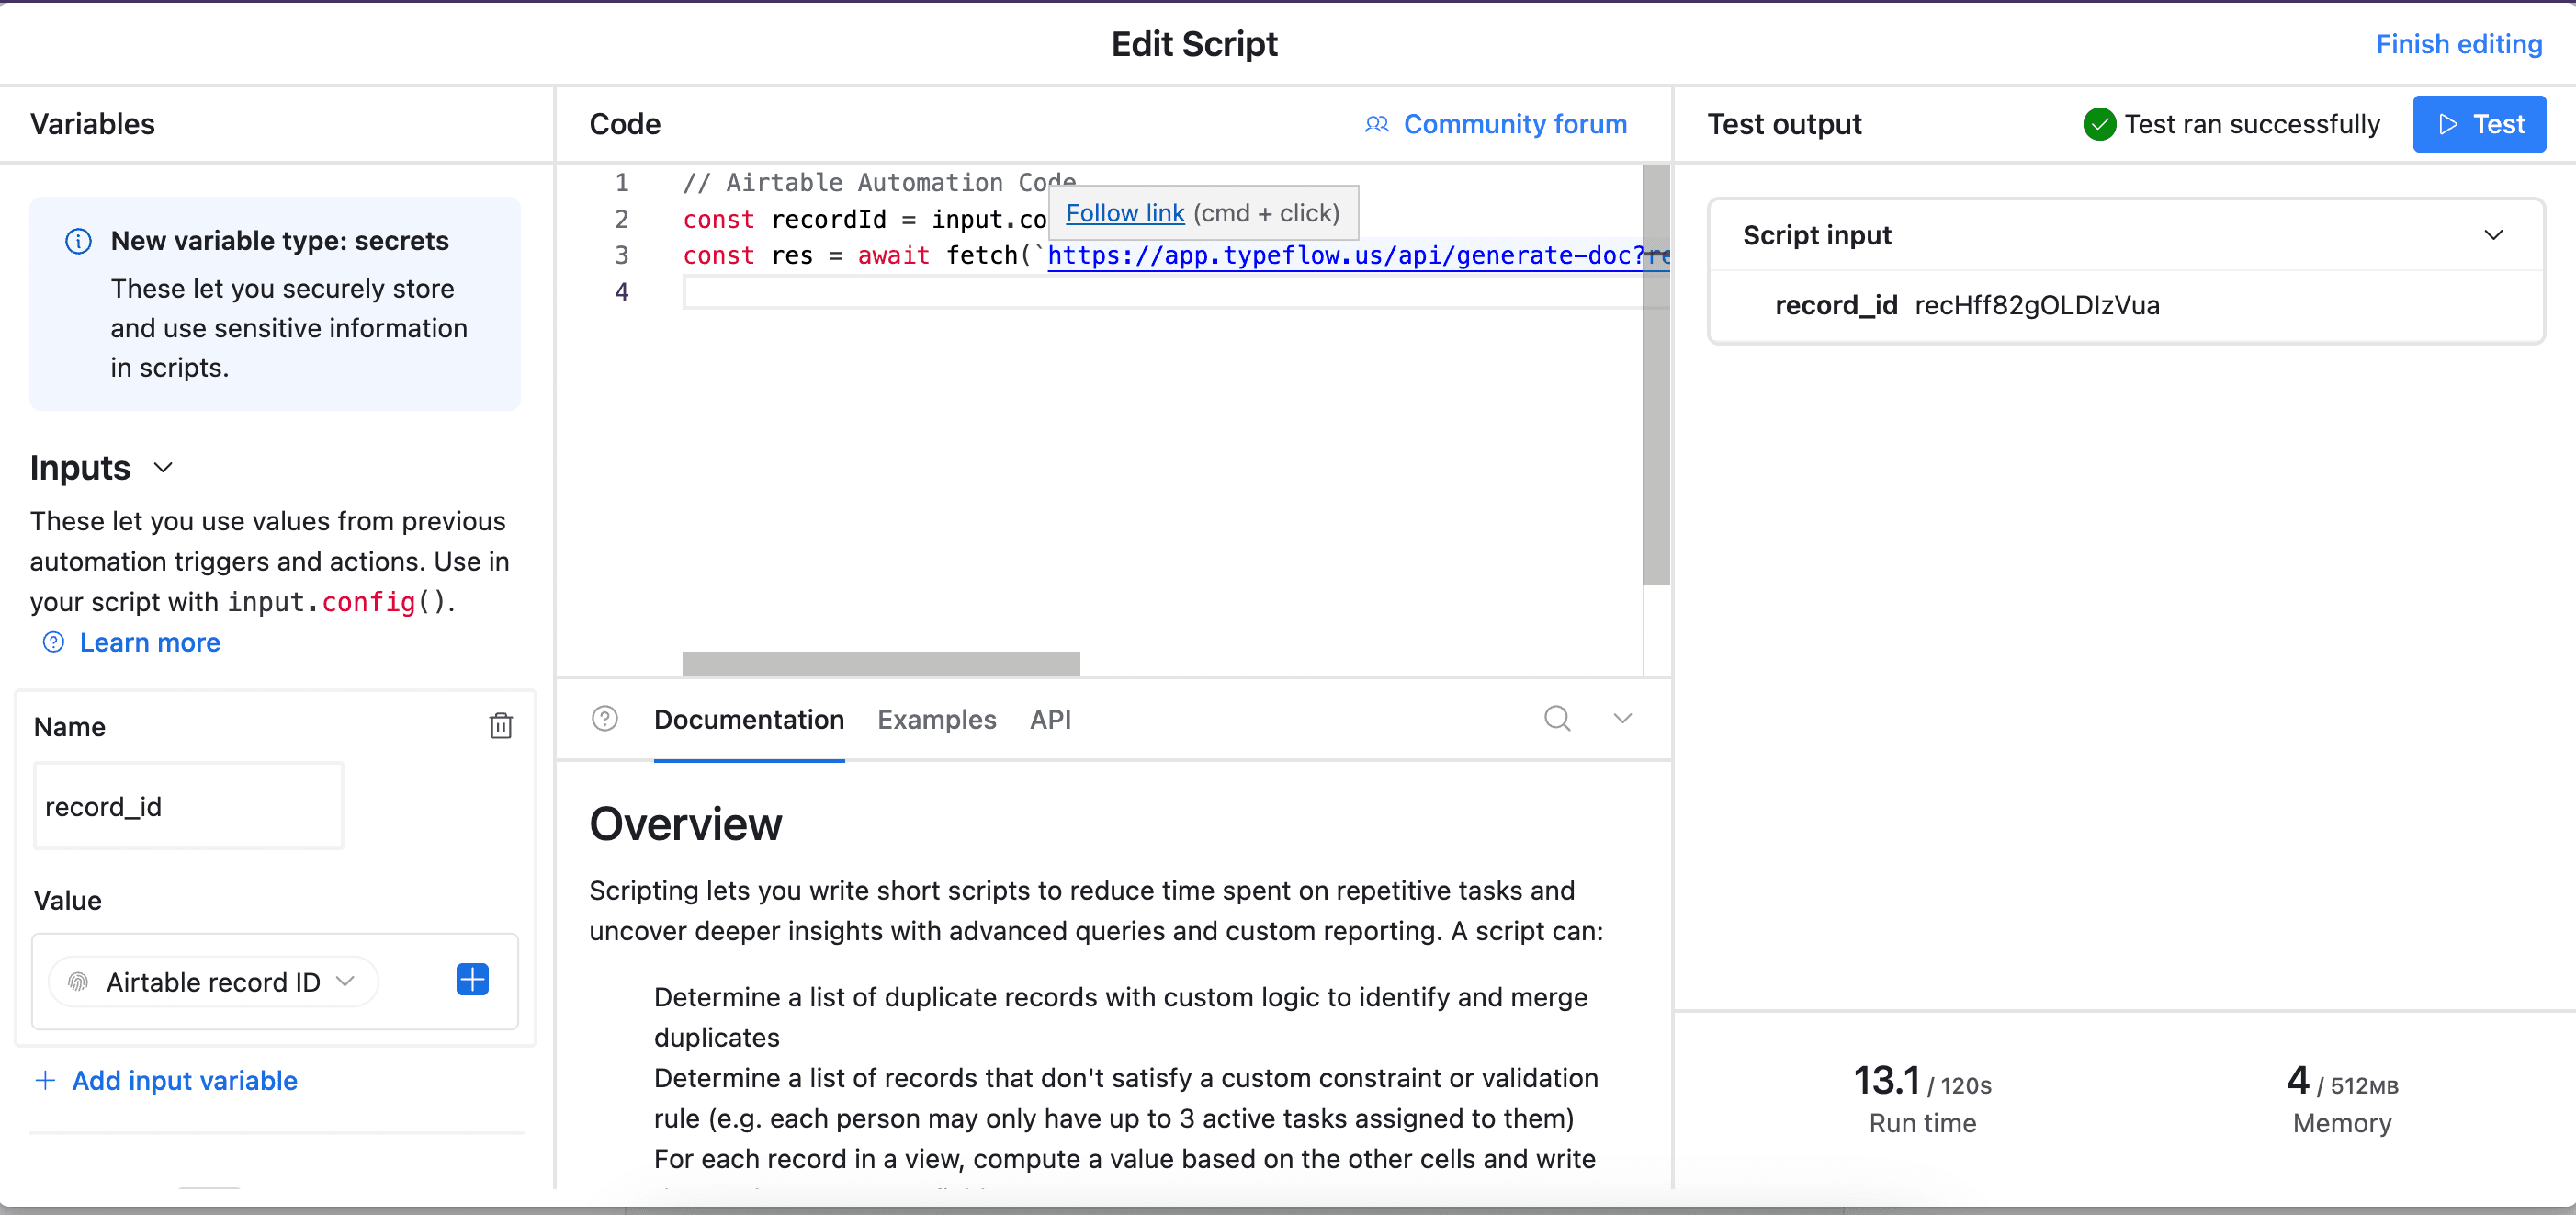
Pick Run Script. A new popup appears.
-
Go back to TypeFlow and select Automation in Airtable. Copy the script.
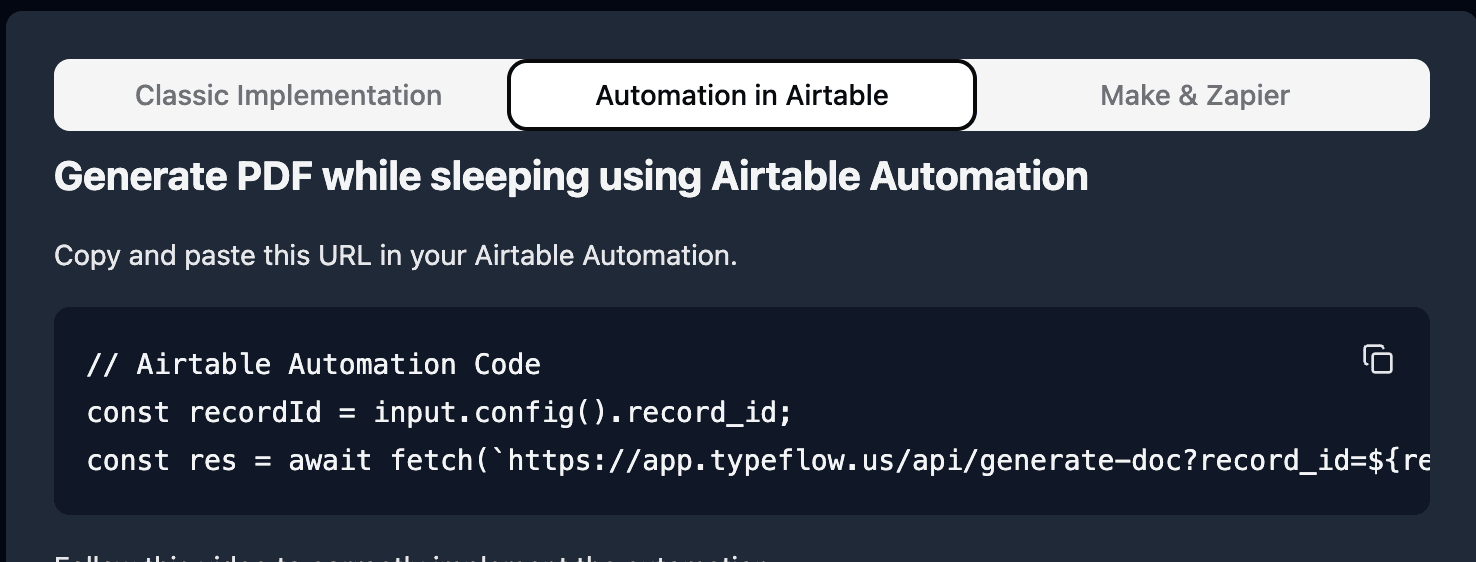
- Paste the script in the popup.
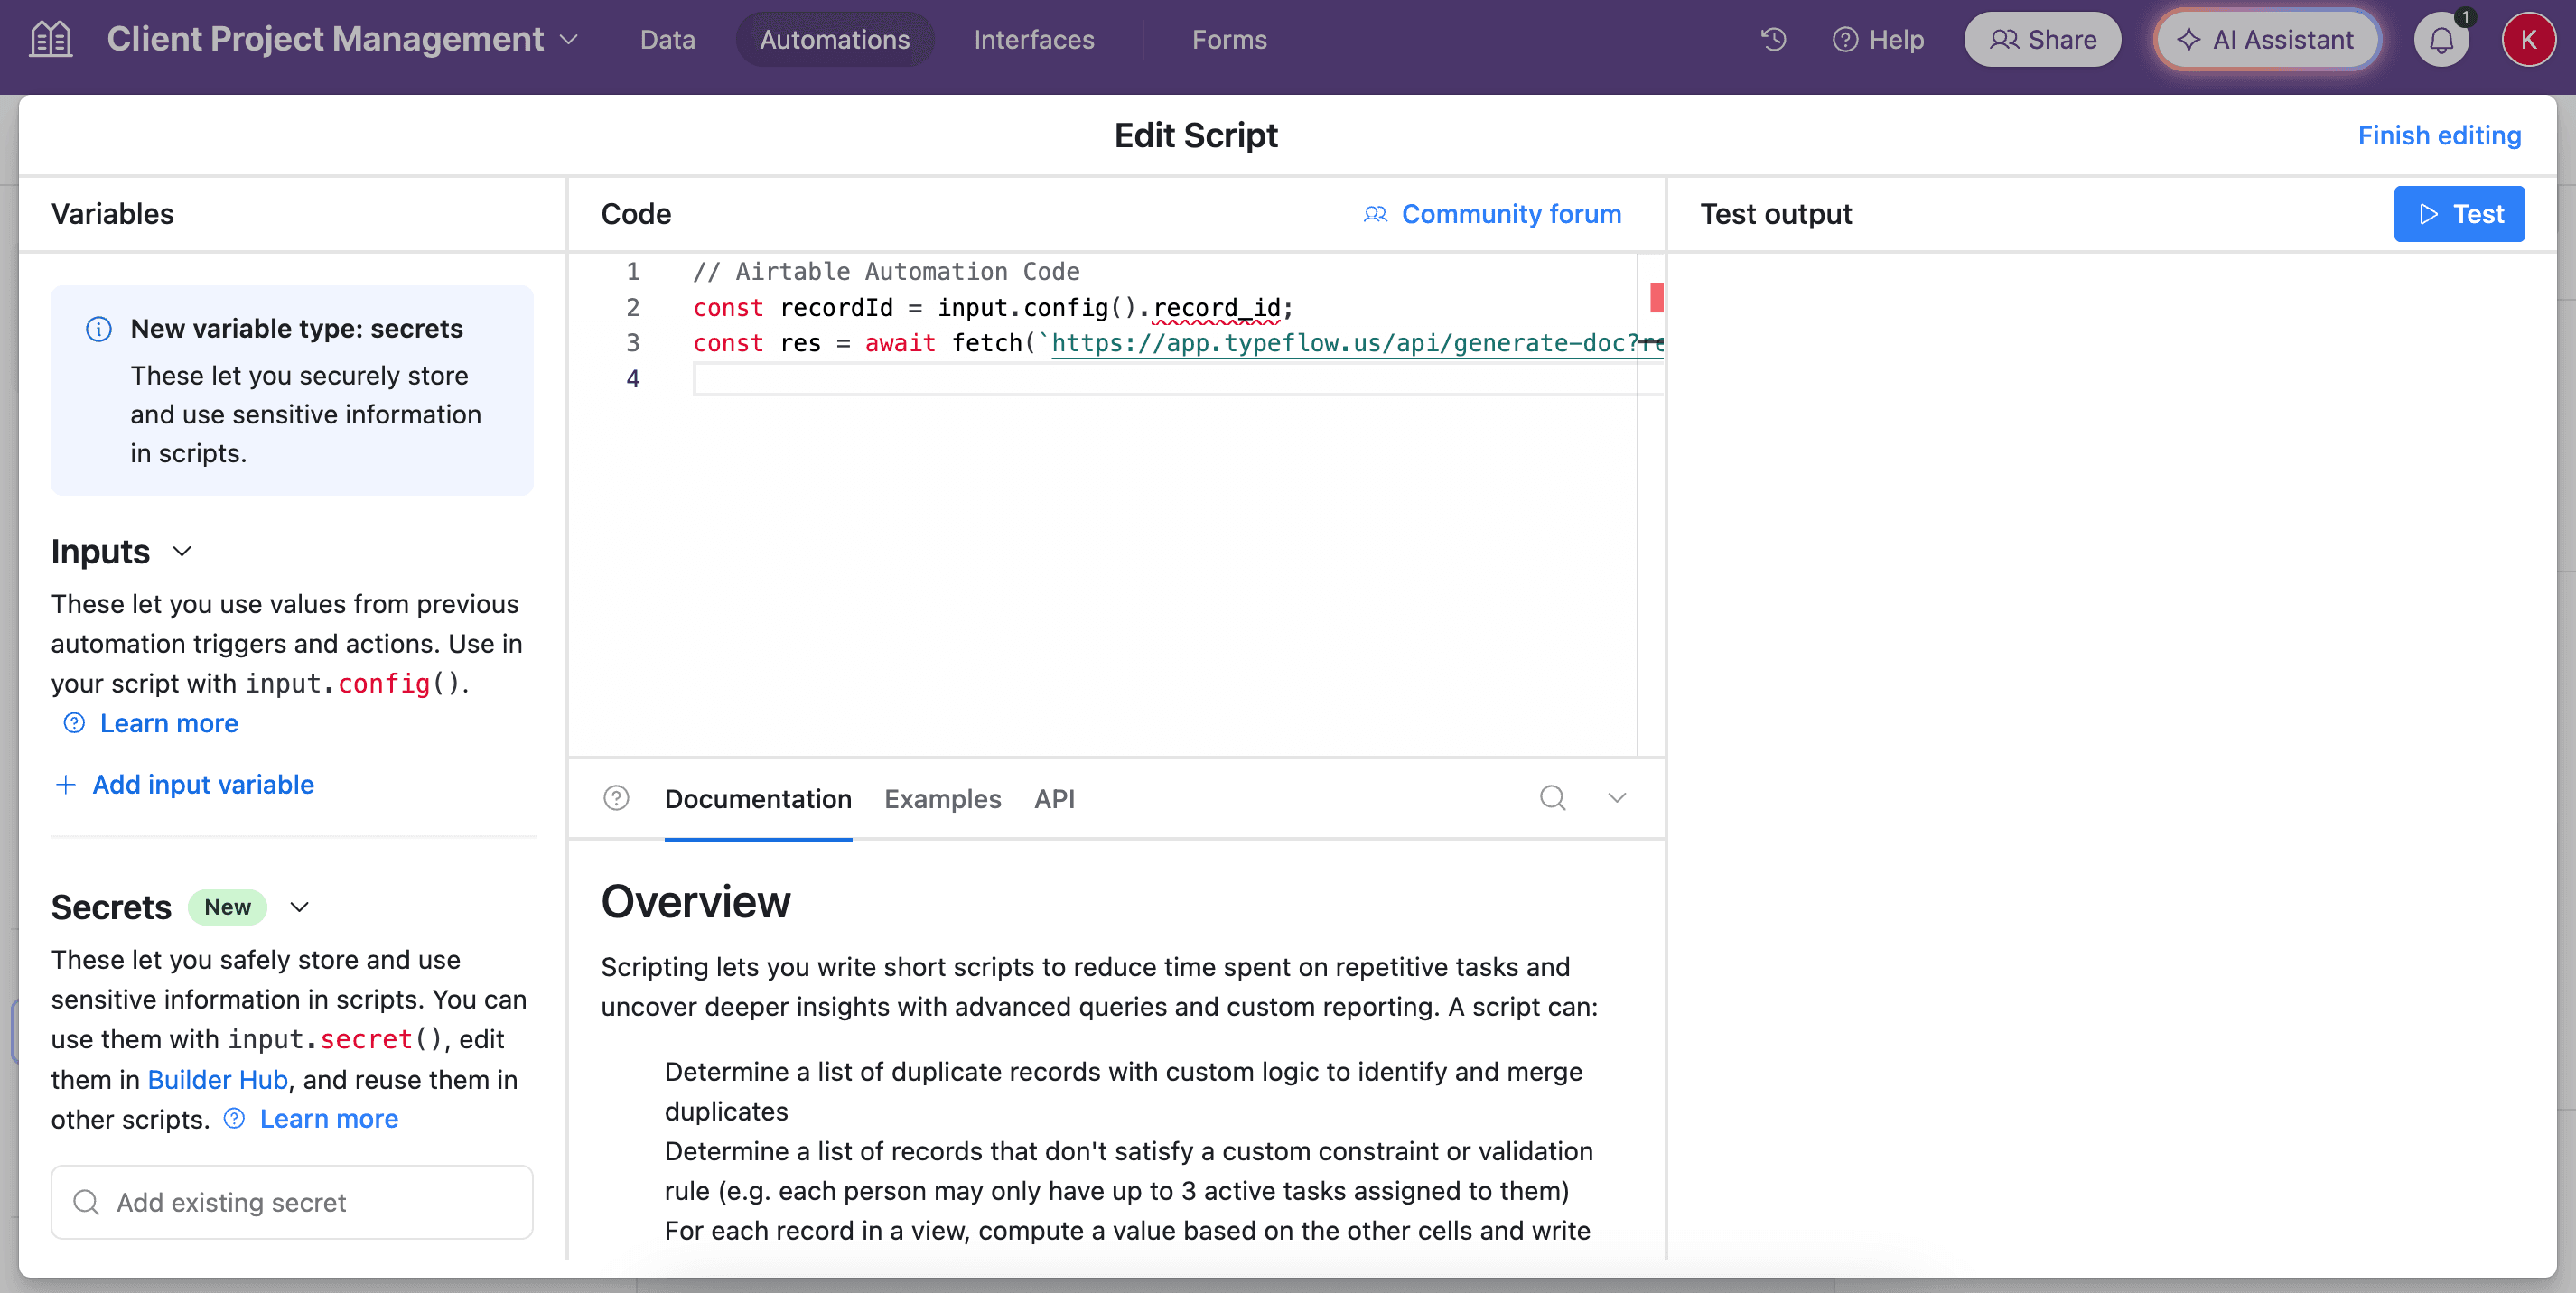
- In the left-side of the popup, configure the variable input
record_id. Select Airtable Record ID from the dropdown.
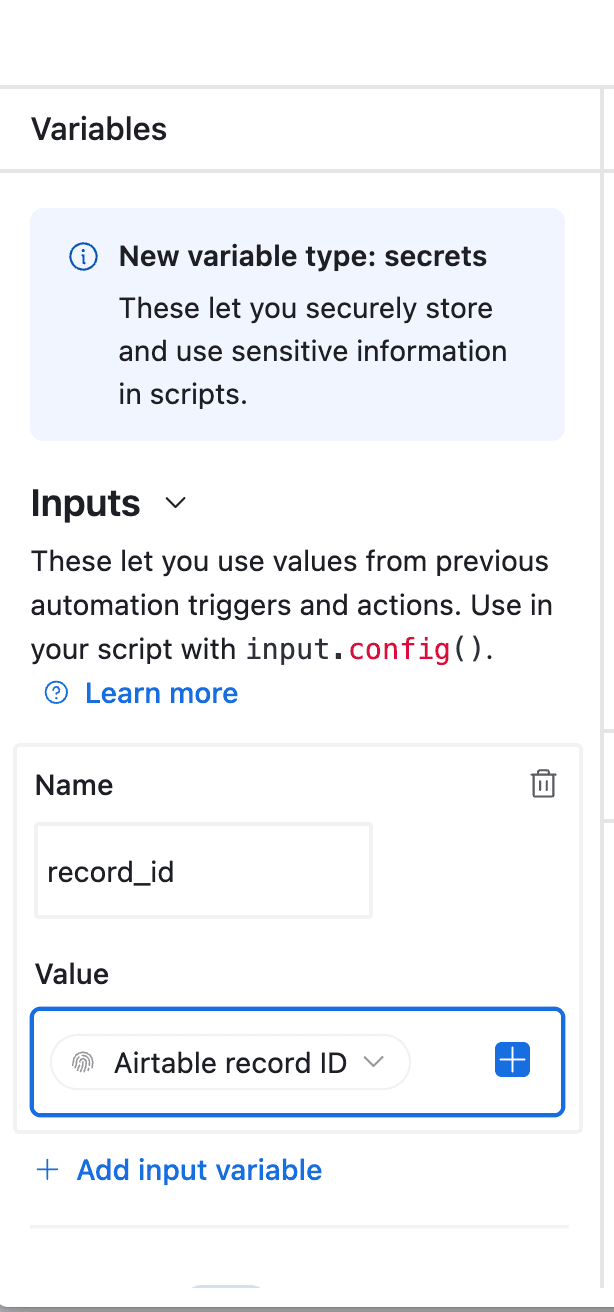
- Test your script and verify it works. Most errors come from the record_id variable not being configured correctly (see step 12).
Best for: High-volume operations, triggering generation when Status = "Approved", or when QA Inspector completes testing.
Sending CoCs to Customers via Email
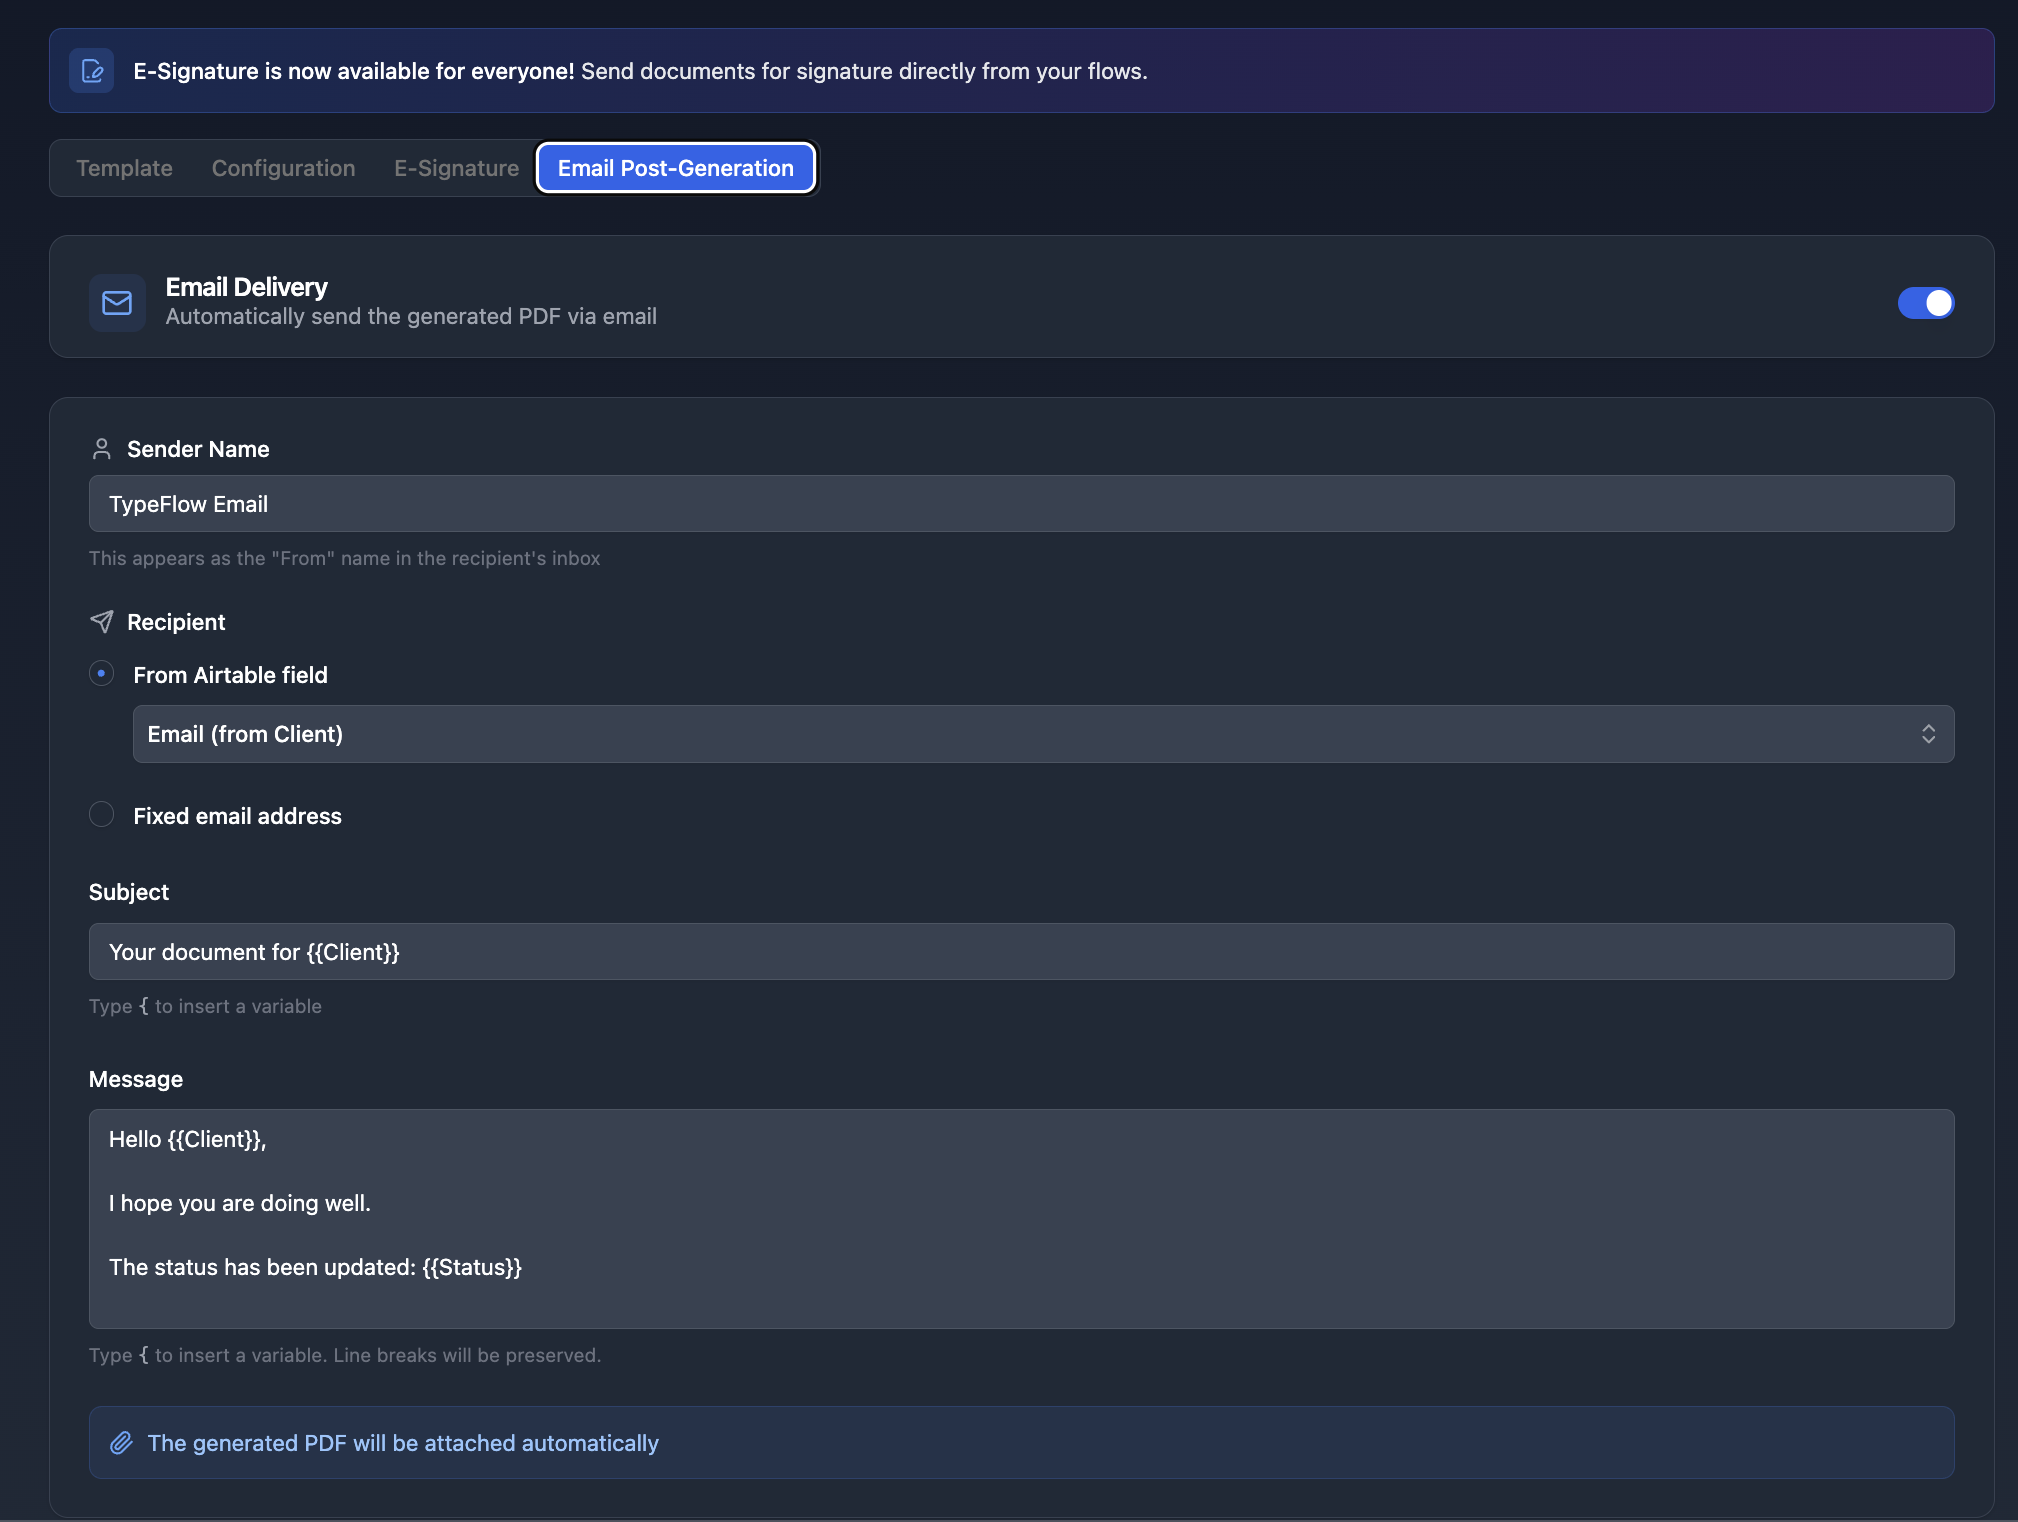
Once your CoC is generated, you can automatically email it to customers. TypeFlow includes integrated email delivery - no external tools required.
- Open your flow and click the Email tab
- Toggle Enable Email Delivery to ON
- Set the Recipient to your Customer Email field from Airtable
- Configure subject and body with
{{variables}}from your record
Delivery tracking: Check your flow's generation history to confirm each email send and troubleshoot failures.
After each generation, the CoC is sent as a PDF attachment. This works with all three generation methods.
Adding E-Signatures to Your Certificates of Conformity
Many industries require authorized signatures on CoCs. TypeFlow includes built-in e-signature that is legally compliant under eIDAS and the ESIGN Act.
Single Authorized Signatory Workflow
Most CoCs require one QA manager or authorized person to sign:
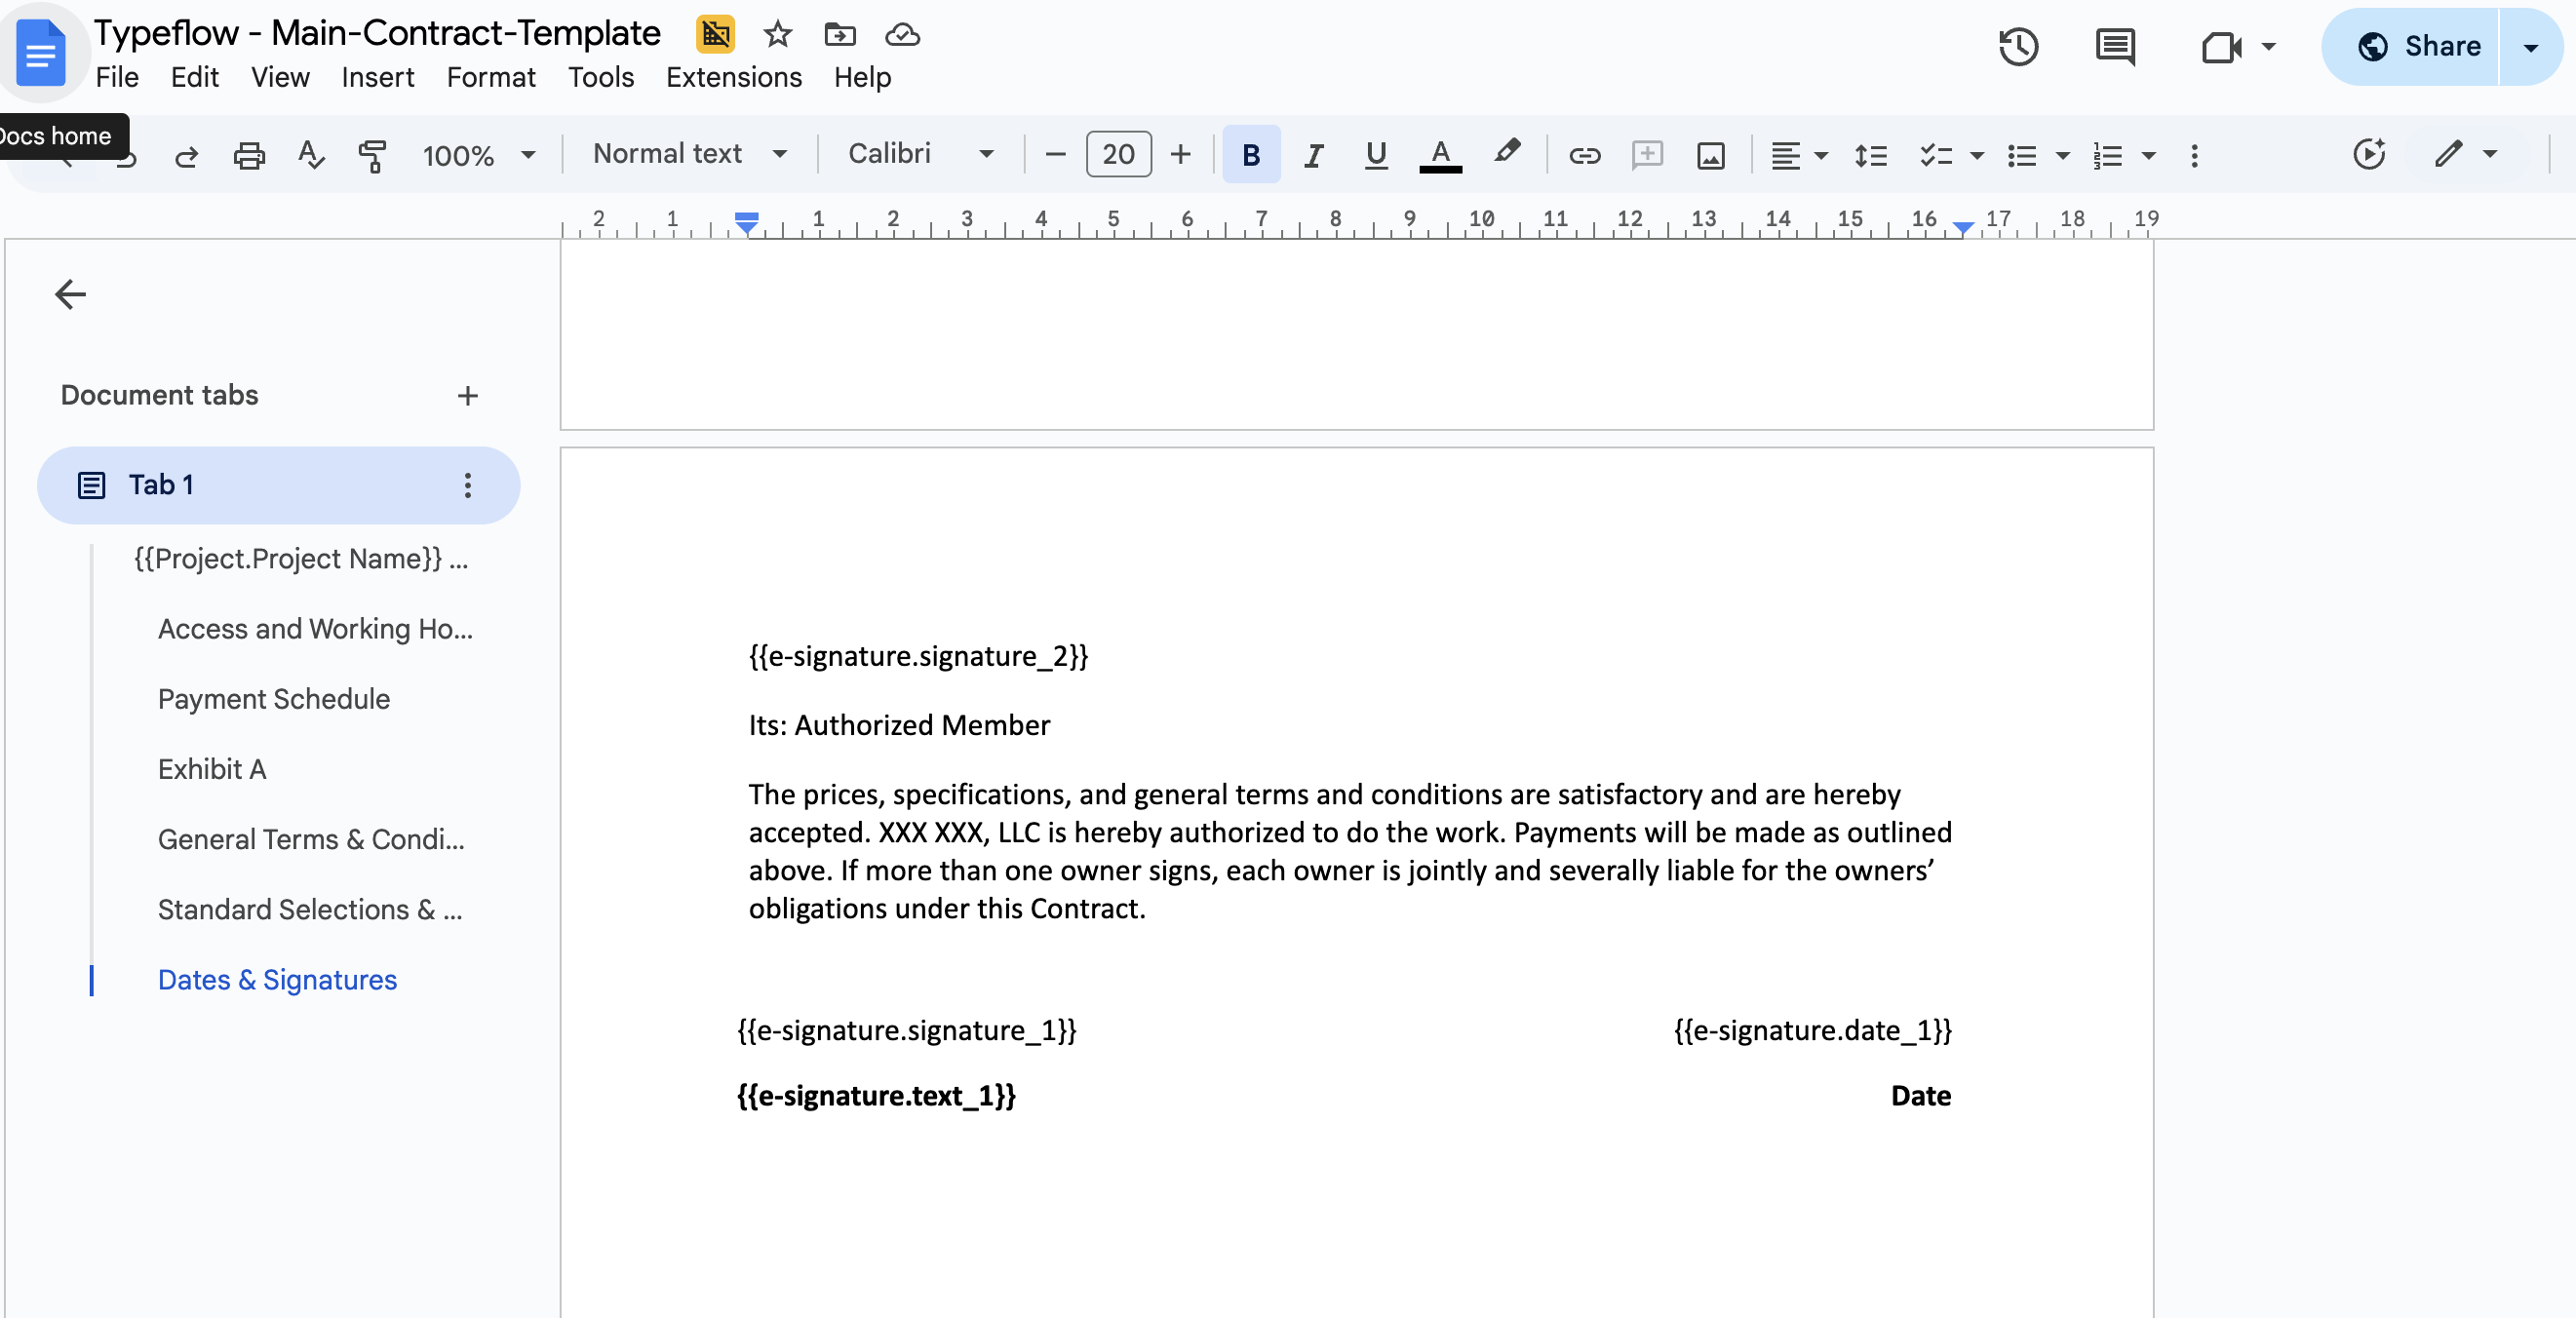
Step 1: Add signature placeholders to your template:
AUTHORIZED BY

Signature: {{e-signature.signature_1}}
Name: {{e-signature.text_1}}
Title: {{e-signature.text_2}}
Date: {{e-signature.date_1}}
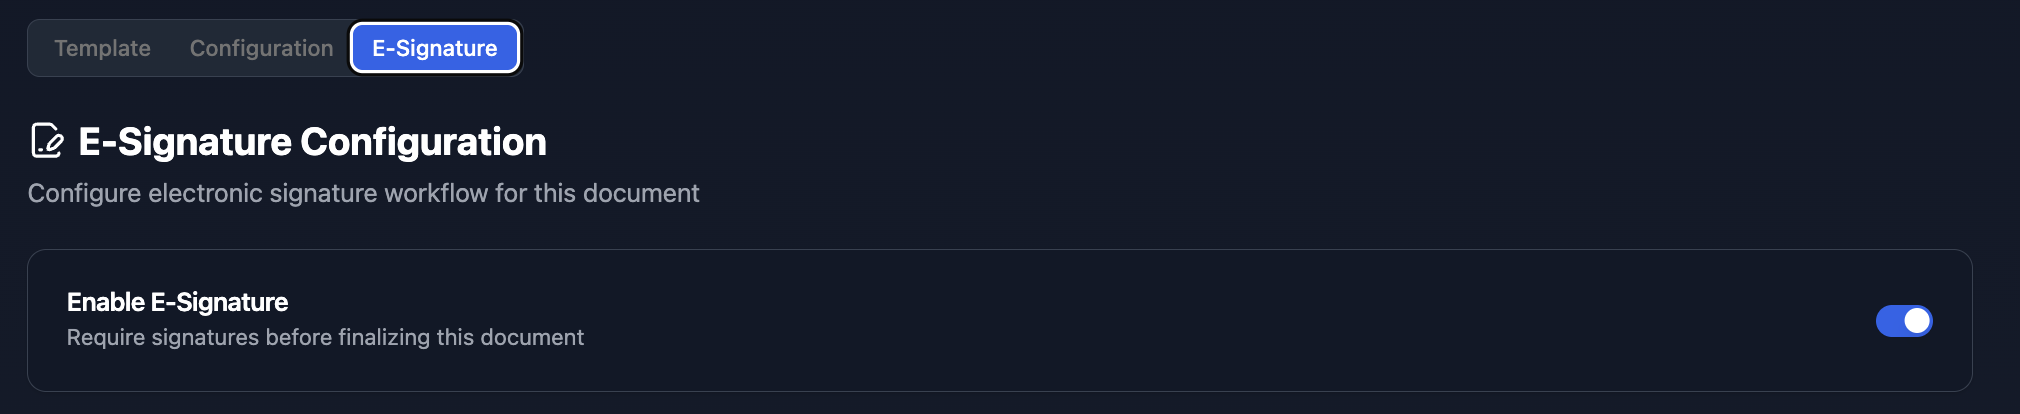
Step 2: In TypeFlow, enable e-signature in your flow settings:
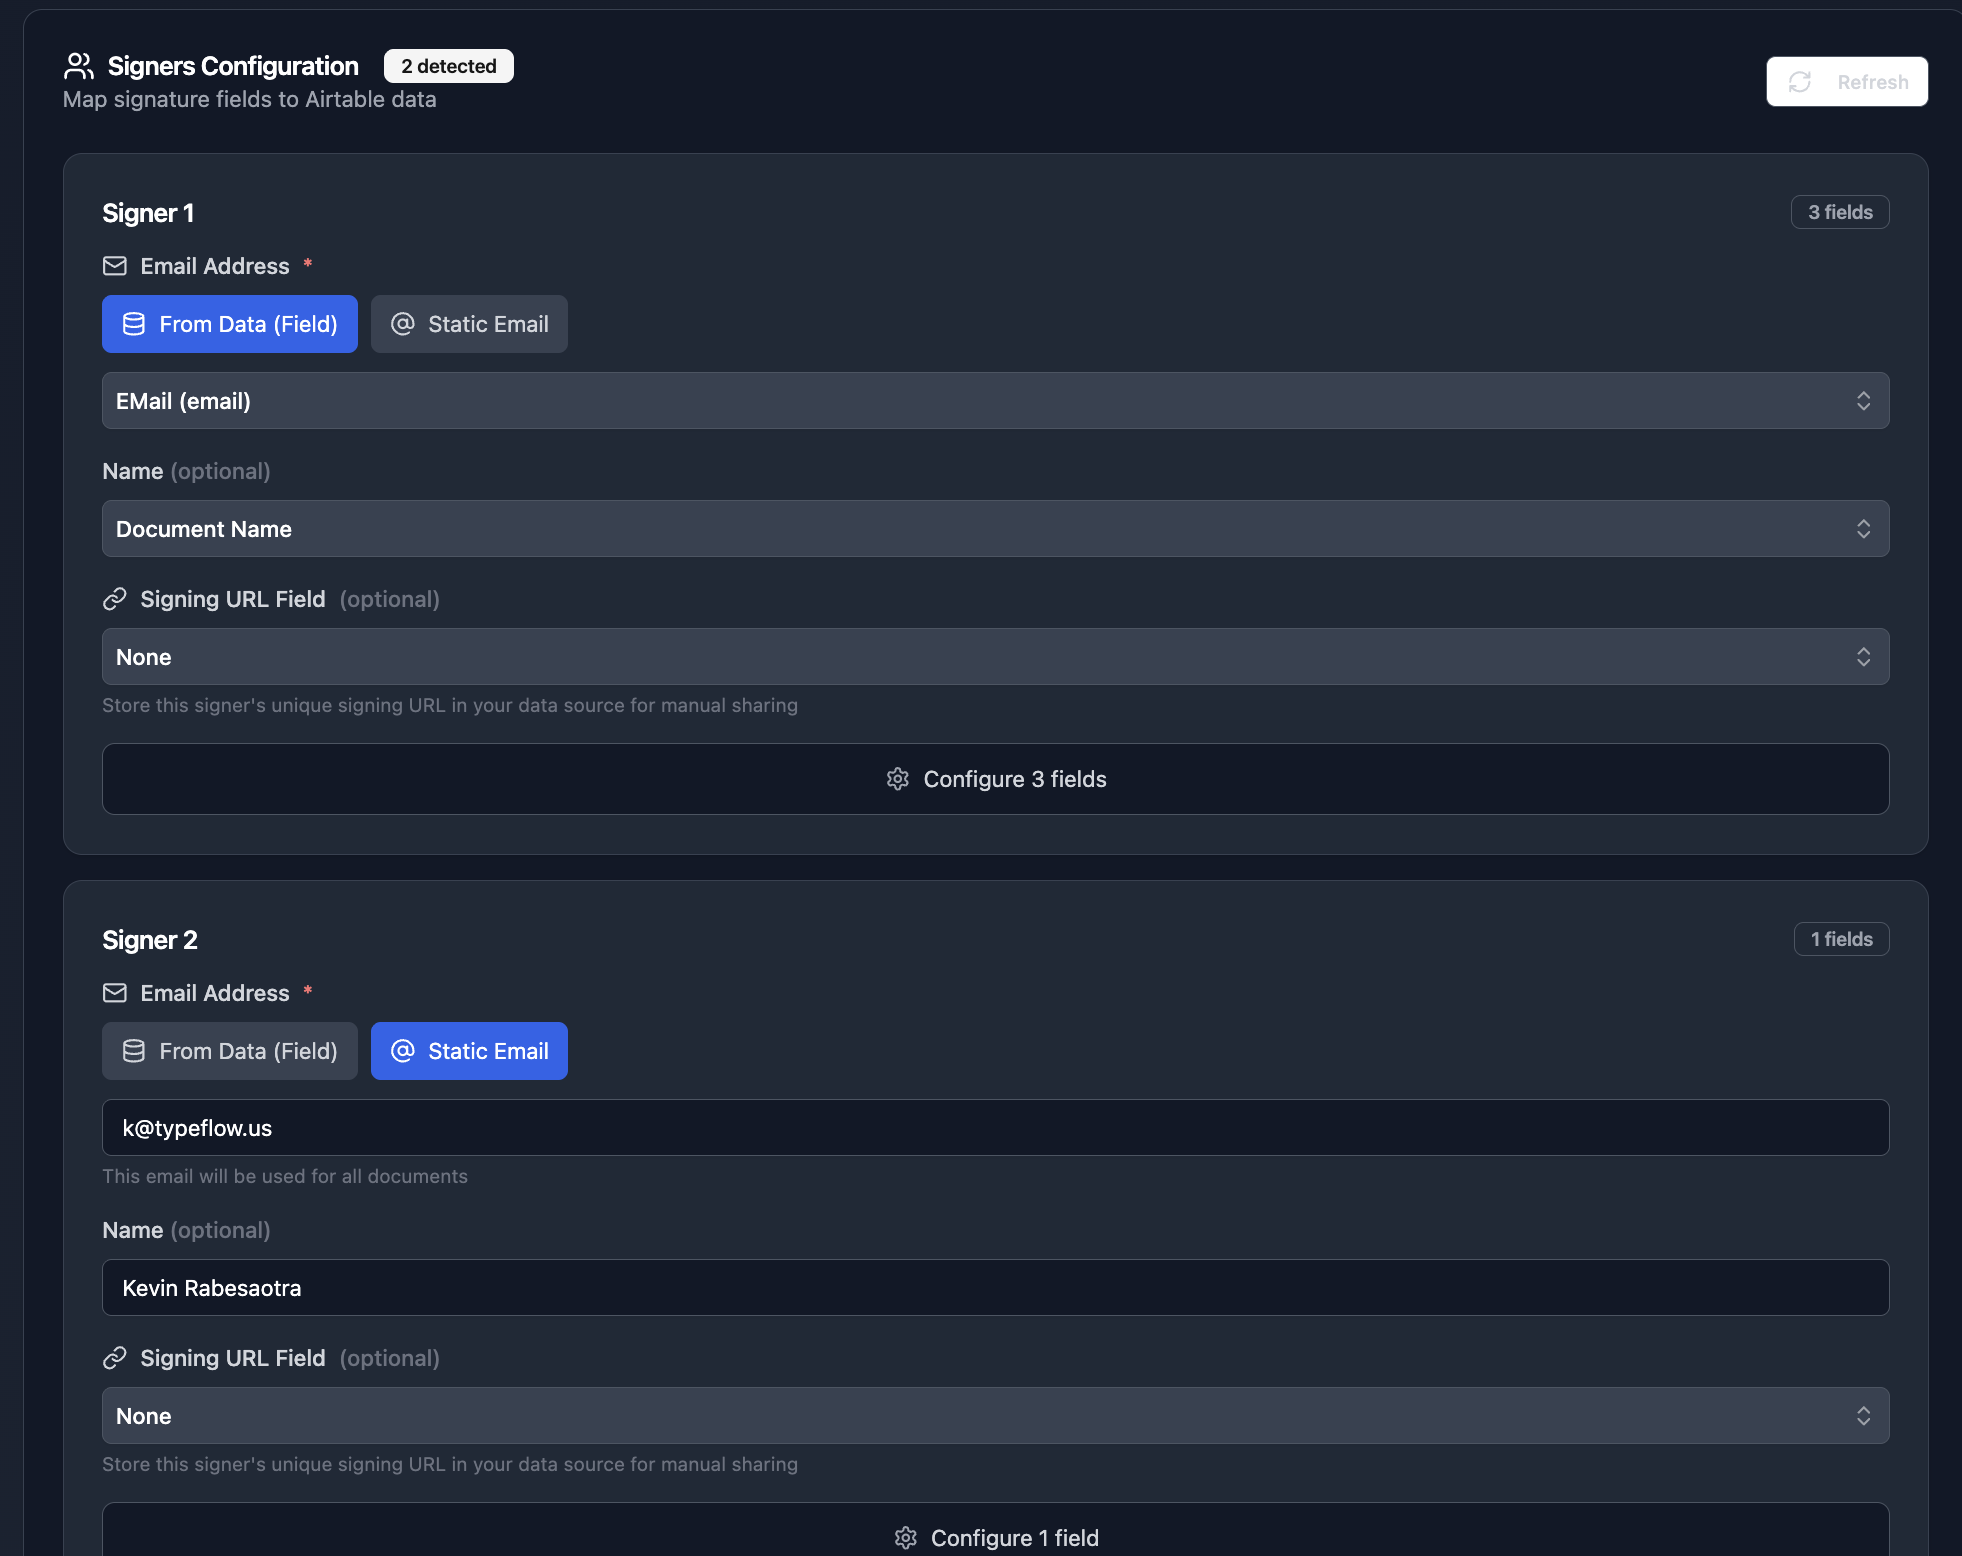
Step 3: Configure the signer. Map the email to your Signatory Email field from Airtable:
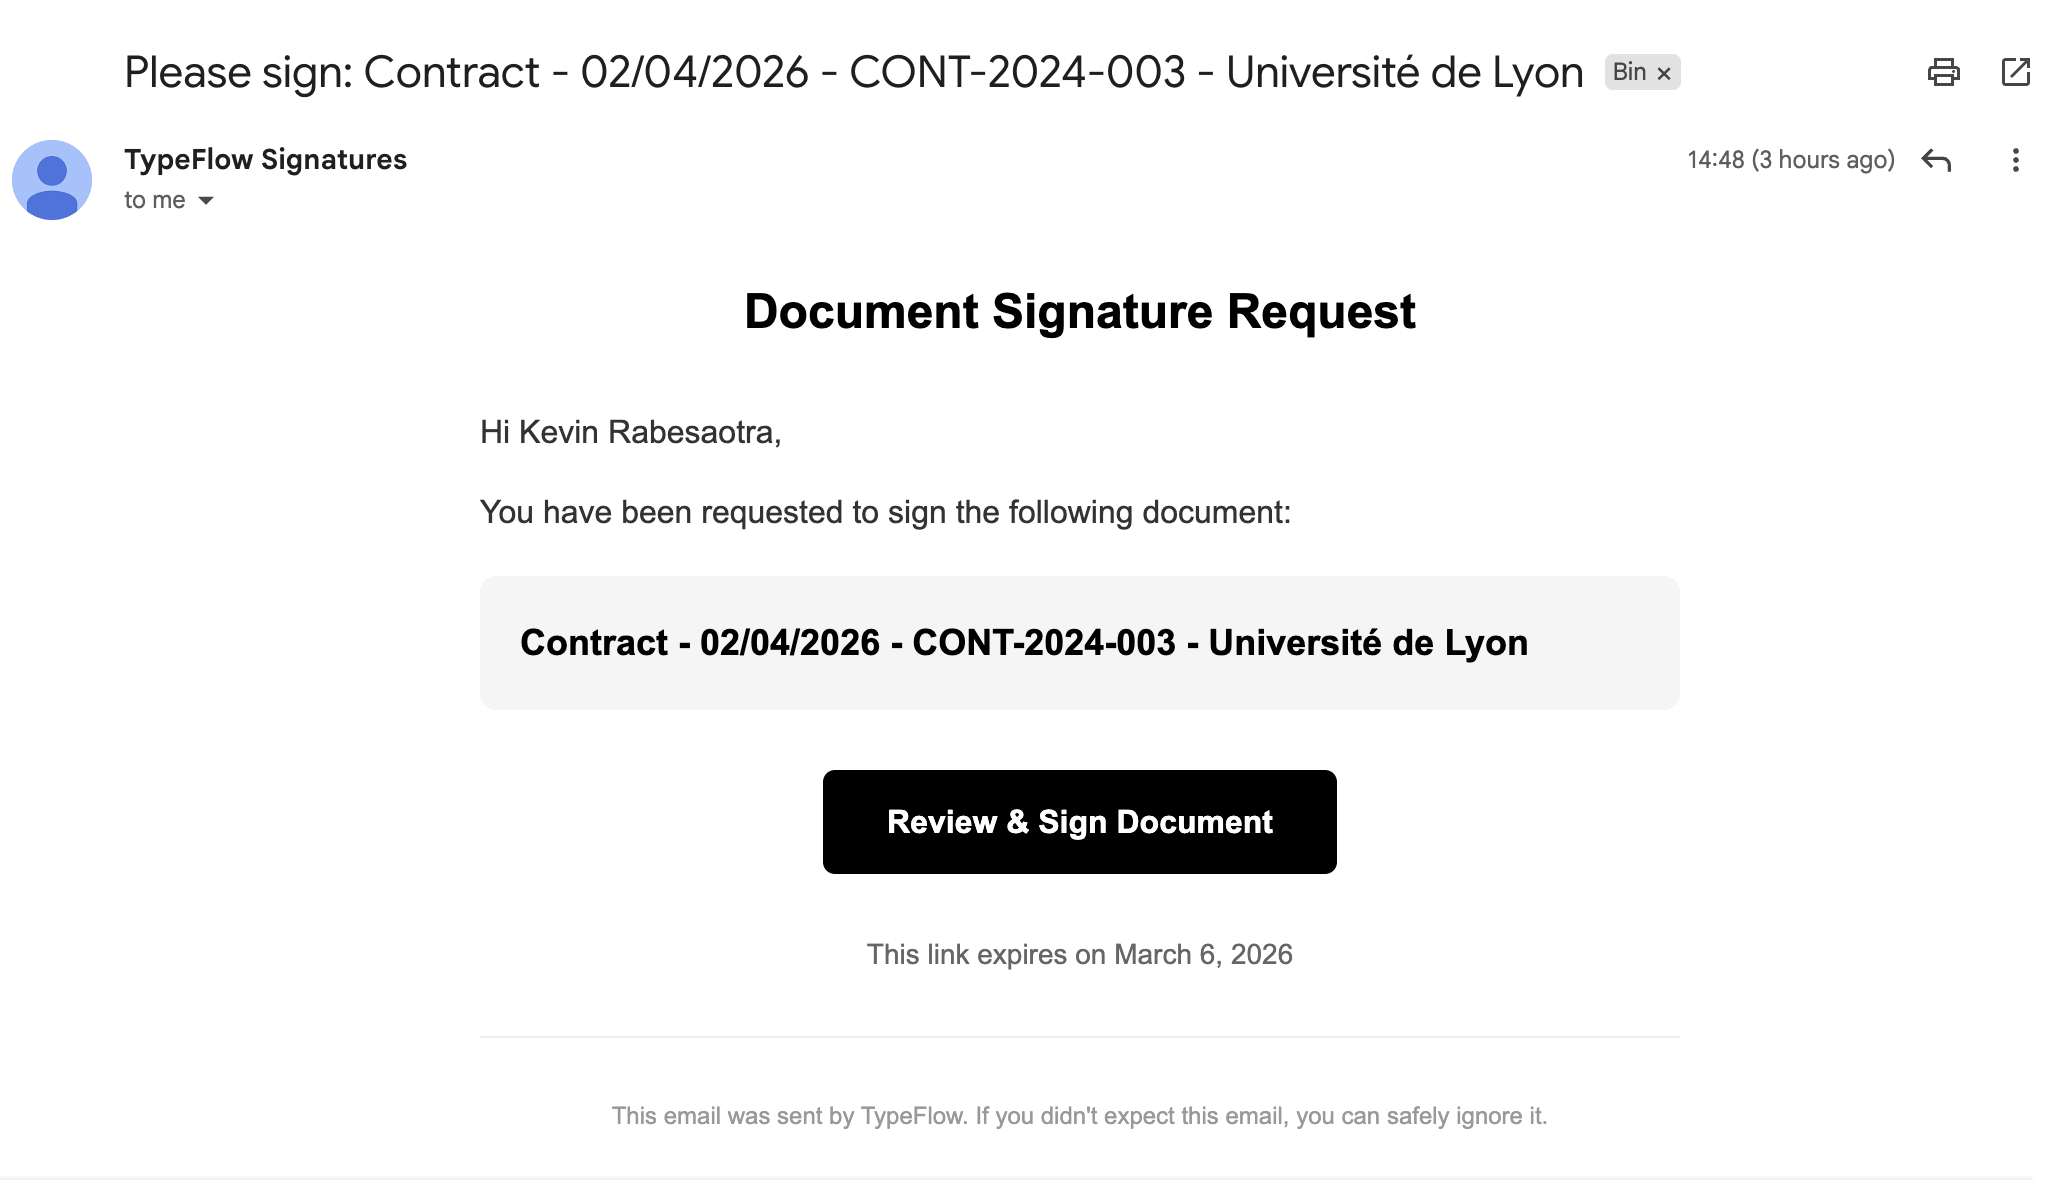
Step 4: When the CoC generates, the signatory receives an email to sign:
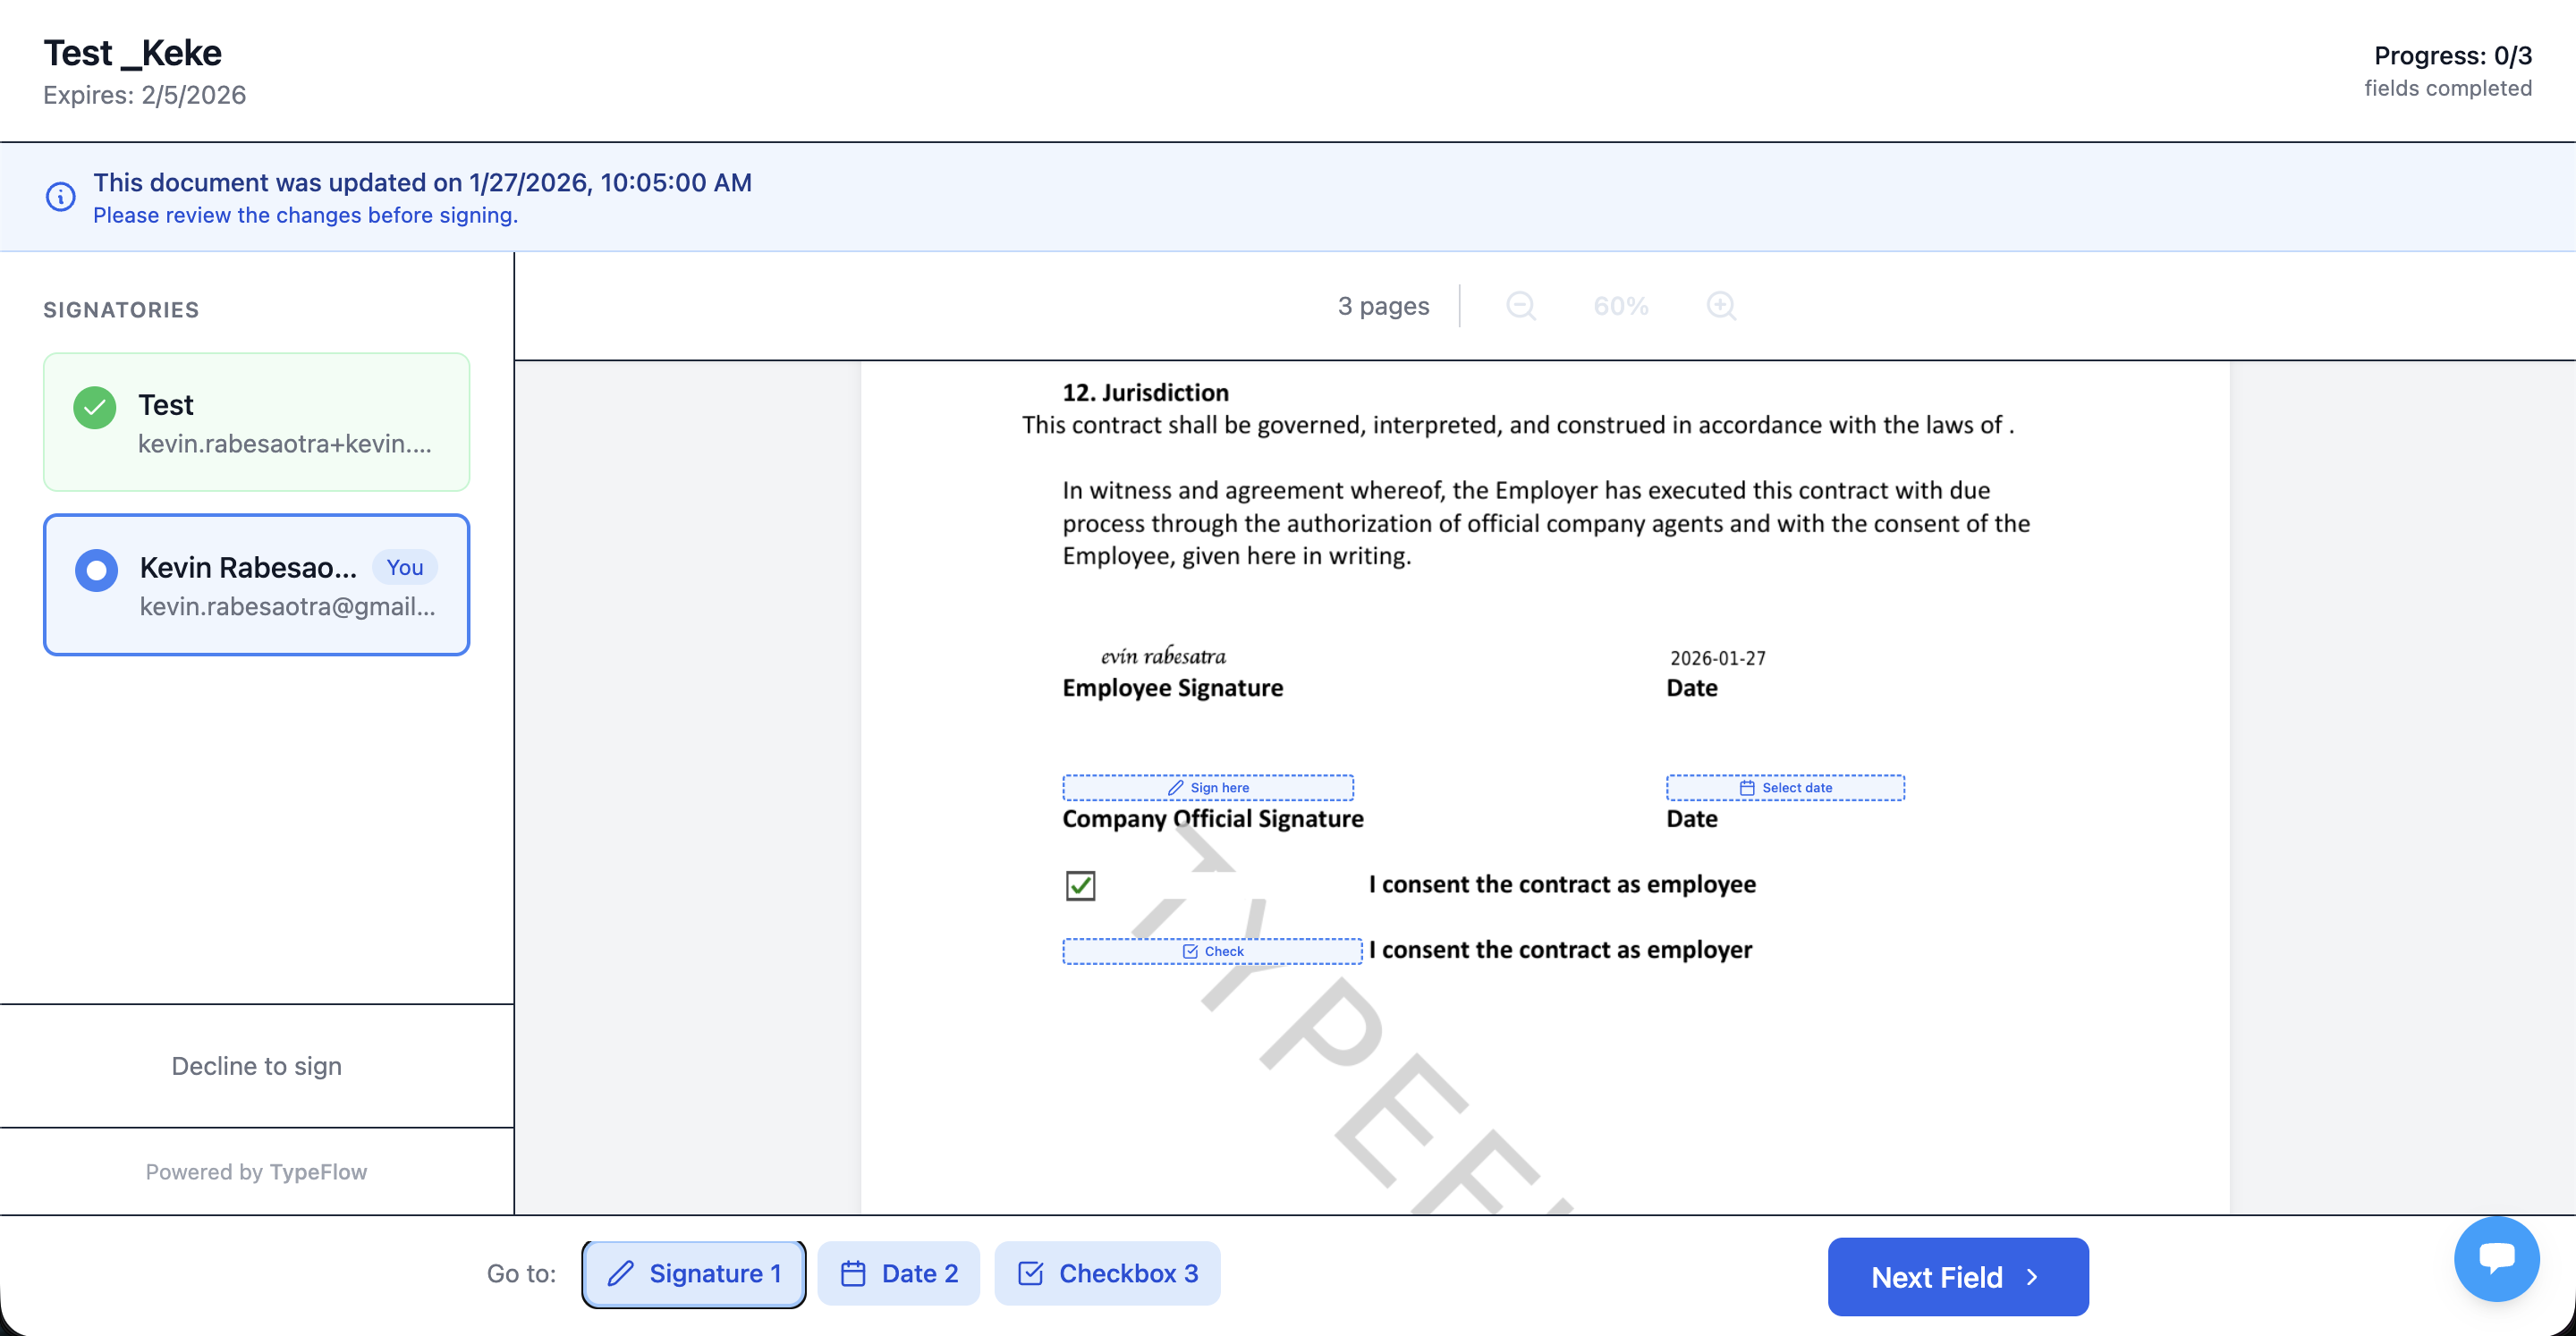
Step 5: The signer reviews the document and completes the signature fields:
After signing, the completed PDF with audit trail saves to Airtable automatically.
Multi-Signer QA Approval Workflow
For organizations requiring multiple approvals (e.g., QA Inspector + QA Manager):
Step 1: Add signature placeholders for each signer:
QA INSPECTOR

Signature: {{e-signature.signature_1}}
Name: {{e-signature.text_1}}
Date: {{e-signature.date_1}}

QA MANAGER APPROVAL

Signature: {{e-signature.signature_2}}
Name: {{e-signature.text_2}}
Date: {{e-signature.date_2}}
Step 2: Configure signers and choose Sequential signing mode. This ensures Inspector signs first, then Manager receives their notification:
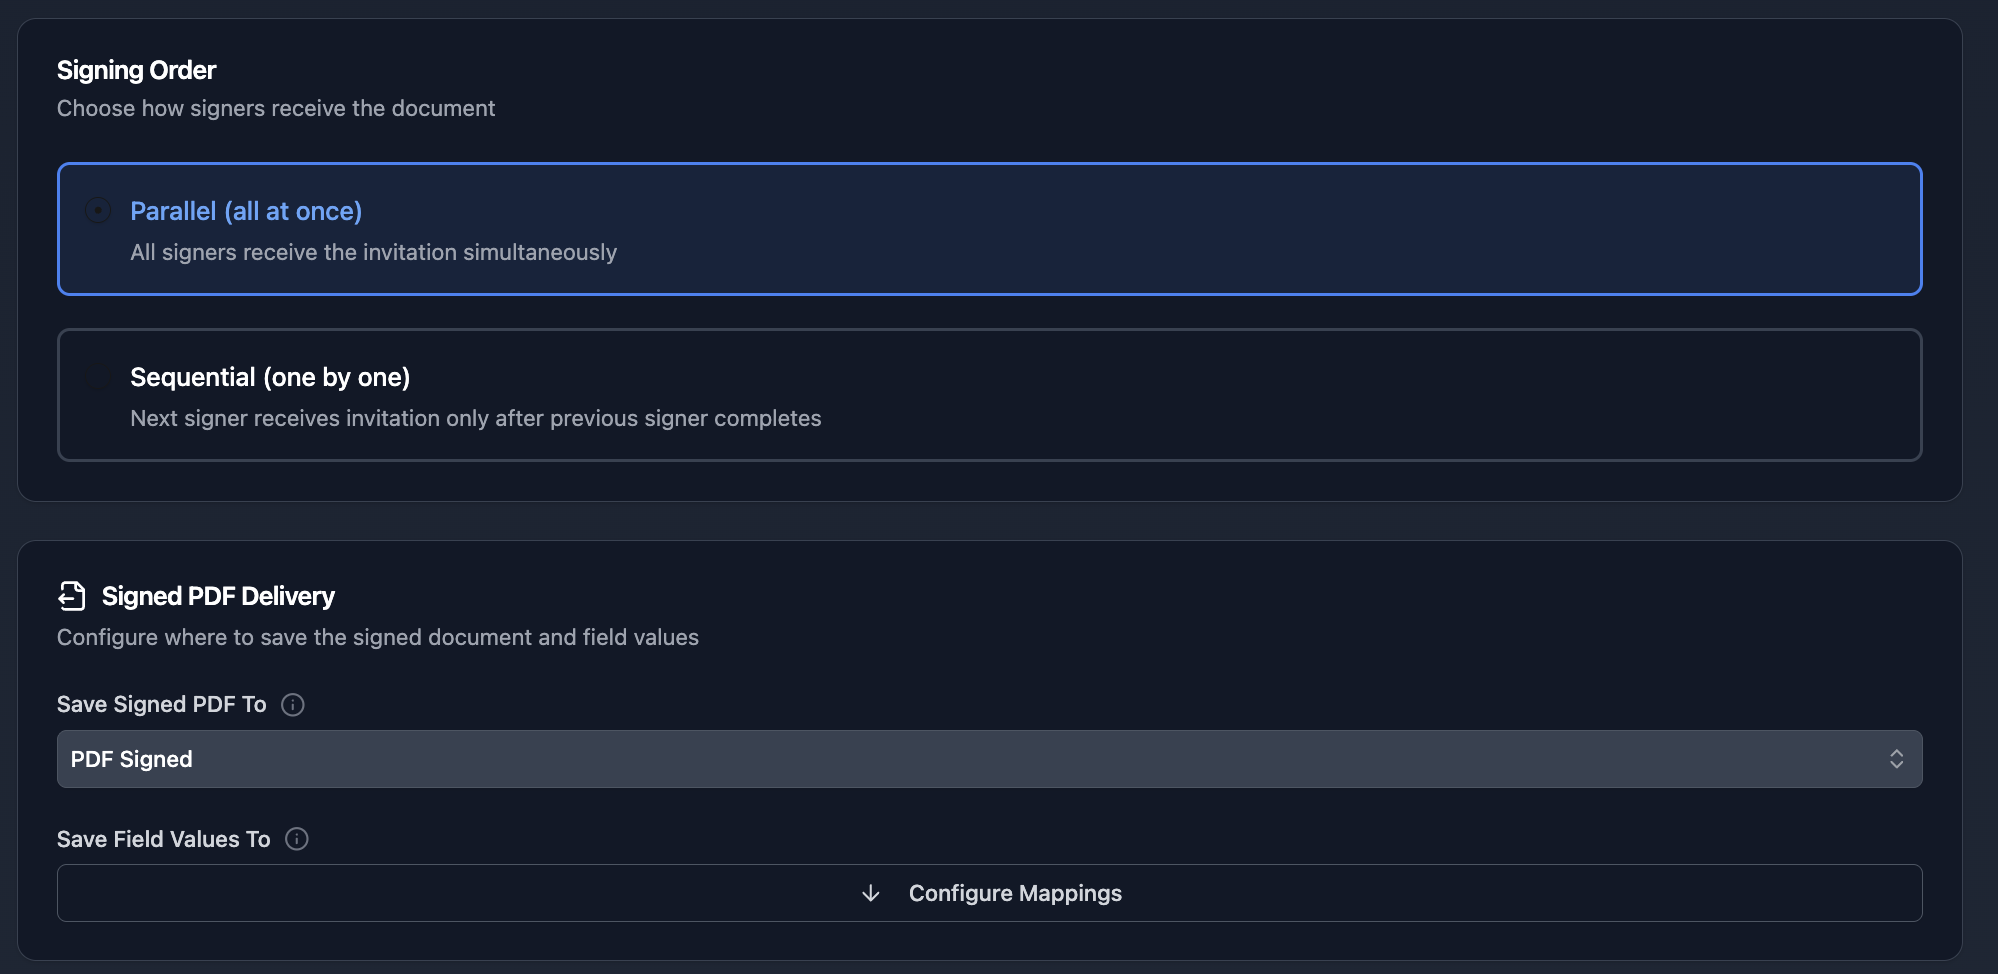
Step 3: Certificate is only complete when both have signed.
Certificate of Completion
The signed PDF includes a Certificate of Completion with:
- Timestamps for each signing action
- IP addresses and geographic location
- Browser and device information
- SHA-256 document hash for integrity verification
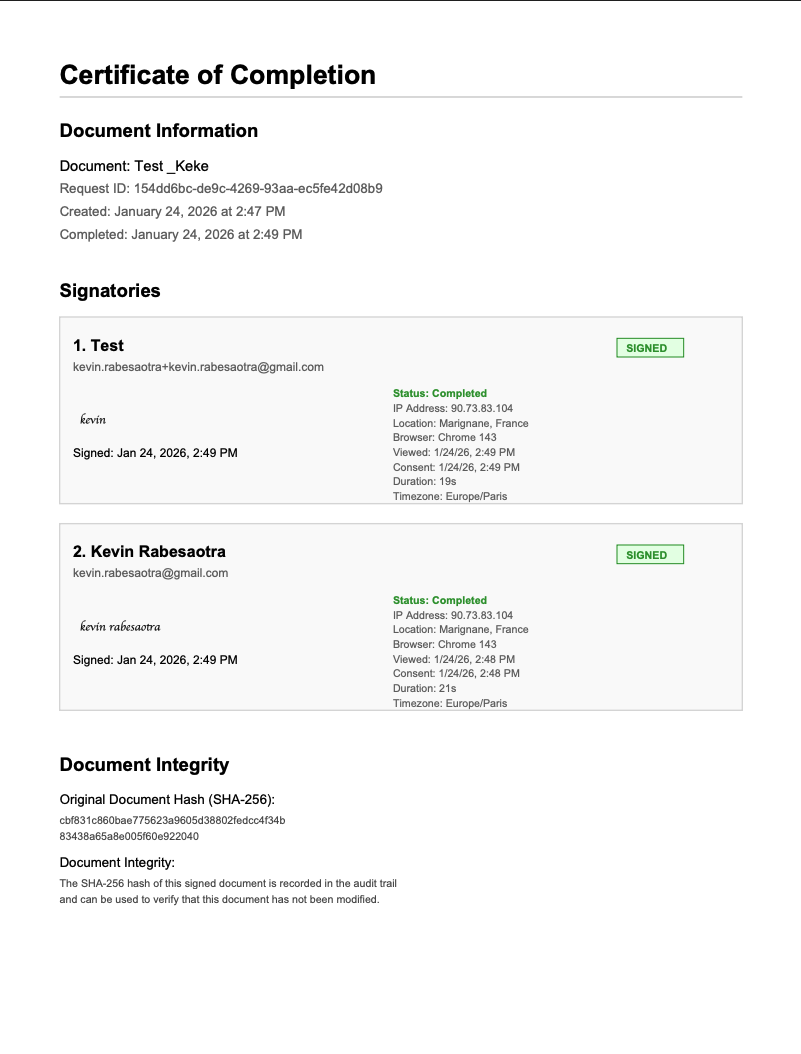
This audit trail meets FDA 21 CFR Part 11 requirements for electronic records and signatures.
Automate your document generation
Start with 20 free documents. Built for businesses using Airtable.
Adding Verification to Your Certificates of Conformity
Customers and auditors may need to confirm a CoC is authentic. Add a verification link (and optionally a QR code) that points back to the source record or a controlled verification page.
QR Codes for Instant Verification
Add a QR code image to your template that links to your verification page. Map it to a QR code URL generated in Airtable (via a formula field or a QR code service).
Verification URLs
Use the Verification URL field in your Batches table and include {{Verification_URL}} in the footer of your template. It can point to a public Airtable view, an Airtable Interface page, or your own verification portal.
Industry-Specific CoC Requirements
ISO 9001 / ISO 14001 Compliance
For ISO-certified operations, your CoC should include:
- Reference to the applicable ISO standard
- Scope of certification
- Traceability to raw materials (via linked records)
- Authorized signatory from QMS-approved list
CE Marking (European Union)
CE-marked products require:
- Declaration that product meets EU directives
- Reference to harmonized standards used
- Notified Body number (if applicable)
- Technical documentation reference
FDA / 21 CFR Part 11 (Pharmaceuticals)
For FDA-regulated products:
- Lot/batch genealogy (linked records)
- Complete test results with specifications
- Electronic signature with audit trail (TypeFlow e-signature meets this requirement)
- Expiration date if applicable
Use the Expiration Date field to track certificate validity, then trigger renewal reminders with Airtable Automations as expiry approaches.
Automotive (IATF 16949)
For automotive suppliers:
- PPAP reference if applicable
- Material certifications (linked records)
- Dimensional inspection results
- Process capability data
Best Practices for High-Volume CoC Generation
Use Clear Field Naming Conventions
Match your Airtable field names to template variables exactly:
| Instead of | Use |
|---|---|
| Batch # | Batch_Number |
| Spec. Ref. | Specification_Reference |
| QA Mgr | Authorized_Signatory |
Create a "Ready for CoC" View
Filter only records ready for certificate generation:
- Status = "Approved"
- All test results = "Pass"
- CoC Attachment is empty
Track CoC Generation Status
Add a "CoC Status" single select field with options:
- Pending
- Generated
- Signed
- Sent to Customer
Use Airtable Automations to update this field based on TypeFlow actions.
Use Autonumber for Certificate IDs
Ensures unique, sequential certificate numbers without manual entry. Format: COC-2026-{{autonumber}}
Troubleshoot Common Issues
Variables Not Populating
Causes:
- Typo in variable name (check spelling and underscores)
- Field not mapped in TypeFlow
- Empty field in Airtable
Fix: Compare your template variables against your Airtable field names. They must match exactly.
Linked Record Data Not Appearing
Causes:
- Linked field not configured in mapping
- No linked records in Airtable
- Wrong table selected
Fix: In TypeFlow mapping, click "Configure" on the linked field to expand and map nested fields.
E-Signature Not Sending
Causes:
- Signatory email field is empty
- Email field not mapped correctly
- E-signature not enabled in flow settings
Fix: Verify the email field has a valid address and is correctly mapped in the E-Signature tab.
Start Generating Certificates of Conformity Today
Turn CoC generation into an automated workflow that runs reliably from Airtable. Set up your template once, then generate consistent certificates whenever batches are approved. Rated by Airtable users on G2.
- Fewer errors: No manual copy/paste from Airtable into documents
- Faster shipping: Generate one CoC or hundreds in minutes
- More compliance-ready: Add e-signatures, audit trails, and verification links
Automate your document generation
Start with 20 free documents. Built for businesses using Airtable.
For complete audit documentation including view snapshots and e-signature approvals, see our audit-ready reports guide.
Related Manufacturing Documents
- How to Generate Production Orders in Airtable - Automate production order PDFs with BOM line items
- How to Create Traceability Document PDFs from Airtable - Generate audit-ready traceability PDFs from batch data
- How to Generate Spec Sheet PDFs from Airtable - Create professional product spec sheets at scale
- How to Build Quality Control Reports in Airtable - Automate QC reports with defect tables and photos
Frequently Asked Questions
Find answers to the most common questions about this feature.
Popular Questions
All Questions
Need more help?
Our team is here to help you solve all your problems and answer your questions.
Contact Us
Kevin from TypeFlow
•AuthorKevin Rabesaotra is a growth engineer and automation specialist with 8+ years of experience building no-code solutions. As Founder & CEO of TypeFlow, he has helped hundreds of businesses automate document generation and streamline workflows with Airtable integrations. Previously, Kevin was a Product Lead specializing in growth engineering, running experiments to drive revenue, retention, and lead generation.
More articles
How to Print Labels from Airtable with Quantity Control (Step by Step)
Print multiple labels per Airtable record based on a quantity field. Step-by-step guide for linked records mode and quantity repeat mode with barcodes and Avery sheets.
Read articleHow to Print Avery Mailing Labels from Airtable
Print Avery mailing labels (5160, 5161, 5162) from Airtable without Word mail merge. Step-by-step guide with print label mode, automation, and bulk generation.
Read articleHow to Create Inventory Labels with Barcodes in Airtable
Create inventory labels with Code 128, EAN-13, or QR barcodes from Airtable. Step-by-step guide for warehouse, retail, and asset tracking with thermal and Avery printers.
Read article